






Every mode's rules in the game's own words and screenshots
Epic Seven game modes
Episodes and side stories
4Episode
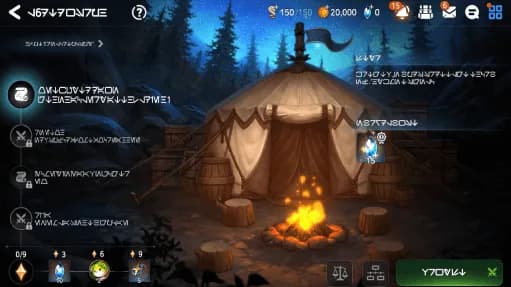
Summary Episodes are a core part of the game that focuses on the main story. At first, stages are locked, but you will be able to gradually unlock them by completing Quests. Create a strong team and complete all Quests! Energy is required to enter Episode stages.
Episode Entry Screen When you enter the Episode screen, you can view all Episodes released so far at a glance. Selecting an Episode will display its sub-chapters. You can also check each chapter's progress and reward status. After completing the 6th World Episode and Episode 1, all previously locked Episodes will be unlocked.
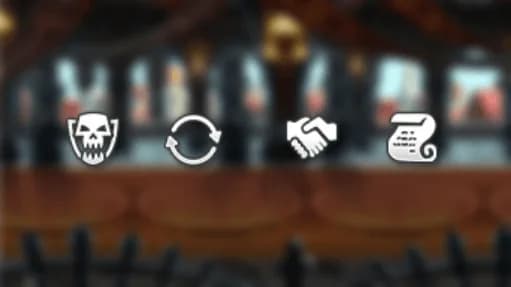
Episode Stage Types There are various types of stages for Episodes, and Special Stages are marked with small icons. Normal Stage: Basic stages without any icons. Boss Encounter: You will encounter Boss monsters in these stages. Repeat Battling Stage: Clear these stages multiple times to obtain Catalysts. Friendly Stage: You will have no or few battles in these stages. Follow the paths to clear missions. Story Stage: Story-only stages with no battle involved.
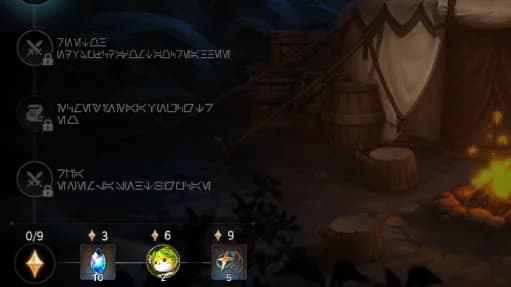
Region Reward Region Rewards can be collected according to the number of Stars you acquire in each region. You can check mission requirements on each stage and collect stars by completing missions. A maximum of three stars can be acquired per stage.
Episode Battle
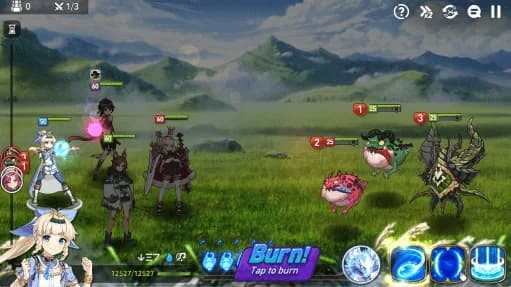
How to Battle Battles are turn-based, with turn order determined by Speed. Details can be found by tapping the hourglass-shaped button located in the upper-left corner of the battle screen. You can use Active Skills on your turn by selecting the skill you want to use and tapping a target. Passive Skills are automatically activated under certain conditions. Tap and hold skill icons to see detailed information about them. Dual Attacks may also be triggered randomly when attacking.
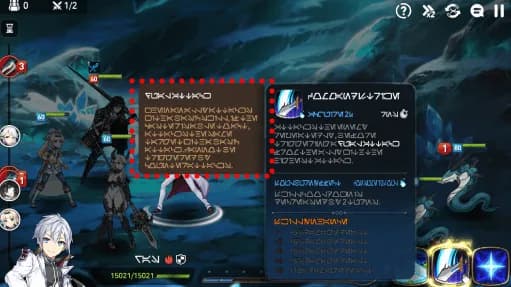
Dual Attack Using basic skills can randomly trigger Dual Attacks from other Heroes based on their Dual Attack chance. Only Heroes who are not paralyzed or stunned can Dual Attack. Dual Attack chance cannot exceed 30%.
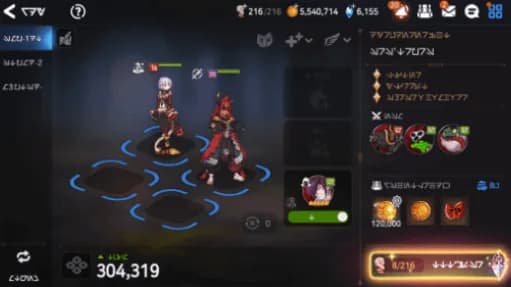
Stage Entry On this screen, you can check important information about a stage before entering. Team Info: Check your team formation. You can change your team formation by tapping the Manage Team button. You can use the exclusive team formation slots made available per content, and each team can have up to four Heroes. Guardian: Tap on the Guardian icon to check information about your Guardians or change the active Guardian. You'll obtain Guardians as you proceed in Episode. Select Supporter: You can use a friend's or recommended user's Hero as your Supporter. You can change the Supporter Usage Mode via AUTO settings. Supporters are unavailable in some battles. Enemies: Check which type of enemies you'll be fighting and prepare in advance. If the Boss has not yet been defeated, their information will be unavailable. Obtainable Rewards: Check all the possible rewards you can obtain from a stage.
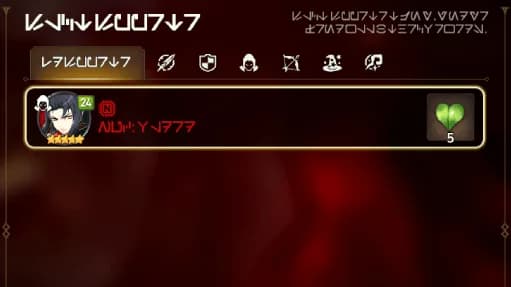
Supporters You can select or change your Supporter by tapping the Supporter icon before entering the Stage. You can set the Supporter deployment method in the Ready screen. If you use one of your friend's Supporters, both of you will receive 10 Friendship Points each, and when using a recommended user's, both of you will receive 5 Friendship Points each. Friendship Points can be spent at the Friendship tab in the Shop. A Supporter's Devotion Skill will also be applied to your team. Fight together with your friends to clear difficult stages!
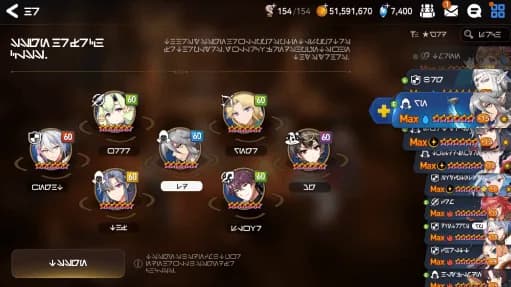
Assigning Supporters If your friend uses one of your Supporters, both of you will receive Friendship Points! There are two ways to select Heroes to support your friends. First, you can tap on the Rep Hero icon in the top left corner of the Lobby, and there you'll find the Change Supporter button. Second, in the Friends menu, tap on the Supporter Management button. Supporters are split into individual classes. Tap Auto Assign and Heroes will be automatically selected for each class according to their CP.
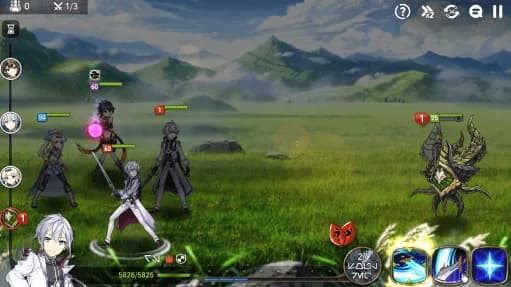
Assigning Supporters You can use the same Hero for both your Team and as a Supporter. However, when a Hero that is already assigned in your Team appears as a Supporter, some passive skill effects that affect an ally or all enemies do not stack with other passive skills of the same name.
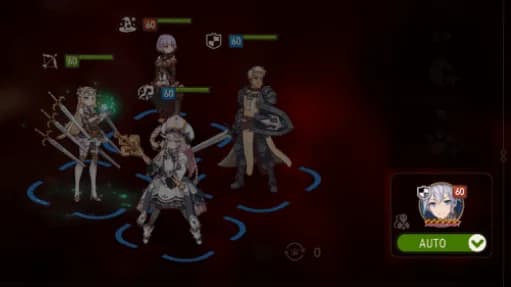
Supporter Usage Mode You can change how Supporters are deployed via Auto Mode settings. When Auto Mode is enabled, a Supporter is automatically deployed if there is an empty slot in the party. When Auto Mode is disabled, you can deploy a Supporter during battle by using the TAG button to switch with an ally.
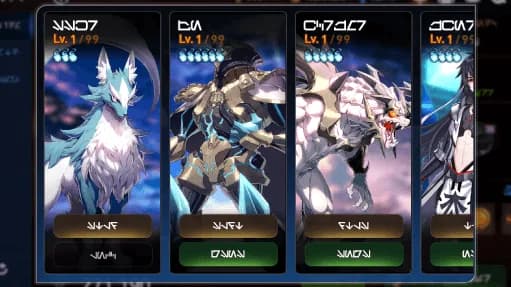
Changing Guardians Guardians are special creatures who were created by Diche, the Goddess of Life. It's said that those who make a contract with a Guardian are granted amazing power. Tap on the Guardian icon in order to change or assign Guardians. You can find more detailed information about their skills by tapping Details, so be sure to use them accordingly!
Side Story
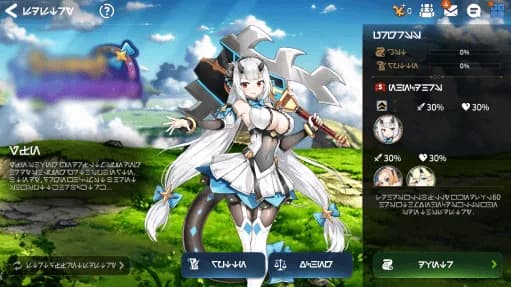
Summary In Side Story, you can explore different Heroes' personal stories that weren't shown in the Main Story. You can also receive special rewards by playing Side Stories. Use Energy to collect event currency and spend these in the Exchange to purchase rare items! Side Story becomes available once you clear Episode 1.
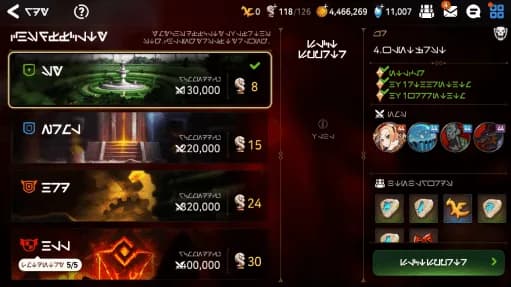
Stage Difficulty Certain Side Story Stages can be played on multiple difficulties ranging from Easy to Hell. You can unlock the next difficulty only after clearing the previous one. Higher difficulties feature stronger enemies, but also provide you with greater rewards and extra event currency. The recommended CP varies according to the difficulty. Hell Difficulty can only be entered a limited number of times.
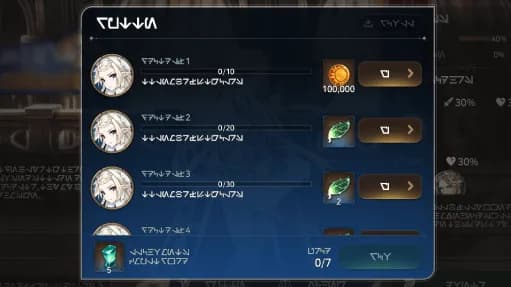
Reputation Side Stories have a special Reputation that is unique only to that content, and you'll be rewarded upon completing a Reputation achievement. When you complete all of a Side Story's achievements, you'll be given an All Achievements Complete Reward. The types of achievements and rewards available may be different for each Side Story.
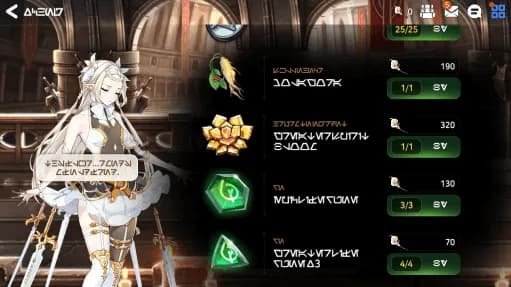
Exchange A Side Story's main rewards can be purchased from the Exchange. Spend event currency to acquire MolaGora Seeds, Catalysts, Runes and other items used to increase your Heroes' strength. Make your Heroes stronger and become an amazing Heir!
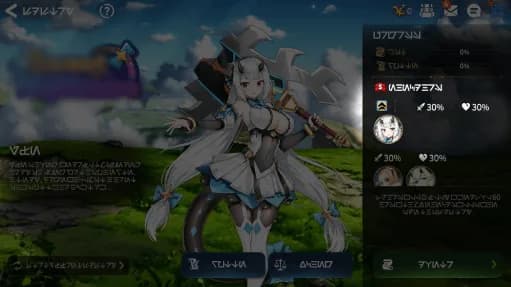
Enhanced Heroes The Enhanced Heroes list shows Heroes whose stats are higher than usual when used to clear stages in the Side Story. Enhanced stats may differ from Hero to Hero. If you have a Hero on this list, including them in your team will help you clear Stages more easily! Regardless of the Hero's actual stats, the Lead Hero will become level 60 and fully Awakened with max enhanced skills.
Orbis Guide
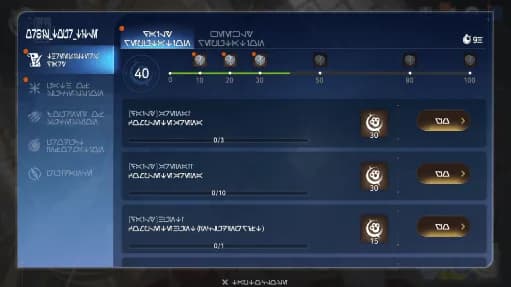
Summary Orbis Guide is a guide to help players get accustomed to the world of Epic Seven. Complete a variety of Missions and receive various rewards needed to make your Heroes strong!
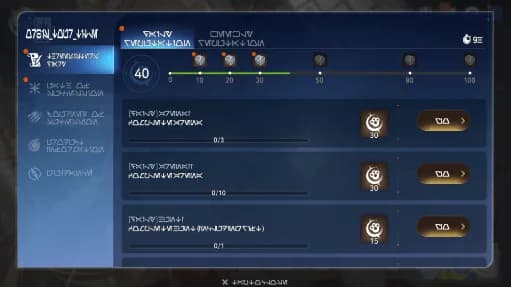
Three Sisters' Diary The Three Sisters' Diary is divided into Daily Reputation and Weekly Reputation. Daily Reputation and Weekly Reputation provide various Missions, rewarding Heirs with various rewards along the way. By obtaining Daily and Weekly Reputation Reward Chests, you can also earn Reputation Points under Reputation.
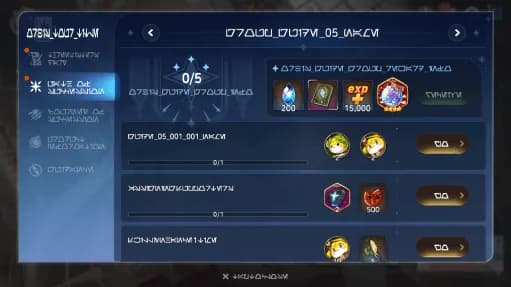
Path of Heir Path of Heir is a guide to help players get accustomed to the world of Epic Seven. Complete a variety of Missions and receive amazing rewards!
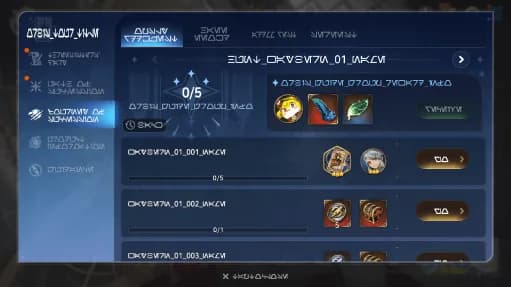
A Journey of Succession A Journey of Succession is a guide that provides challenging Missions and amazing rewards. Complete a variety of Missions and receive amazing rewards!
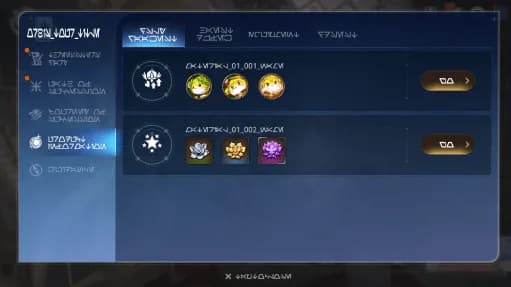
Currency Details Currency Details is a guide that provides information about the Location of various currencies needed for Hero or Equipment growth.
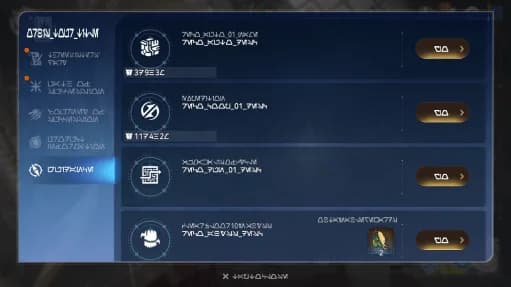
Guide Guide is a guide that provides information about ongoing content or events.
Combat content
16Combat Content
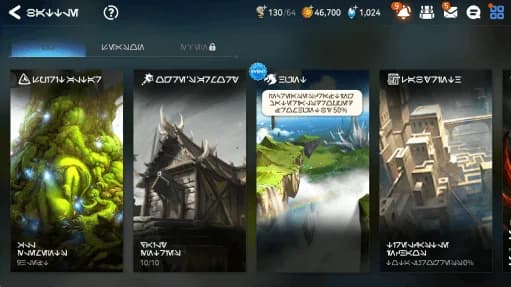
Summary Through battle content, you can obtain the Equipment and Materials you need to help your Heroes grow stronger. In order to unlock these game modes, the following conditions must be met: Spirit Altar: Clear 6th World Episode, Chapter 3. Things to Keep Abyss: Clear 6th World Episode, Chapter 3. Failed to Protect Labyrinth: Clear Episode 1, Chapter 1. Belief at a Crossroads Automaton Tower: Clear Episode 2, Chapter 1. Meeting the Covenant Hunt: Clear Episode 2, Chapter 3. Flight Hall of Trials: Clear Episode 2, Chapter 4. Wanderer's Eyes Rift: Reach Account Rank 50 Otherworld Breach: Clear Episode 2, Chapter 3. Flight
Shadow Information Broker's Request
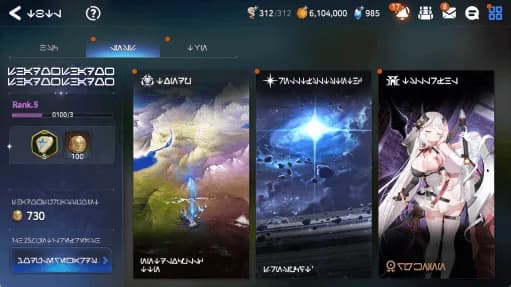
Summary Completing requests from the Shadow Company grants Request Rewards and allows you to obtain various items from the Shadow Company Exchange. Shadow Company requests can be completed by playing content in Battle > Seasonal. Requests and rewards are refreshed every 3 weeks.
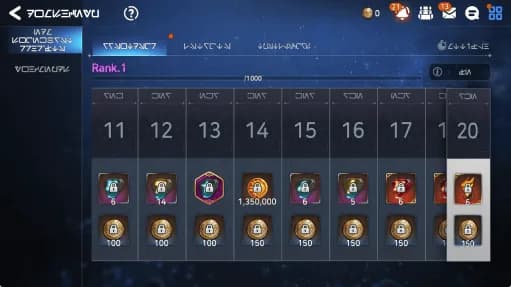
Shadow Information Broker's Requests allow you to earn rewards by completing Normal and Special Requests. Missions can be completed by playing content in Battle > Seasonal. Requests and rewards are refreshed every 3 weeks.
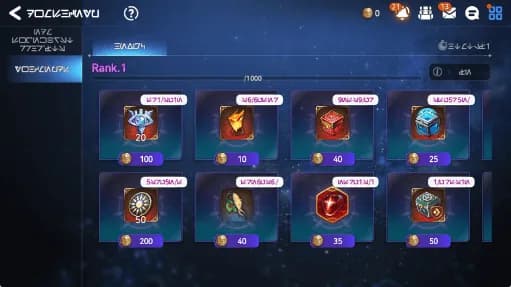
Shadow Company The Shadow Company allows you to use Shadow Coins earned from Shadow Information Broker's Request to obtain rewards. Rewards offered by the Shadow Company are refreshed every 3 weeks.
Spirit Altar
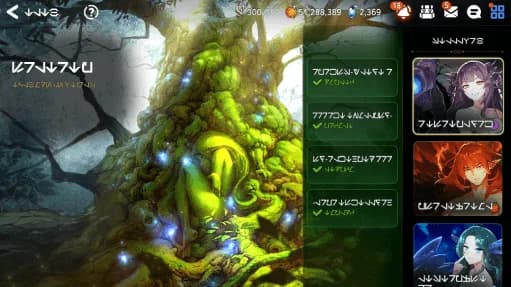
Summary The Spirit Altar consists of 5 different elemental types, where you can acquire Runes used to Awaken Heroes. The type and grade of the Runes that can be acquired are different based on the element and stage of the Spirit Altar. Energy is required to enter.
Abyss
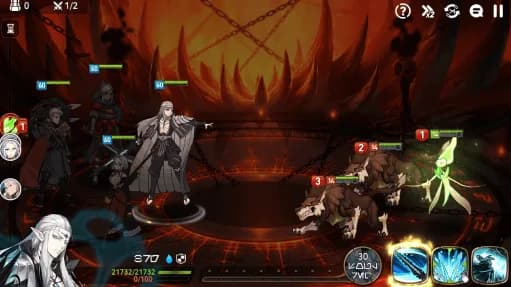
Summary Abyss is the deepest and most dangerous part of the world. Defeat strong opponents and receive fantastic rewards. Energy is required to enter the Abyss.
Hunt
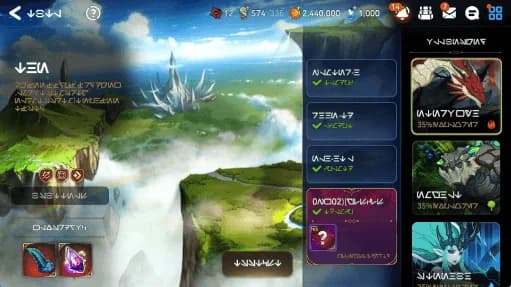
Summary In Hunt, you can acquire Equipment and crafting materials. Different Equipment Sets are available from different types of Hunt. You can use any crafting materials you collect to create Equipment in the Steel Workshop. The higher the Hunt stage, the stronger the boss and the higher your chances of finding better Equipment and increased crafting material drops.
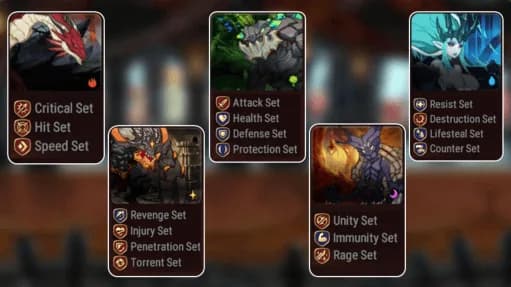
Available Sets Different types of Hunt provide different Equipment Sets. You can choose what kind of Hunt to challenge depending on the Equipment Set you are looking for. The Equipment Sets available from each type of Hunt are as follows: Wyvern Hunt: Critical, Hit, Speed Golem Hunt: Attack, Health, Defense, Protection Banshee Hunt: Resist, Destruction, Lifesteal, Counter Azimanak Hunt: Unity, Immunity, Rage Caides Hunt: Revenge, Injury, Penetration, Torrent Ogre Hunt: Reversal, Riposte, Warfare, Pursuit
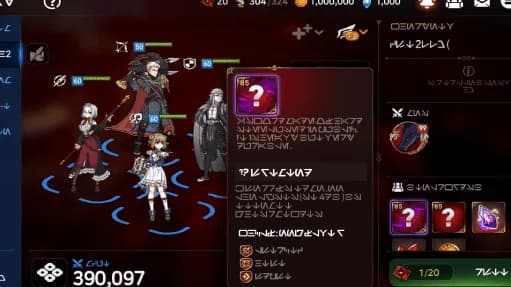
Otherworldly Difficulty Unlike the Normal-Hell difficulties of Hunt, the Otherworldly difficulty will require an exclusive entry currency called the Spectral Core. Spectral Cores can be purchased with Energy up to 3 times per day, and you can hold a maximum of 30 Spectral Cores at a time. When Otherworldly difficulty is cleared, you can acquire Otherworldly Epic Equipment. These pieces of Equipment will only have Speed or %-based main stats and substats, and will be given high enhancement values when enhanced.
Labyrinth
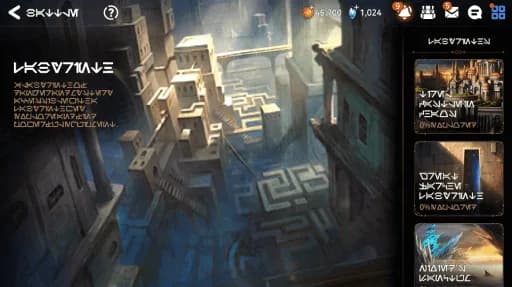
Summary The Labyrinth is a place full of both wonders and dangers. Make your way through the twists and turns of the Labyrinth to find powerful Equipment! You can explore the Labyrinth without consuming any currency and obtain Labyrinth Equipment as a reward.
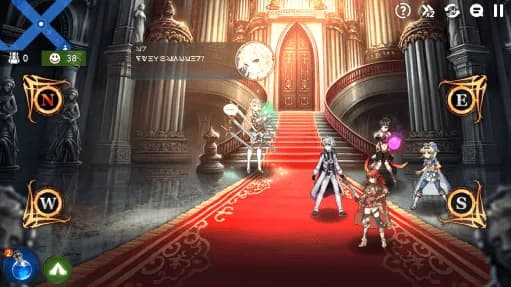
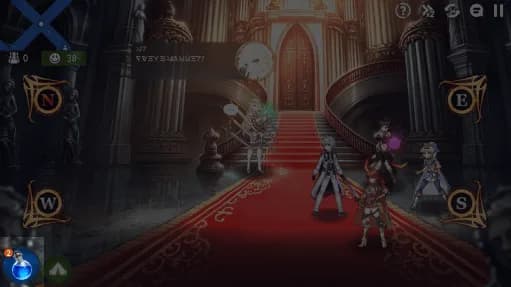
Crossroads When you reach a crossroads, you will have to choose which direction to proceed in. You can return to the crossroads and try going a different direction at any time. Tap the minimap on the upper left-hand corner to see the entire map. Be sure to check the entire map when choosing which direction to go!
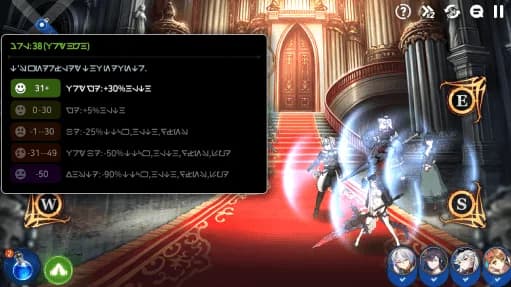
Morale In normal Labyrinths, Heroes' stats will change according to the team's morale. Please note that the stats differ in Raid Labyrinths. Morale 31+: +30% Health Morale 0 - 30: +5% Health Morale -1 - -30: -25% Attack, Health and Defense Morale -31 - -49: -50% Attack, Health, Defense, and Speed Morale -50: -90% Attack, Health, Defense and Speed
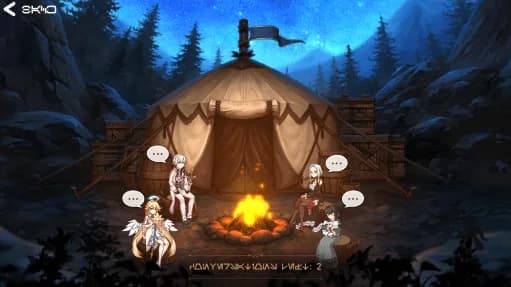
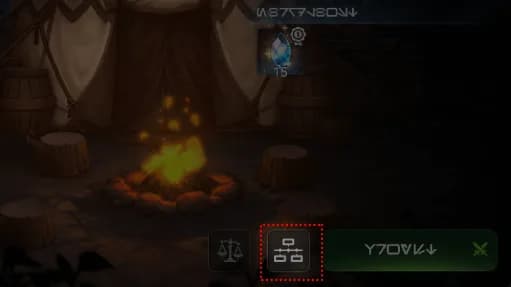
Camping Camping is a great opportunity to talk with your Heroes and raise their morale. It's important to keep the team's morale high since it greatly affects their performance in battles. Camping is available at any crossroad, and you may only Camp once per exploration.
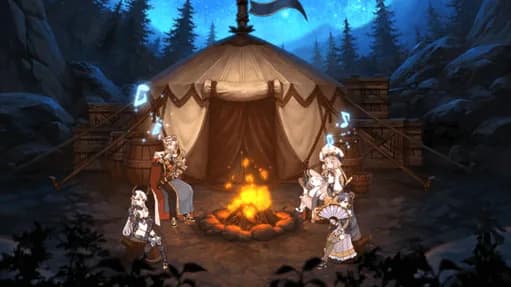
Conversation While Camping, you can hear the thoughts and stories of your current team's Heroes. During the conversation, the other Heroes will have positive or indifferent reactions depending on their personality. When a Hero likes the conversation, morale increases. Indifferent reactions do not cause morale to decrease. Camping will automatically end after two conversations.
Small Potion You can use Small Potion to recover your Heroes' Health. The Small Potion will recover 10% of their Health and can be used twice per exploration.
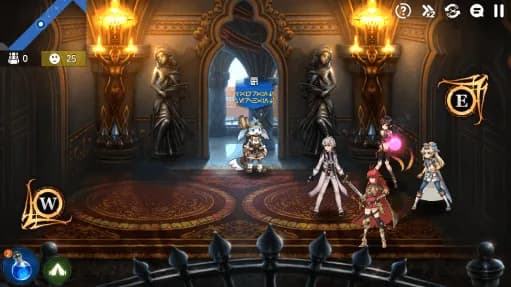
Vagrant Merchant You can find a wandering merchant at set locations when you explore Labyrinth. They sell special items which can only be purchased in limited quantities. The wandering merchant's available merchandise is reset every day.
Otherworld Breach
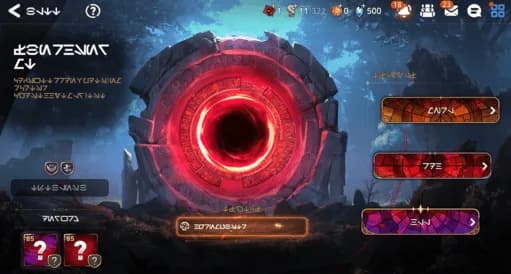
Summary Otherworld Breach is a subspace that appears through the Chaos Gate. It consists of three difficulty levels and requires a special entry ticket to enter. In Otherworld Breach, players can earn new set Equipment as rewards, with a chance to acquire Otherworldly Epic grade items.
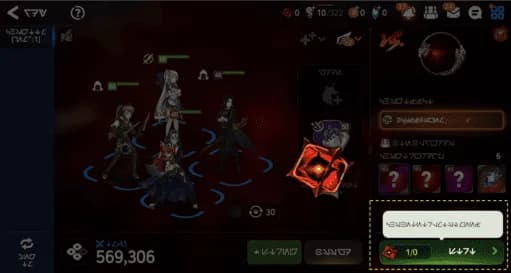
Entry Cost Otherworld Breach requires special entry tickets to enter. The entry ticket, Spectral Cores, can be acquired by consuming Energy, Leif, and Skystone. Tickets bought with Energy have a daily purchase limit.
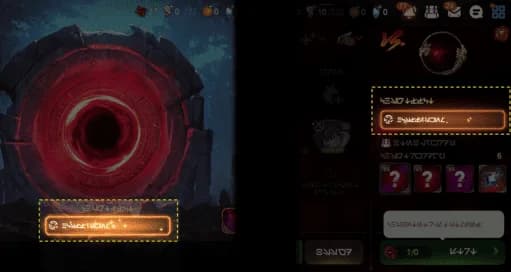
Gate Effect In Otherworld Breach, battles take place within the gate. Inside the gate, additional effects are applied as advantages for the Boss.
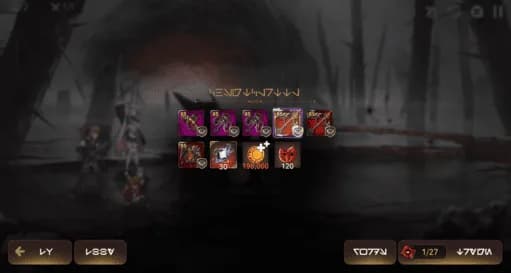
Reward You can earn abundant Equipment rewards, with a chance to acquire Otherworldly Epic Equipment. For Otherworldly Epic Equipment, only core stats are granted, and will be given high enhancement values when enhanced.
Automaton Tower
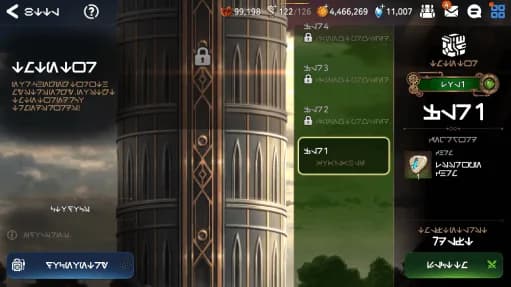
Summary Automaton Tower is a tower with 25 floors. When you clear a floor, you will obtain Devices that provide special effects and give you strategic advantages, allowing you to climb to higher floors and obtain even better rewards. Once you have completed Floor 25, higher levels will unlock, featuring better rewards and stronger enemies. Your progress in Automaton Tower can be reset manually anytime by resetting the level. Upon resetting, all current records will be deleted and you will have to start climbing the tower from Floor 1.
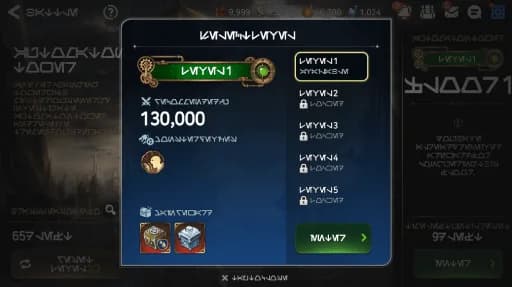
Level In Automaton Tower, you can select a level to play. Once a level has been selected, it cannot be changed until the tower resets. The requirements to unlock each Level are as follows. Level 2: Clear Level 1 or Abyss Floor 60 Level 3: Clear Level 2 or Abyss Floor 80 Level 4: Clear Level 3 or Abyss Floor 100 Level 5: Clear Level 4 If you conquer the entire tower, you cannot enter again with a new level until it resets, so you may wish to consider clearing floors in Abyss prior to entering Automaton Tower.
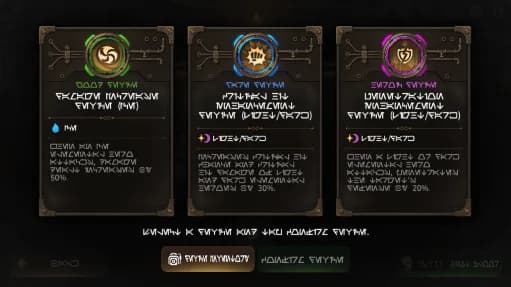
Devices Devices are special items that can be used to enhance designated elements, classes, or Heroes when fighting enemies within the tower. You will be able to select one Device out of three every time you clear a floor. The effects of your selected Devices will remain active until the tower resets.
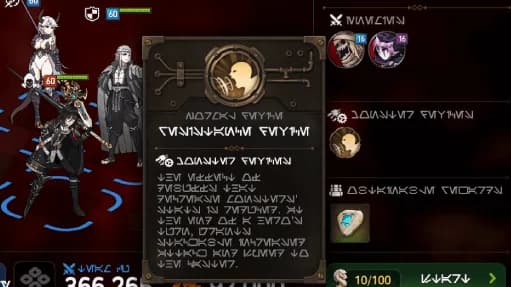
Monster Devices Monster Enhancements Devices provide advantageous effects to monsters in battles, with effects growing more powerful as the level increases. On certain floors, extremely powerful Monster Devices appear, so it is imperative that you check which Monster Devices are in use before entering a floor. Device information can be viewed on the level selection screen, Hero Assignment screen, and the Monster Devices panel at the top of the battle screen. In the descriptions of Monster Devices, "Heroes," "monsters," and "debuffs that decrease stats" refer to the following: Heroes: All playable characters Monsters: All enemies appearing in the Automaton Tower Debuffs that decrease stats: Decreased Attack, Decreased Defense, Decreased Speed, Decreased Hit Chance
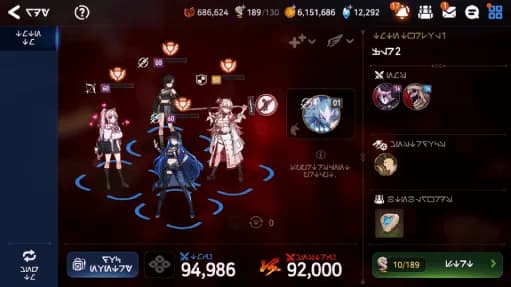
Saving Battle Info Automaton Tower saves the Health status of both monsters and Heroes after each battle is completed. Heroes who were defeated in battle cannot be reassigned to the team unless their Health is recovered by spending Stigma.
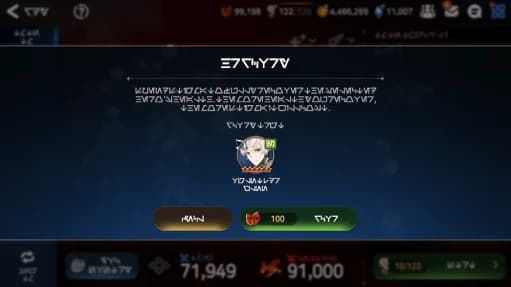
Recovery The Recovery feature can be used to restore the Health of your injured or defeated Heroes. Recovery costs Stigma, and the more times you use it, the more Stigma it will cost. The Recovery feature is available by either tapping the button above each Hero on the team or via the Hero list on the Hero Assignment screen.
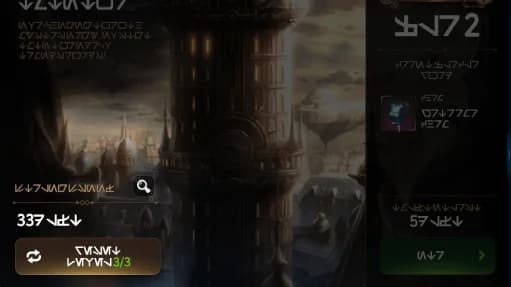
Reset Level By resetting the level, you can reset your current progress in Automaton Tower. Upon resetting, your progress and all Devices obtained will disappear and you will have to start again from Floor 1. After switching levels, floors that were cleared in the previous level will not cost Energy to enter but will also not provide rewards upon clearing in the current level. You can reset the level three times. This count resets when the Automaton Tower is reset every other Monday.
Rift
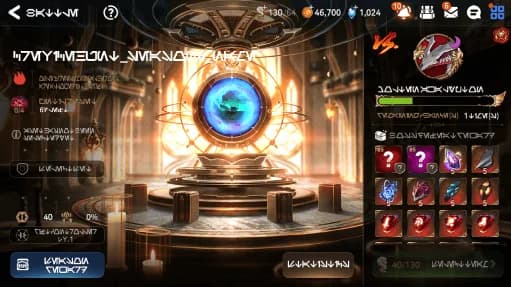
Summary Rift is an abnormality caused by an energy imbalance with regards to other dimensions. Heirs, please maintain order within the dimension by using the Rift Controller, a high-tech magical engineering device. Dealing with a power strong enough to create a rift between dimensions will require taking significant risks. Make sure you're well-prepared. Unlock Requirement: Reach Account Rank 50
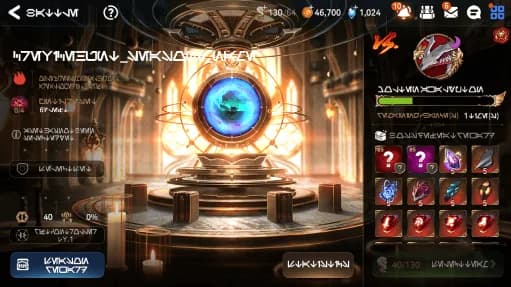
Rift Controller Rift Controller is a magical engineering device that grants you access to great power in a different dimension. You can use this device when the season is active, and a more detailed manual for its operation can be found in the following pages.
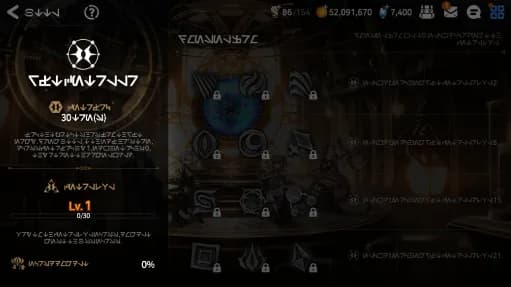
Rift Energy Rif Energy is the energy required to enhance the functionality of the Rift Controller, which you can acquire each time you defeat a Boss in the Rift. As you accumulate a certain amount of Rift Energy, your Control Level increases. Depending on the Control Level, your damage dealt against Rift Bosses also increases, with the maximum level being 21. Upon reaching a certain Control Level, you will be able to use Dimensional Form.
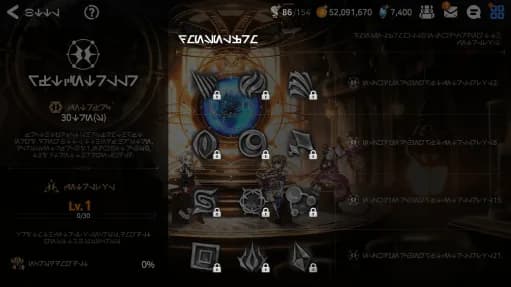
Rift Fragment Dimensional Forms are substances shaped by forces lost in another dimension due to the strange phenomenon of the Rift. They have significant effects when battling Rift Bosses. At Control Level 1, 8, 15, and 21, you will be able to utilize a new Dimensional Form, and will be able to select one Dimensional Form out of three for each level. They can be changed without limit, allowing you to make strategic choices depending on the combination of Heroes utilized.
Reset When the season ends, the Control Level resets and the effects of Dimensional Form change.
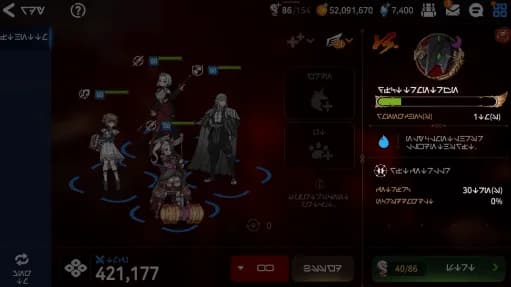
Season Element Only Heroes with the designated element can participate in Rift battles. The designated element changes along with every season. And don't forget about the new factors, Counterforce and remaining chances. Please refer to the next page for a more detailed manual.
Counterforce Counterforce is a force that protects Heroes from a strange force from a different dimension. At the end of every Hero's turn, Counterforce decreases by 1, and when it reaches 0, the battle ends and you will return to the original dimension. Rift Bosses are too strong to subdue with just a single battle. Therefore, it is important to deal as much damage as possible while the Counterforce persists.
Remaining Chance(s) During battle, when all allies are dead, the damage dealt against the Rift Boss will not be saved, and the remaining chance will decrease by 1. You have a total of 3 chances, and they reset upon defeating the Boss or using up all chances.
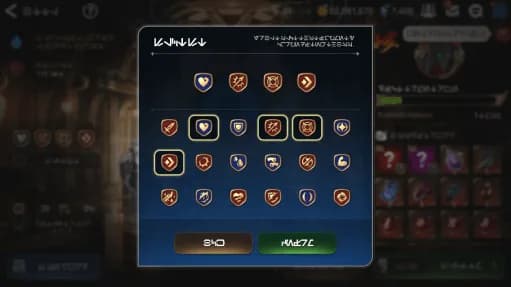
Select Set Select Set is a function where you can choose the set for the Equipment you acquire as a Boss Defeat Reward. You must select 4 sets, otherwise you are not allowed to enter the battle. Selected sets can be changed at any time.
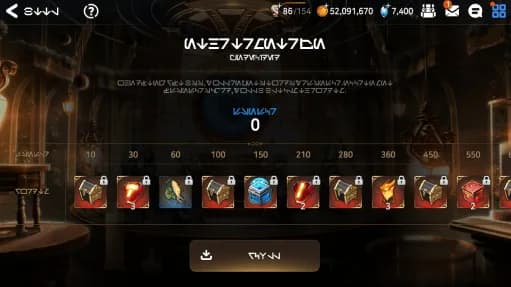
Season Reward In Season Reward, you will acquire a reward upon reaching a certain amount of Season Score. The rewards can be claimed once during the season. At the start of a new season, the Season Score will be reset and you will be able to receive new rewards.
Hall of Trials

Summary The Hall of Trials is a place where you can challenge opponents who have been recreated from the Memory Chain's records. The Boss's advantages change every time the Hall of Trials begins. You will need to pay close attention to the monster's characteristics and build your team appropriately in order to earn as many points as possible. A Grade Reward will be granted once, based on the Grade you achieve during the 3-week cycle, and in cases where you achieve a higher Grade following a retry, you will receive additional rewards in accordance with the difference between your previous Grade and the newly attained Grade. When the battle ends, a Ranking Reward will be given based on your final ranking according to your score. The Hall of Trials has two different modes: Normal and Challenge. You can see more details on the next page.

Normal Mode In the Normal Mode of Hall of Trials, Bosses have a fixed amount of Health. The battle ends when the Boss's Health reaches 0 or all the Heroes in your team are defeated. You can earn a Grade Reward based on the score you acquired at the end of the battle, and a Ranking Reward based on your ranking at the end of the period. Compared to Challenge Mode, Normal Mode is relatively easier and starts the battle with a certain amount of exhaustion gauge filled up, making it a safer option to achieve points if your team is lacking Combat Power.
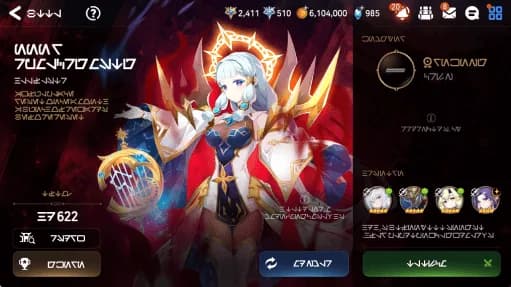
Challenge Mode In Challenge Mode of Hall of Trials, Bosses have an infinite amount of Health. The battle ends when all the Heroes in your team are defeated. You can earn a Grade Reward based on the score you acquired at the end of battle, and a Ranking Reward based on your ranking at the end of the period.

Rules The following rules apply to the Hall of Trials: 1. The higher the Combat Power of your team, the more damage they deal. 2. Soul cannot be acquired in the Hall of Trials. 3. Exhaustion gauge increases when a Hero attacks the Boss on their turn, and increases dramatically when certain conditions are met. Does not apply to extra attacks. 4. When the Boss's exhaustion gauge is filled, dispels all buffs from the Boss, inflicts additional damage on the Boss before changing Combat Readiness to 0, and becomes exhausted. 5. An Exhausted Boss has their Defense, Speed, and Effect Resistance greatly decreased. 6. A Boss recovers from the exhausted state after taking a certain number of hits from Heroes, reducing its remaining maximum exhaustion count by one. 7. When exhaustion is dispelled, dispels all debuffs from the Boss, fully resets skill cooldowns, and increases the damage suffered by the Boss. 8. When granted berserk, stats of the Boss greatly increase and the Boss's attacks will always kill the enemy.
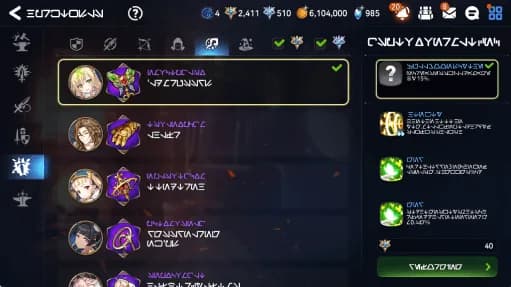
Craft Exclusive Equipment You can use Wisdom's Gaze and Fate's Gaze earned through competing in the Hall of Trials to craft Exclusive Equipment in Steel Workshop > Exclusive Equipment. 1. You can craft Exclusive Equipment for Covenant Heroes and 4★ Moonlight Heroes using Wisdom's Gaze. 2. You can craft Exclusive Equipment for 5★ Moonlight Heroes using Fate's Gaze. When crafting Exclusive Equipment, stat values are granted randomly.
Trial of the Constellations
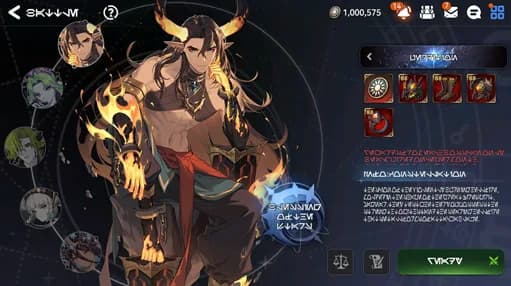
Summary The Trial of the Constellations is a seasonal, high-difficulty PvE mode where players can test their strength against powerful bosses across various difficulty levels. Utilize the Blessing of the Stars system and build strategic teams. 1. Bosses & Difficulties: Each element has its own Boss (Fire/Ice/Earth/Light/Dark), each with 4 difficulty levels (Hard/Hell/Nightmare/Perdition) 2. Entry Conditions: You need a specific number of Heroes of designated elements to enter.
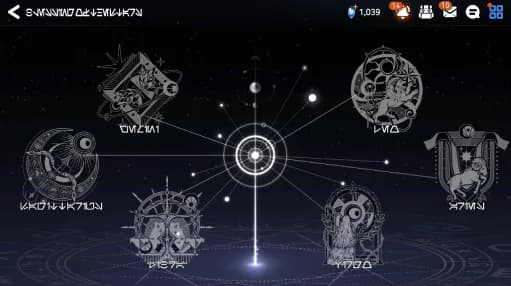
Blessing of the Stars The Blessing of the Stars is the core enhancement system that highly impacts the course of battle, and is designed to help players make the most of their Heroes. 1. Unique enhancement effects applied when battling against Bosses. 2. Forming a team of Heroes of specific constellations and their elements or classes to unlock and enhance slots with points. 3. Each Blessing has up to Level 5, and players will receive even greater effects with each increasing level.
Blessing of the Stars Details The benefits you acquire from the Blessing of the Stars can be highlighted as the following: 1. Special Blessings are tailored to each Boss, along with universal Blessings that apply to all Bosses. 2. For the Perdition difficulty, a minimum of Special Blessing of the Stars Level 3 is required. 3. The Blessing of the Stars Level is determined based on Hero Score, which reflects the combined value of each Hero's Level, Equipment, Artifact, and other factors. Growth from Grace of Growth does not contribute to Hero Score.
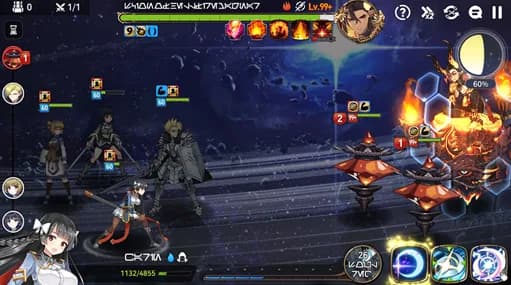
Constellation Energy The Trial of the Constellations revolves around its own unique gauge called the Constellation Energy. 1. Constellation Energy Gauge: Values fluctuate as the battle progresses, granting battle-defining effects when reaching 0% or 100%. 2. The method of controlling the gauge varies by Boss. For example, certain Bosses may require strategic use of debuffs to reduce the gauge.
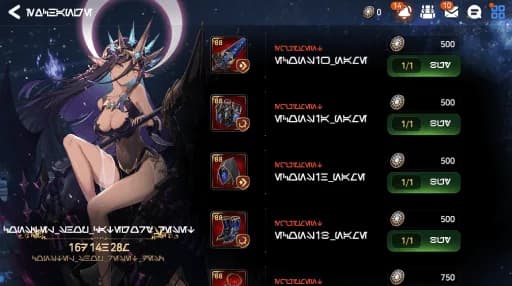
Reward The following rewards are given out to those who overcome the Trial of the Constellations: 1. Starfall Coins: Can be used to purchase Lv.88 Equipment from the Exchange. 2. Obtainable Equipment: When defeating the Boss, you may acquire high-tier Equipment. 3. Points: Can be used to unlock Constellation slots.
God of Battle's Colosseum
Content Overview God of Battle's Colosseum is a PvE content based on the World Arena that utilizes an AI Ban Pick system. Players progress in a single direction across a World Map consisting of 9 areas. You must clear the previous area to challenge the next one, and you can retry cleared areas. You can purchase Battle Effect Objects used exclusively in the God of Battle's Colosseum from the Shop and utilize them in battle. Objects that can be equipped are limited to a maximum of 5. Shop currency can be acquired through achievement rewards. In addition, there is an independent League and Victory Point system based on the player's gameplay status, and the League structure consists of 9 Leagues, identical to the World Arena.
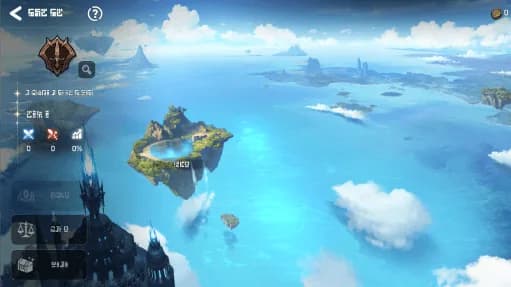
World Map Progress through the World Map, which consists of 9 areas, in sequential order. Clear Areas 1 to 8 one by one to unlock the next area. Enemy NPCs in Areas 1 to 8 range from Silver to Champion League, and NPCs in the later areas will have a higher level of AI Ban Pick capabilities and Hero stats.
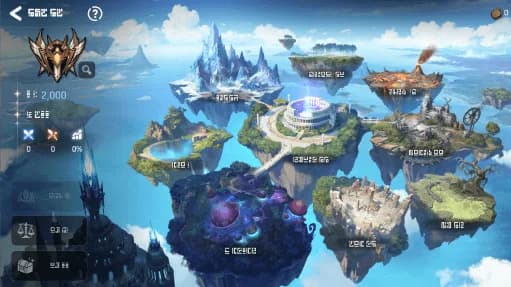
Colosseum of Glory The Challenge Area, Colosseum of Glory, will appear after clearing all 8 areas and reaching the Champion League. In this area, NPCs that are one League higher than the player's current League will appear. Even within the same League, NPCs with different Hero pools will appear randomly, and the next NPC will be swapped after the battle.
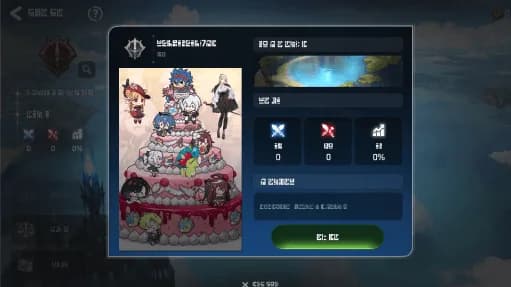
NPC Enemy NPCs in each area are structured based on the same Leagues as the World Arena, possessing Hero pools and stats appropriate for their League.
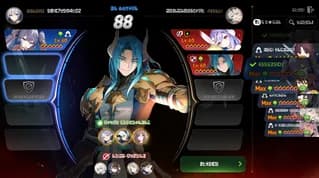
Ban Pick AI The opponent NPC in each area utilizes an AI that has learned from World Arena player data to conduct Ban Picks on its own. To avoid repeating the same choices in every battle, it applies weight to recommendation rankings to select bans and picks probabilistically. The higher the League, the higher the probability of picking Heroes high on the recommendation ranking.
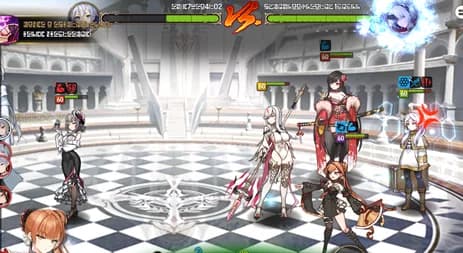
Battle AI God of Battle's Colosseum NPCs engage in battle using an AI trained on actual player data, making strategic decisions regarding skill usage, target selection, Soulburn usage, and more.
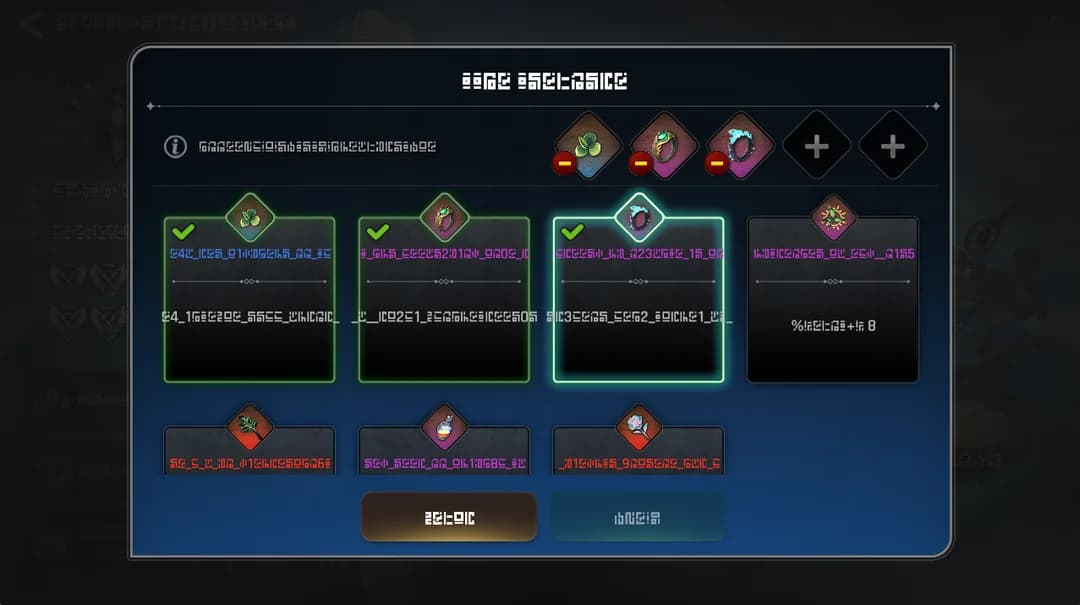
Battle Effect Object These are content-exclusive Battle Effect Objects purchased from the Shop using content currency. Even for the same effect, there are 3 grades: Rare, Heroic, and Epic. Objects of the same type cannot be equipped in duplicate. You can equip up to 5 Objects.
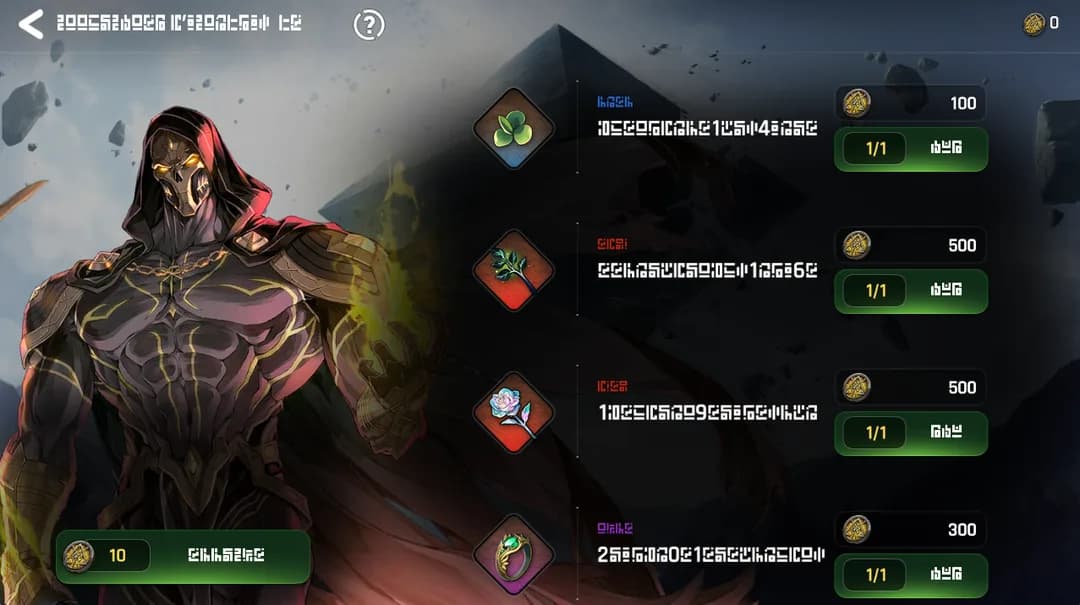
Shop You can purchase Battle Effect Objects in the content-exclusive Shop. 5 items are displayed at a time. You can consume currency to refresh the items, but previously purchased items will not be displayed again.
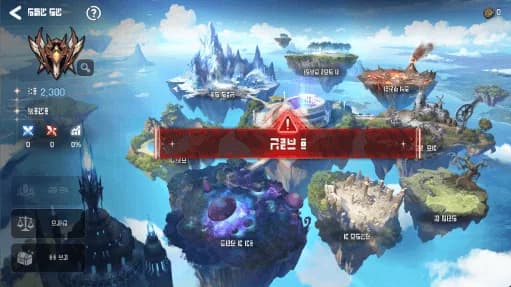
Formidable Enemy Appearance Formidable Enemies will appear when you meet the Victory Point conditions required for promotion in the Colosseum of Glory. You must win the battle against Formidable Enemies to be promoted to the next League, and the battles are conducted in a multi-round format depending on the League.
Formidable Enemy Effect Formidable Enemy Effects are present in battles against Formidable Enemies. Depending on the effect, Formidable Enemy Effects can apply to allies, enemies, or both.
Emergency Mission
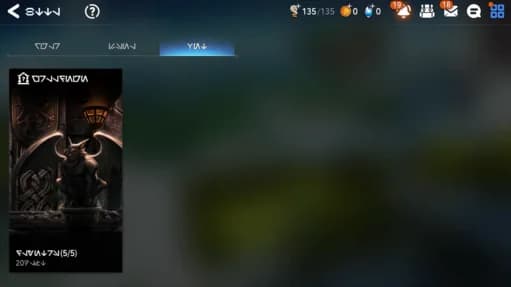
Summary Emergency Mission is an event dungeon that appears non-periodically. It offers two levels of difficulty, and the higher the level you challenge, the more exclusive tokens and items you can earn. The Emergency Mission will close immediately at the end of the event period, and all exclusive tokens in your possession will be removed upon its closure.
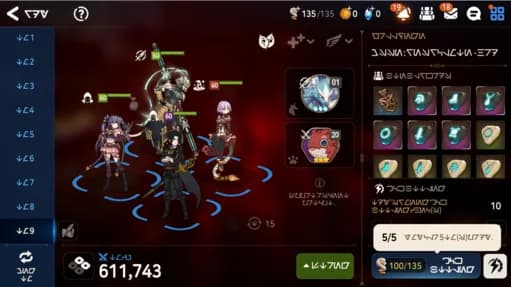
Daily Limited Entries Emergency Mission has a limited number of daily entries. Your entry count will be fully recharged the following day.
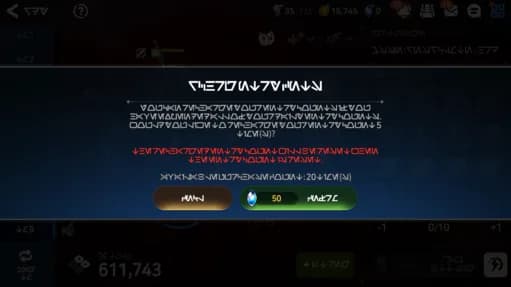
Recharge Limited Entry Counts You can recharge your entry count if you have expended all of your daily entry counts. There's a daily limit to recharge counts and the cost will increase with each recharge.
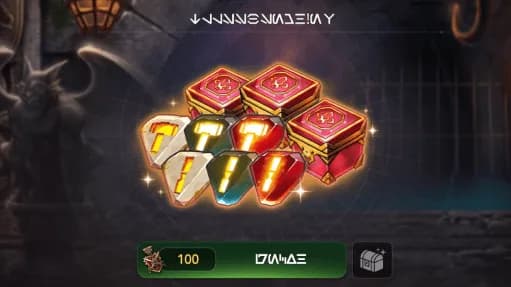
Exchange Items Upon clearing the Emergency Mission, players can obtain exclusive tokens. Tokens can be exchanged for a variety of items.
Advent
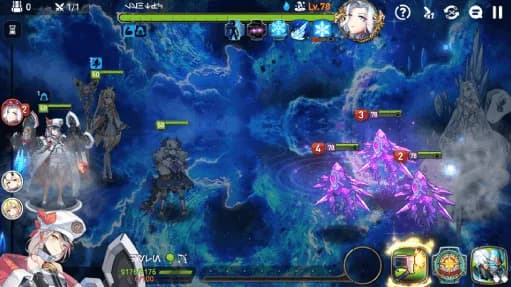
Summary Advent is a high-difficulty battle content that will become available once players clear Episode 2. With a total of 9 Heroes divided into three separate teams, players can challenge an enemy that becomes stronger as the battle progresses.
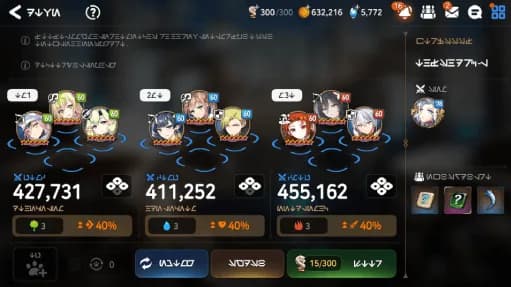
Features When you form a team with Heroes of the same element, each team will be granted an enhanced element buff, granting you an advantage in battle when going against the Advent boss monster. The Advent Side Story does not provide Friendship EXP, EXP, or a Penguin Bonus.
Strategic Archive
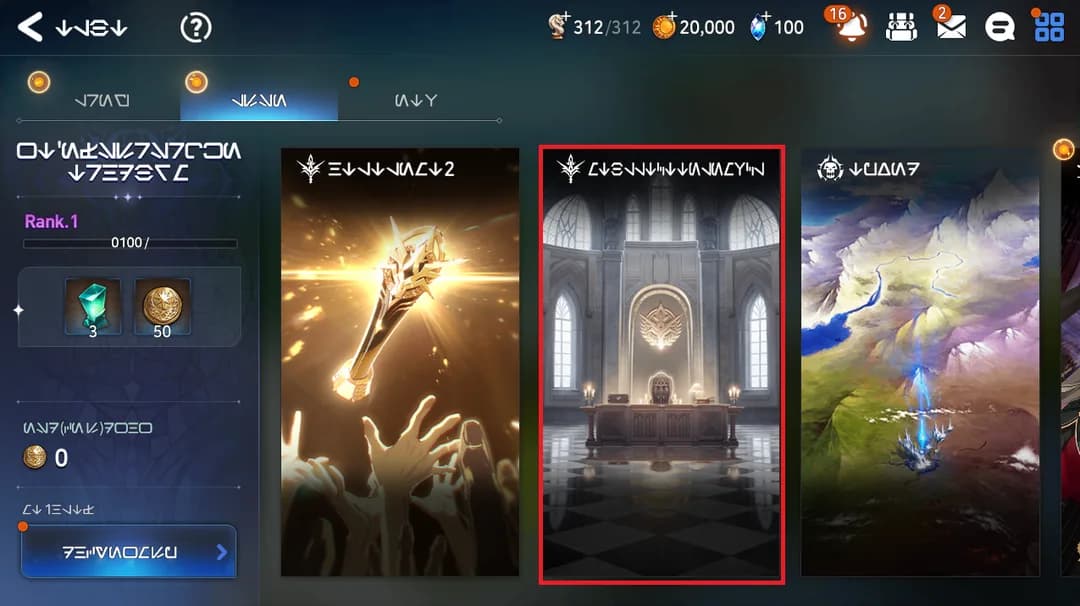
Summary Strategic Archive is a mode where you break through enemy teams composed of four Heroes. Only a limited pool of Heroes is available each season, and Support Heroes are provided. PvP rules apply by default, and Strategy Effects are applied to both allies and enemies.
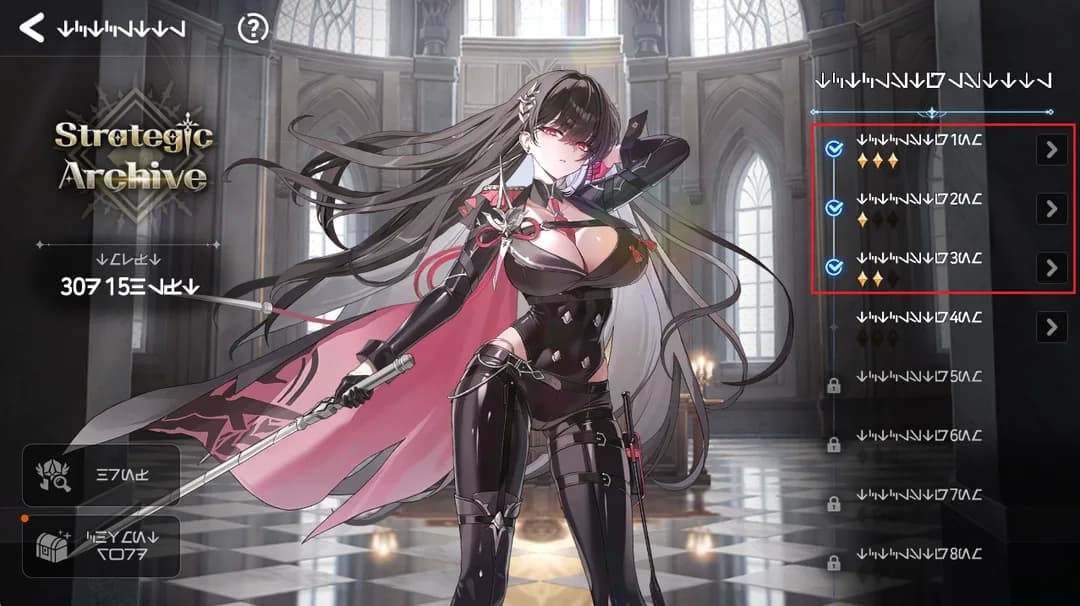
Stage Mission Battle stages in the Strategic Archive can be replayed even after being cleared. Each stage has three missions, and completing them grants additional rewards.
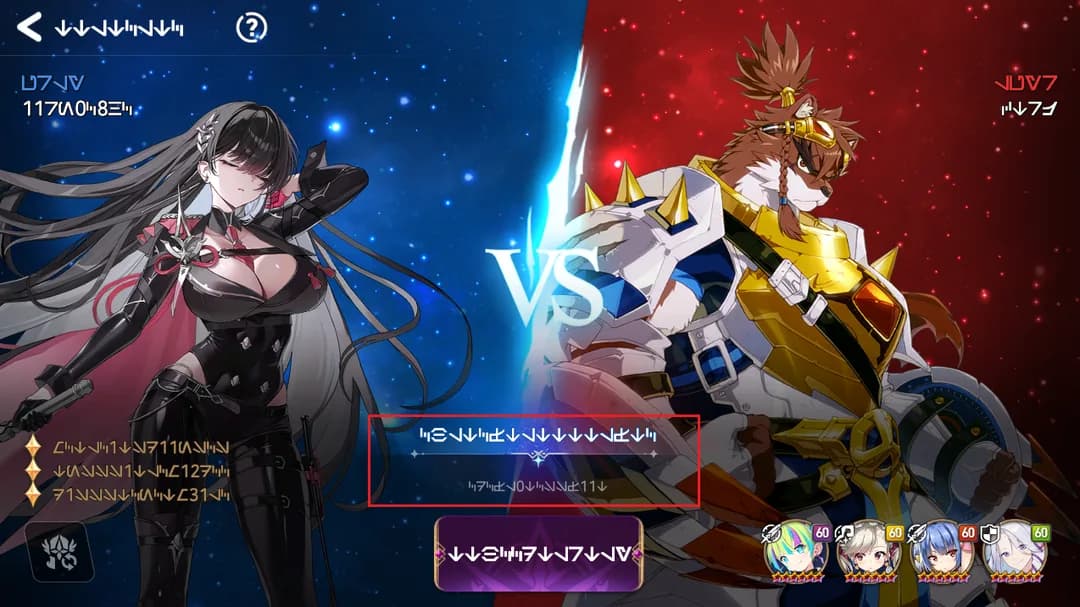
Strategy Effect You can check the Strategy Effects that apply to both allies and enemies on the battle screen. All Strategy Effects ignore the target's Effect Resistance.
Dimensional Exploration
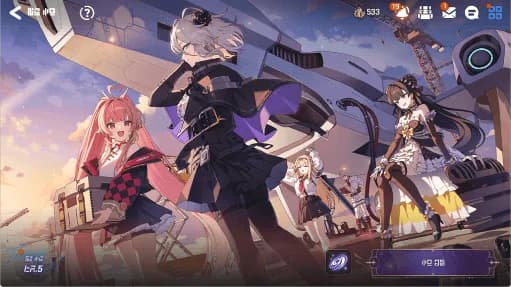
Summary Dimensional Exploration is a roguelike PvE content featuring various themes, and can be accessed upon reaching Account Rank 40. You can check for more details within Dimensional Exploration.
Arena
5Arena
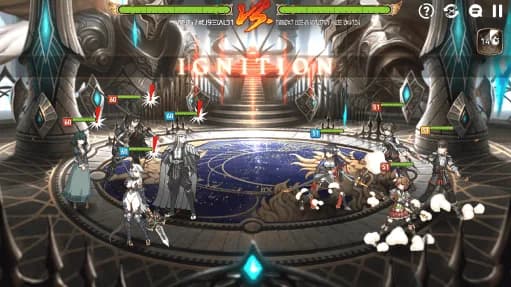
Summary The Arena is a game mode in which you can compete with other players. Enter the Arena and join the glorious battle for the Monolith! Winning battles will provide you with Conquest Points, which can be used to purchase various items like MolaGora Seeds and Charms from the Conquest Points tab in the Shop. Please note that you need Flags to fight in Arena.
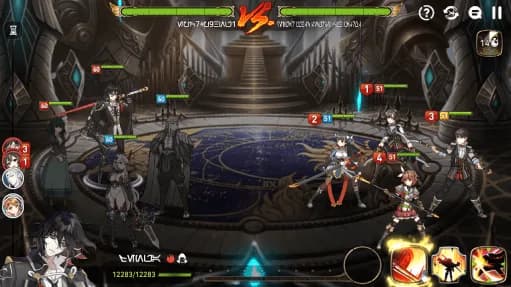
Arena Battle You cannot use Guardians and Supporters in the Arena. If the battle drags on for too long, Protector's Punishment will activate and the challenger will take damage. Protector's Punishment inflicts damage on all Heroes on the challenger's team and deals more damage as time goes on. If you lose a battle, you can try fighting the same opponent again, but you can no longer gain or lose Victory Points from an opponent to whom you've lost to twice or more.
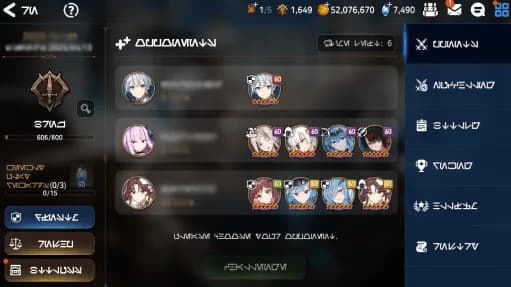
Opponents When you win a battle, you will receive Conquest Points and Victory Points. If you win 4 or more consecutive victories, you will receive additional points. Please note that the Consecutive Victory reward will be reset when you use Gold to refresh the list of opponents or when you're defeated. You'll lose Victory Points upon defeat, and your ranking is determined according to the Victory Points you've earned. The opponents list displays 3 opponents and is automatically reset when you defeat all of them.
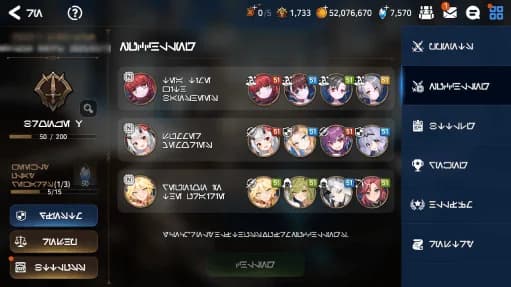
NPC Challenge In NPC Challenge, you'll fight against NPCs. If you win, you'll receive Conquest Points, but you won't receive any Victory Points.
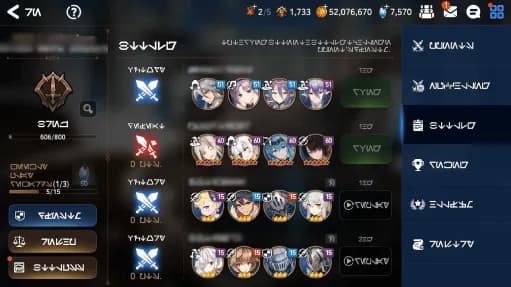
Battle Log Battle Log provides information on your most recent 20 matches in Arena. 1. Check your Offense Team's battle results. 2. Check your Defense Team's battle results. 3. Check your opponents' teams. 4. Tap Revenge to fight back. 5. Watch Replays of battles progressed through Quick Match. Replay is only available on the same device.
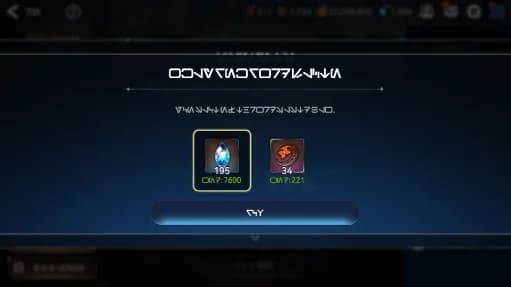
Arena Reset Arena results are calculated on a weekly basis. If you enter the Arena after the weekly calculations are finished, you'll be rewarded with the Weekly Rank Reward according to your league. Upon entering the Arena after the Weekly Ranking Change, you will also receive Season Points based on your performance during the week. 1st place receives 100 points, 2nd rank receives 99 points, and so forth until the 100th ranked player. Your Season Ranking will be determined according to how many Season Points you receive.
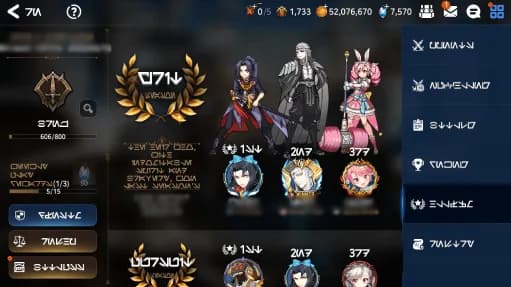
Hall of Fame The Hall of Fame is a place to introduce you to the Heirs who won the previous season with their indomitable fighting spirit and bravery. The top three Heirs with the highest Season Points in a season will be placed in the Hall of Fame.
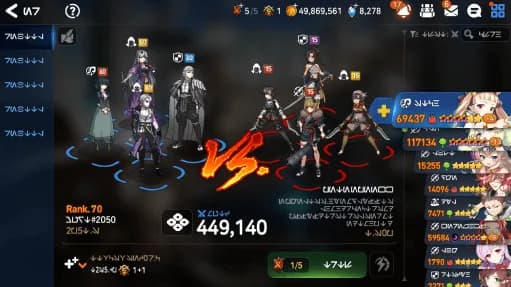
Hidden Arena Hidden Arena is available in leagues Emperor V and above, and if you are demoted to below Emperor V, you will not be able to participate in Hidden Arena. When Hidden Arena is active, you will be unable to see other players' information in the opponent list and Battle Log, except for their Victory Points. Information on the Total Ranking screen is affected by Hidden Arena only on Sundays.
Rookie Arena Rookie Arena is a PvP mode where new Heirs can test their strength. Matches follow the same rules as the regular Arena, but new Heirs will compete exclusively against other new Heirs, staying in the same bracket with the same group of opponents for 2 seasons. Additionally, new Heirs who enter the Hall of Fame will be rewarded with a Rookie Arena Frame. Unlike the regular Arena frames, new Heirs will only be able to acquire the same Rookie Arena frame once. The Rookie Arena only hosts up to the Challenger League, and Heirs who have stayed in Rookie Arena for 2 seasons will be promoted to the regular Arena.
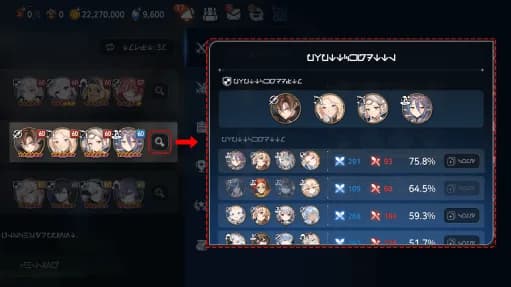
Attack Guide Attack Guide allows you to view records of how other Heirs have attacked Arena defense teams. For defense teams composed of four Heroes, the top 10 attack records with the highest win rates are displayed. Please note that the Attack Guide is not available for the Legend League or higher. By selecting the "Copy" button, you can instantly copy the corresponding attack team composition to your first Arena team.
World Arena
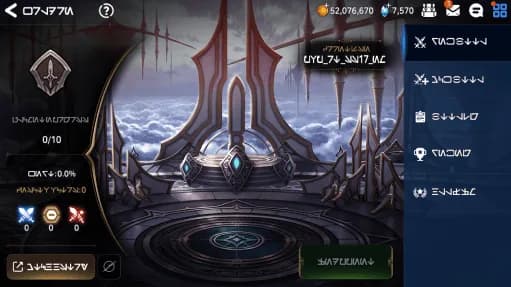
Summary You can battle users from all over the world in real-time in World Arena, at any time of day, and earn great rewards at the end of the season according to your rank. Fight with all your might to earn the Monolith.
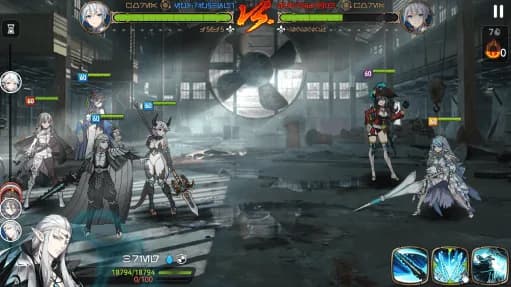
World Arena Battle You cannot use Guardians or Supporters in World Arena. If the battle drags on for too long, Battle Frenzy will activate and affect all Heroes, increasing damage dealt while decreasing max Health and healing.
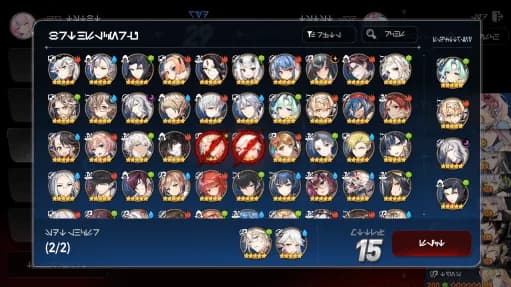
Pre-Banning Heroes In World Arena, each player can select two pre-ban Heroes. The selected pre-ban Heroes will be unavailable for use in battle for both the player and the opponent. If no pre-ban Hero is selected within the given time, the Hero you most recently selected in a previous pre-ban will automatically be selected. If there is no recent record, a random 5★ Hero will be selected.
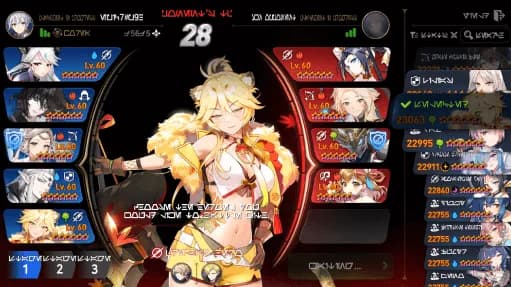
Picking Heroes After two opponents are matched, it is randomly decided who will get first choice in picking their Hero, before alternating turns between competitors of choosing two Heroes. You cannot select the same Heroes as your opponent, and if you do not select your Heroes within the time limit, they will be automatically selected based on highest CP. After each competitor selects five Heroes, you proceed to the Ban stage.
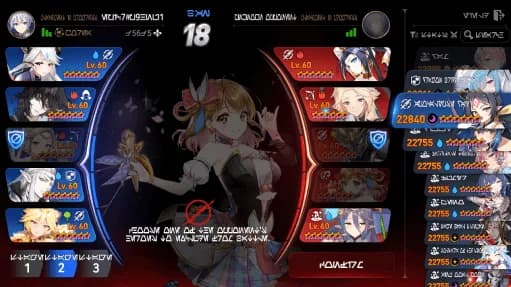
Banning Heroes You can ban one Hero from the five Heroes the opponent selected for their team, with the remaining four going on to participate in the battle. If you do not select a Hero to ban within the time limit, one will be chosen randomly. After each competitor bans a Hero, you proceed onto the Team Formation stage.
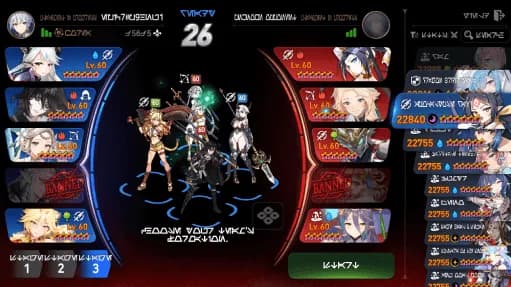
Team Formation In this step, you can place your Heroes in the positions you want. If positioning is not finished within the time limit, Heroes will be positioned as they are when the time runs out.
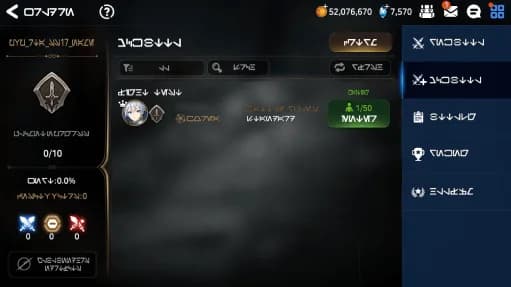
Mock Battle From the Mock Battle menu, you can create or join a Mock Battle room and challenge your friends, Guild members, Heirs you've spoken to in chat, or anyone who enters the same room to battle. Mock Battles will not affect your Victory Points or your ranking.
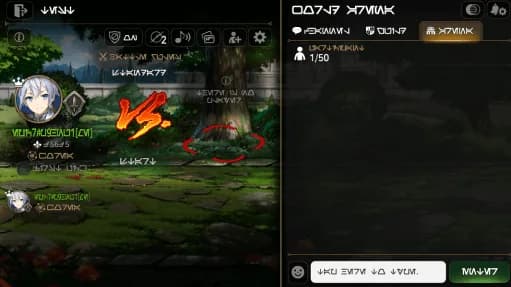
Mock Battle Requests The moderator can designate two players to participate in a battle. The other players in the room will automatically become spectators and be able to watch the battle in real-time. Spectators in the same room will also be able to talk to each other using Arena chat.
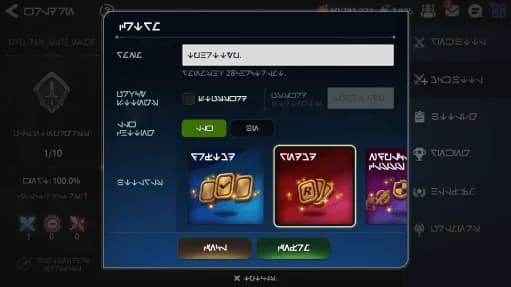
Round Mode Round Mode is a battle mode available in Mock Battle, where two players play several consecutive rounds. In the first round, players select 0-2 pre-ban Heroes, depending on the room settings, and choose one additional Hero as each round progresses. Pre-ban Heroes selected in each round roll over into subsequent rounds, leading to a total of 16 banned Heroes by the end. According to the round rule of single round, best of three, best of five, or best of seven, the player who meets the winning conditions will be the ultimate victor of the battle.
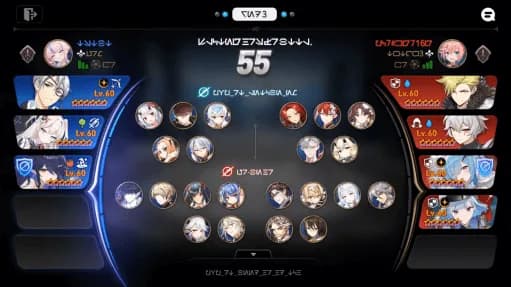
[Lunatic Draft] Lunatic Draft is a battle mode available in Mock Battle. Two players will play several consecutive rounds, and the 10 Heroes who were banned the previous round will be registered as 'Lunatic Banned Heroes,' where they will remain banned for the next round. These Lunatic Banned Heroes will be reset each round, but the rules surrounding the Pre-Banned Heroes will remain the same as that of the Round Mode. Essentially, up to a total of 38 Heroes can be banned, so this mode will require players to be much more strategic in how they approach each battle.
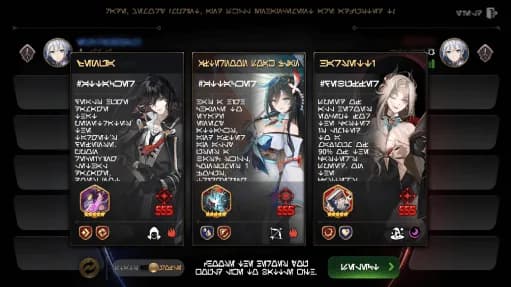
Draft Mode Accessible via Mock Battle, Draft Mode is a battle mode where you create your teams by selecting Heroes one-by-one from randomly generated pools. All Heroes that appear in Draft Mode are preset and are unrelated to any of the Heroes you may have on your account. Therefore, players may enjoy the content without worrying about having obtained the Heroes or having optimal Equipment. Both competing players will be choosing one of three Heroes from their own respective list simultaneously, and after the Drafting process is complete, the battle will begin once both players have banned one Hero of their choice from the opponent's team.
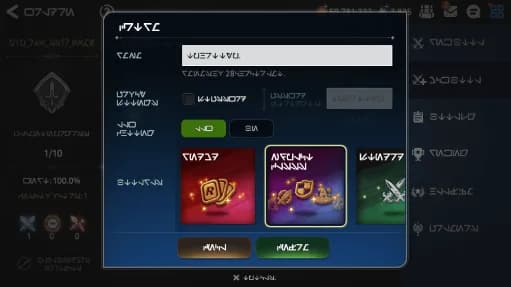
No Duplicate Classes Mode In No Duplicate Classes mode in Mock Battle, you can select one Hero from each class. Each player will select a total of five Heroes, each a different class, before choosing one of their opponent's Heroes to ban and proceeding to battle with four Heroes.
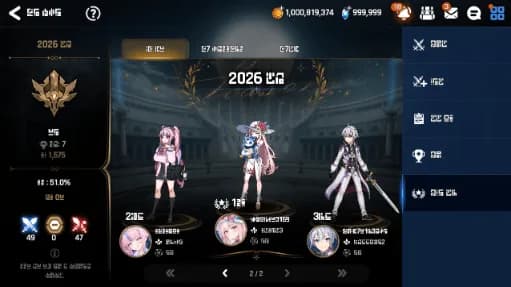
Hall of Fame In the Hall of Fame, you can find the strongest Heirs who have left their names in World Arena history. If you finish a Regular Season in the top 3, your record will be permanently recorded in the "Regular Season" tab. You can check the records of official tournament champions in the "E7WC" and "E7 Masters" tabs.
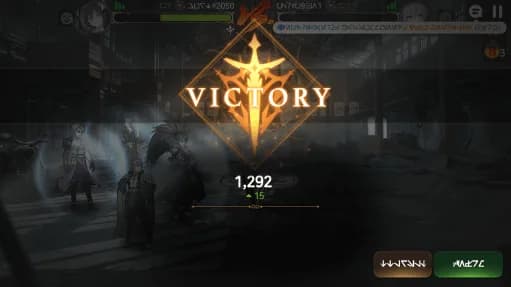
Victory Points Deduction Rules In a set amount of time after the last Rank Battle in the Gold League or higher, (Gold: 7 days, Master or above: 3 days) 2% of your current Victory Points will be deducted. Subsequently, an additional 2% will be deducted from your Victory Points every same time period. You will receive a message when nearing the time this rule is applied, so please check and manage your Victory Points.
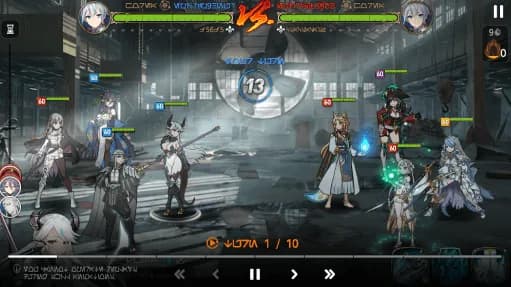
Replay Replays can be accessed and watched from the Battle Log tab. You can maneuver through the Replays based on turn order. Actions within Replays will take the actual amount of time it took during the battle, including emojis. Each Replay is saved to the device that played the battle and will be deleted once the Battle Log is deleted. Battles that ended abnormally and those played on a different device will be unavailable for Replay.
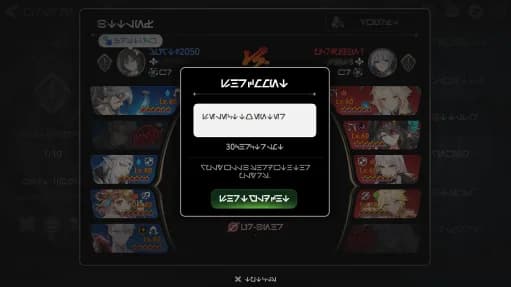
Share Replay Once you have joined a Guild, the Share Replay function becomes available via the Guild Chat. Share your battles and strategies with your Guild members. Shared Replays can be watched up to 15 days from the day when the battle took place, and cannot be accessed in battle.
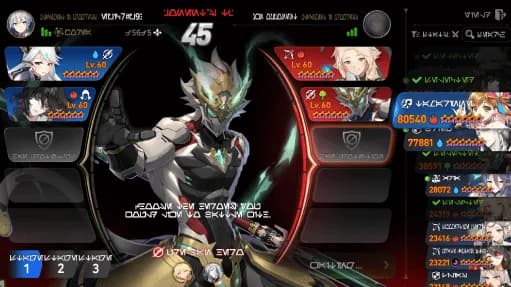
Ban Protection Ban Protection is a function that allows you to protect your third slot Hero from being banned by the opposing player. By protecting key Heroes with Ban Protection, you can ensure completing your team formation or gain an advantage by anticipating the opponent's strategy. Ban Protection is not available in Draft Arena or regular Arena modes.
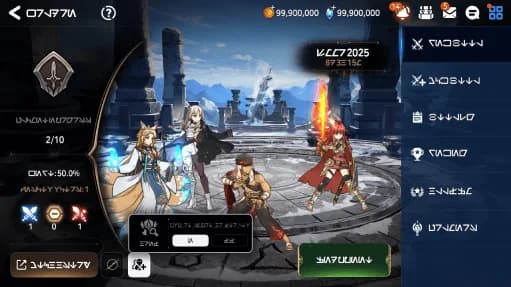
Hero Support System The Hero Support System is a feature that provides select Heroes to Heirs, allowing those who may not have all the necessary Heroes or Equipment to enjoy World Arena more easily. Supported Heroes can be used regardless of ownership, and this system is available only to Heirs whose World Arena Rank Battle League is below Champion.
Warfare Rules Warfare Rules is a system that selects a random set of special rules to be applied to World Arena matches. The rules themselves are revealed before the Pre-ban phase and can be examined during the Ban Pick phase and when in actual combat. You can view the entire list of the current season's Warfare Rules from the World Arena Lobby. In World Arena Ranked Battles, they are applied in matches with Champion rank or higher.
Draft Arena
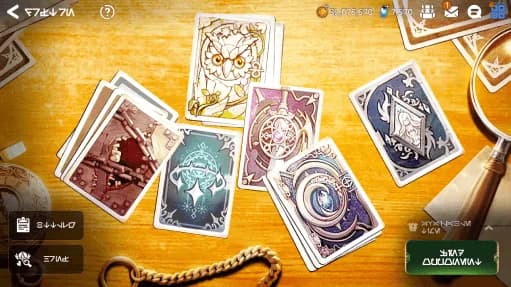
Summary You can battle users from all over the world in real-time in Draft Arena, during the designated time of day, using Heroes provided by the content. Fight with all your might to earn the Monolith.
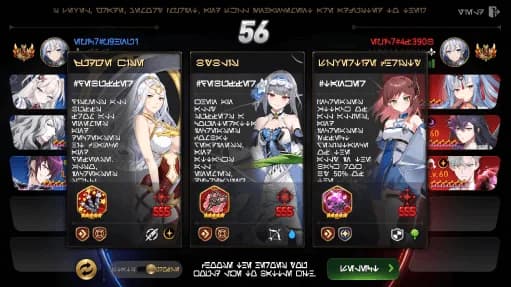
Draft Arena Rules In Draft Arena, Heroes provided by the content will appear randomly. Each round, the two players will be given three non-duplicate Hero options simultaneously. The players will form a deck by choosing one Hero from each set. After selecting five Heroes each, they will ban one Hero from each other's deck before proceeding to battle.
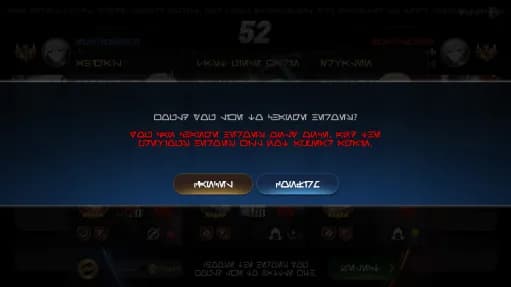
Change Hero Function If you dislike the Heroes that appear randomly during the draft, you can recruit new Heroes that haven't appeared yet using the Change Hero function. This function is only available once per game for each player.
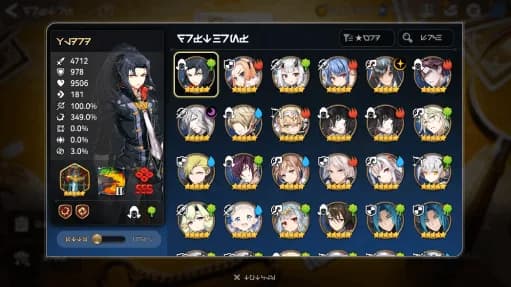
Draft Hero Info Tap "Hero Info" located in the Draft Arena Lounge to see a list of Heroes provided by the content, along with their Equipment and stats. Heroes appearing in Draft Arena can be added or removed from the list with each cycle.
World Arena Tournament
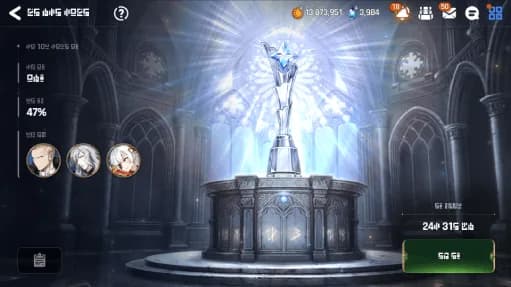
Summary The World Arena Tournament is PvP content where 16 players participate to determine a winner. The final winner is decided through the Group Stages and the Tournament Stages. Tap the "Register" button while the tournament is open to begin matchmaking.
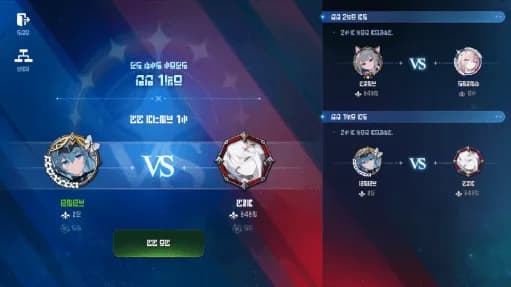
Waiting Room In the Waiting Room, you can check your opponent's information and prepare for battle. Tap "Ready" to change your status to ready, which cannot be canceled once completed. When both players are ready, the battle will start after a countdown.
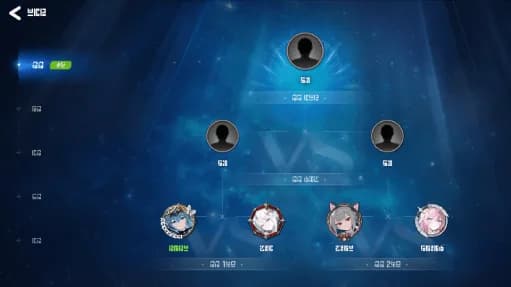
Bracket The tournament begins with the Group Stages among Groups A, B, C, and D. The winner of each group advances to the Tournament Stages, and the final winner is decided through the Semifinals and the Grand Finals. You can check your position, ongoing matches, and your next opponent on the bracket.
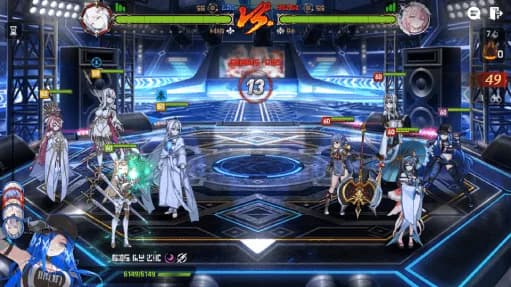
Match Rules Each match is conducted within a time limit. If a winner is not decided within the time limit, the winner is determined in the order of remaining Health ratio, number of surviving Heroes, and total damage dealt.
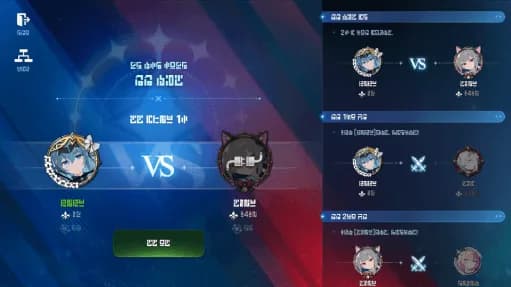
Leaving and Default Victory Yielding the battle or leaving the tournament may result in a loss for that match. If the opponent leaves or disconnects, the winner may be decided without a battle. In this case, the winner advances to the next stage by a default victory.
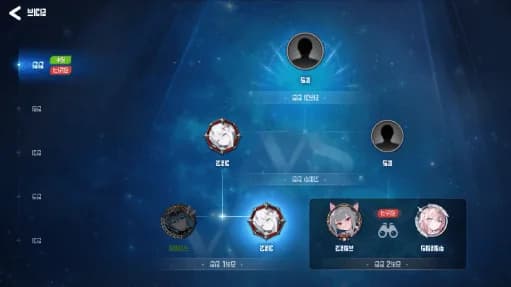
Spectate Select a match marked LIVE on the bracket to spectate. Eliminated players can freely spectate ongoing matches. Participating players can spectate other matches in the same round after their current round match has ended.
The Call of Chaos
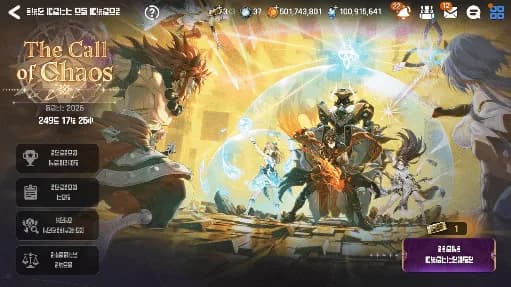
Summary The Call of Chaos is a real-time PVP content that takes place in the Chaos realm, the hidden side of reality. The battle is a 3v3 format, and the side that destroys the opponent's Sentinel first wins. You can turn the tide of battle by selecting your Fate, powerful effects that impact the battle.
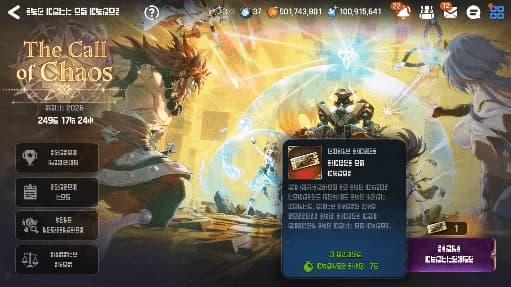
Start Challenge The Call of Chaos proceeds in units of a single Challenge. You can start a Challenge using a Ticket of Chaos.
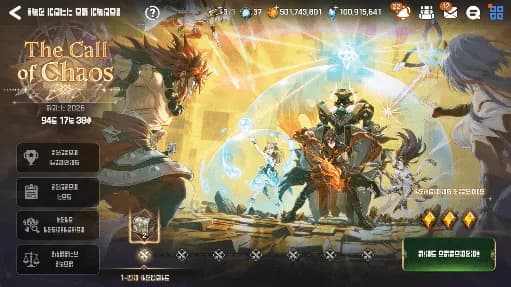
Challenge Progress Once the challenge begins, you can tap the "Find Opponent" button to find an opponent of a similar stage. Every time you win a battle, your stage increases, and the quality of the reward chest also improves. When you lose a battle, Essence is decreased. You are given a total of 3 chances. If you achieve 7 wins, the challenge ends in success, and if all Essence is consumed before achieving 7 wins, the challenge ends immediately.
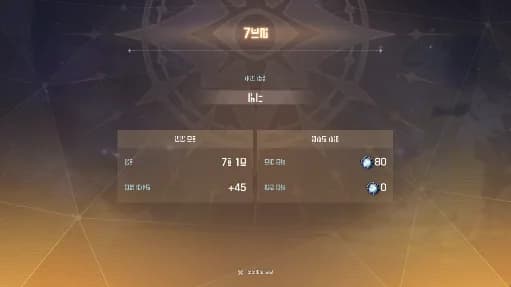
Challenge Calculation When a Challenge ends, the results of the Challenge are calculated, and you can obtain rewards according to your stage.
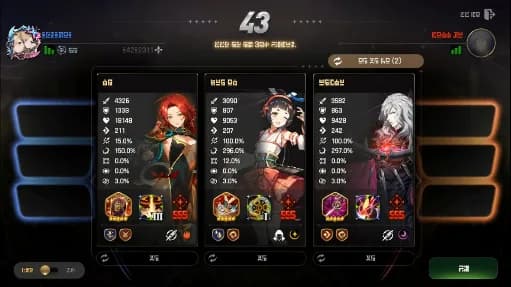
Hero Selection Phase In the Draft phase, you will select 3 Heroes to dispatch into battle. Heroes are selected automatically, and if you want different Heroes, you can use the Refresh function. The remaining number of Refreshes is displayed in the top right corner of the screen. Heroes that have already appeared will not appear again when refreshing.
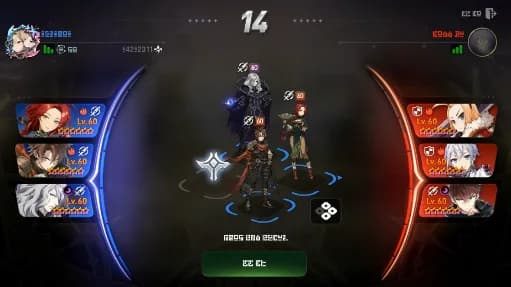
Ready Phase After both sides have confirmed their dispatched Heroes, the Heroes chosen by both sides are revealed. Once you adjust the placement and Devotion Skills of your Heroes, the battle will immediately begin.
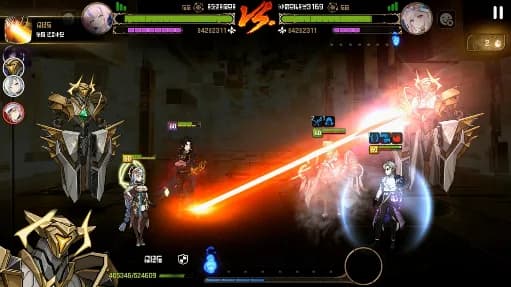
Sentinel In The Call of Chaos, unlike other World Arena modes, the side that destroys the opponent's Sentinel first wins, rather than the side that defeats the opponent's Heroes first.
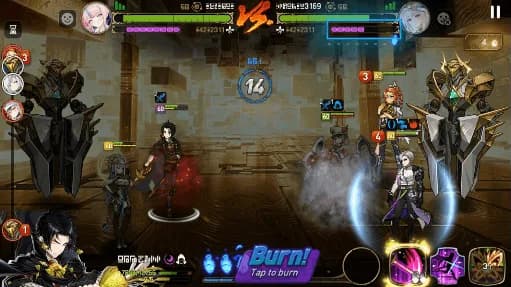
Guard Gauge A Sentinel is immune to all harmful effects and possesses tremendous durability, making it difficult to destroy directly. Therefore, to defeat a Sentinel, you must first weaken it by decreasing its Guard Gauge. The Guard Gauge decreases every time you defeat an opponent's Hero, and as it decreases, the Sentinel's Defense, Speed, and Penetration Resistance also decrease.
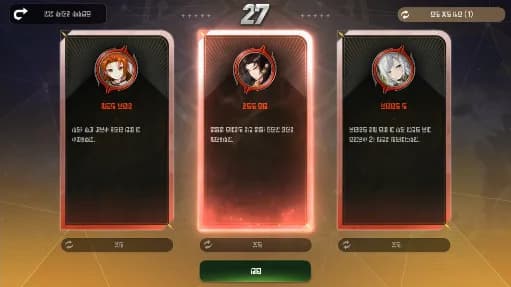
Fate In The Call of Chaos, you can select your Fate during battle. Fates are various effects that impact the battle, and they are powerful effects that can turn the tide of battle.
Fate Fate can be selected every time a certain number of turns pass during battle, and there are up to 4 Selection Phases. In each Selection Phase, 3 Fates are given at random, and if you want different Fates, you can use the Refresh function. The remaining number of Refreshes is displayed in the top right corner of the screen. A Fate that has already appeared will not appear again when refreshing, but after the Selection Phase ends, all Fates except the ones you already own can appear again. Fates consist of Rare, Heroic, and Epic grades. The Fates that appear for both players will not overlap, but their grades will be identical.
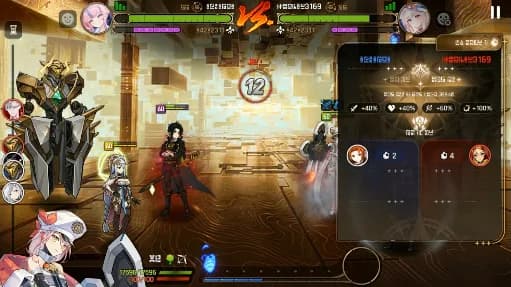
Blessing of Fate Every time you select a Fate, Blessing of Fate is granted. Blessing of Fate is an effect that increases Attack, max Health, Critical Hit Chance, and Critical Hit Damage of all allies. You can check the Fates and Blessings of Fate acquired during battle through the tab on the right side of the screen during battle.
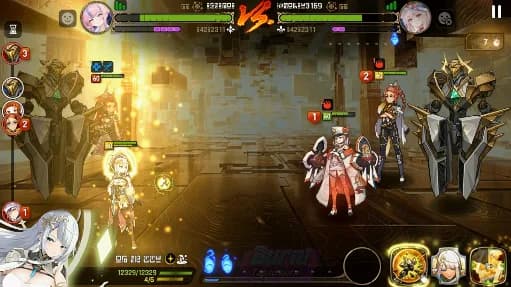
Hero Revival In The Call of Chaos, even if a Hero dies during battle, they will automatically revive as long as the Sentinel is not destroyed. Each Hero will revive after someone's turn ends 5 times following their death. Upon revival, the Hero's Combat Readiness increases by 100%, their skill cooldowns decrease by 1 turn, and all injuries are recovered.
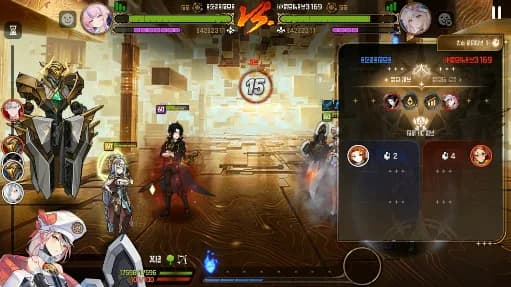
Revival Information You can check the revive cooldown of dead Heroes by tapping the tab on the right side of the screen during battle.
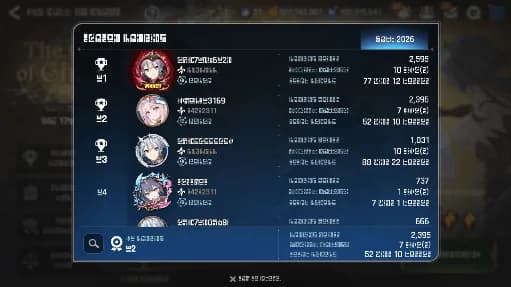
Season Ranking In the Season Ranking menu, you can check the ranking of the ongoing season. The season ranking is calculated based on the Ranking Points acquired from Challenges. Ranking Points are obtained upon Challenge calculation according to the results recorded in each Challenge.
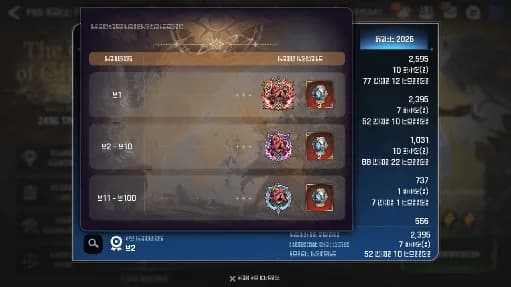
Rank Reward When you finish the season with a high rank, you can obtain a special rank reward. Rank rewards can be obtained by entering the Call of Chaos during the grace period after the season ends.
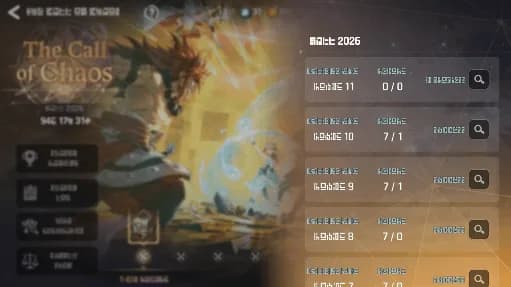
Season Log In the Season Log menu, you can check the log of the ongoing season. You can check the battle record, results, and detailed battle logs for each Challenge round.
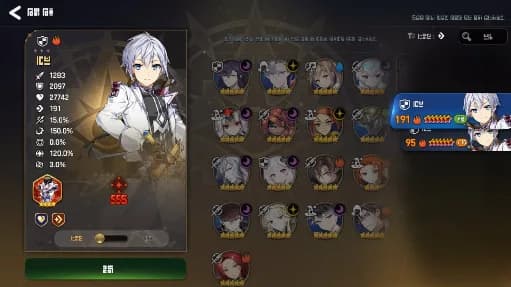
Hero Registration In the Hero Registration menu, you can check the information of Season Heroes and register Heroes to use. You can register and use either your own Heroes or Supported Heroes. Tap the Change button, select a Hero, and save to register. You can change them freely.
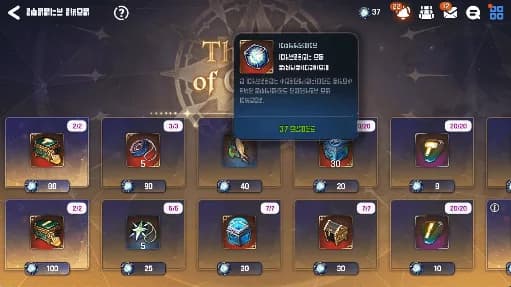
Crystal of Purification As you proceed with a Challenge, you can obtain Crystal of Purification every time you finish a battle, which can be used in the Supply Shop. If you encounter and defeat an opponent who has 1 remaining Essence, you can obtain additional Crystals of Purification. Crystals of Purification can only be used during the corresponding season and will reset when the season ends.
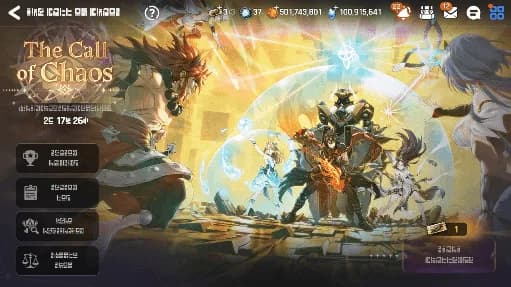
Season End and Grace Period Once the season ends, a 7-day grace period will proceed. During the grace period, you can enter The Call of Chaos, but you cannot proceed with a Challenge.
Guild
4Guild
Summary Fight to become the strongest Guild! Found a Guild or join an existing one to send and receive catalysts through aid and benefit from Guild buffs. Participating in Guild activity will increase the Guild level, allowing the Guild to recruit up to 30 members. The more members a Guild has, the better the Guild Check-in reward.
Guild Weekly Reward Chest The Guild Weekly Reward Chest can be obtained once per week and grants one random reward from Skystone, Mystic Medals, or Brave Crests. Higher Guild Mastery Levels unlock more reward types and increase reward amounts.
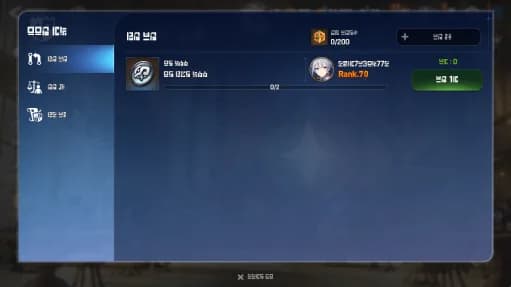
Aid You can ask other Guild members for Runes, Catalysts, and crafting materials. You can Request Aid once per day, and the amount you receive differs according to the item requested. Sending Aid to other members rewards you with Brave Crests. You can receive up to 200 Brave Crests per day, and you can't send any more Aid once reaching this limit.
Guild War
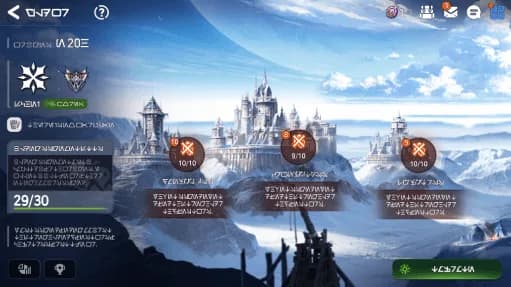
Summary Compete with other Guilds in Guild War. A Guild must have the required number of members with Defense Teams to participate. Each member must form two Defense Teams, each consisting of three Heroes, and the Guild Captain must assign members to defend crucial buildings, particularly the Stronghold and Defense Towers within each Fortress. Once the Guild War begins, each Guild will start attacking their opponent's bases. Destroying the opponent's bases rewards Havoc, and the guild with the highest Havoc at the end of the war wins. Guild War takes place three times a week.
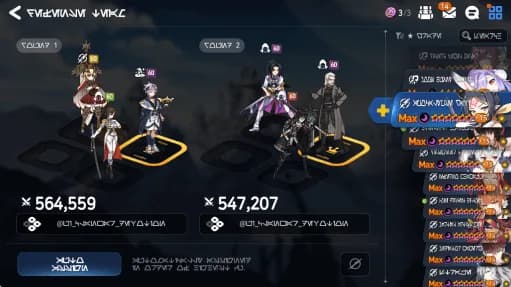
Guild War Defense There are two rounds in a Guild War battle, thus requiring two Defense Teams. You can have up to three Heroes per team in Guild War. Using Auto Assign will automatically add Heroes to the team based on CP.
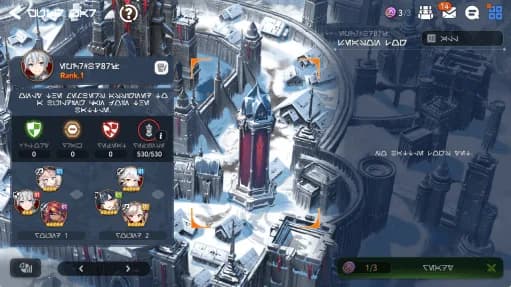
Guild War Offense Once the war begins, you can check your opponent's Fortresses and choose where to attack first. As with Guild War Defense Teams, your Offense Team can have up to three Heroes per team. Any Hero who is killed cannot be used in the Guild War until the next war begins. Each Fortress contains 1 Stronghold, and each Stronghold remains protected until at least one of its two Defense Towers has been destroyed.
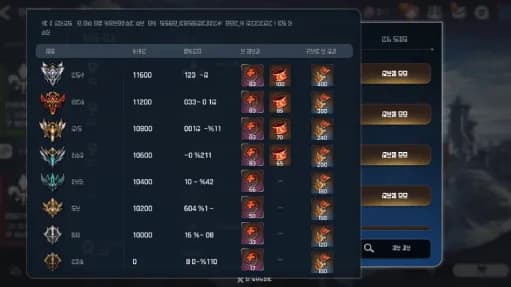
War Reward The quantity of Mystic Medals awarded as War Reward is calculated as such: (value based on individual attack history + value based on war win/loss) x Reward Ratio. Additional Mystic Medals will be awarded according to successful Defense history.
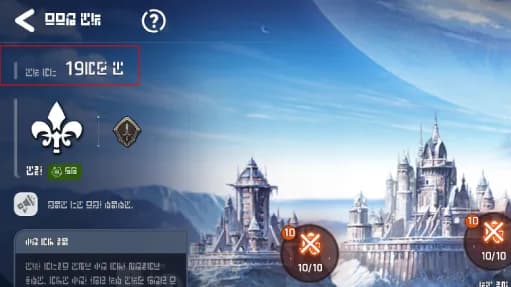
Schedule Guild Wars take place every Monday, Wednesday, and Friday at 3:00:00 UTC. There are no Guild War battles on Tuesdays, Thursdays, and weekends, giving Guild Captains time to prepare their Guilds (Preparation Period).
World Boss
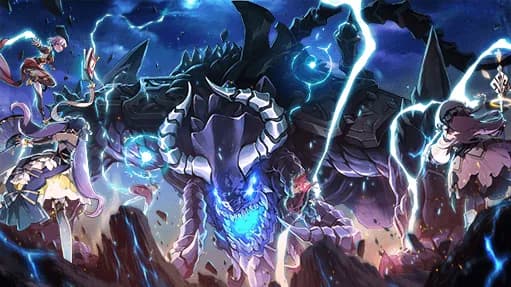
Summary In World Boss, you can take part in battles against beasts threatening Orbis. Collect points in battles to join both the Guild and Personal Rankings, and join forces with your Guild members to take down these beasts and bring honor to your Guild.
Battle Schedule World Boss is unavailable for the first 6 hours after your server's daily login reset time on the day a battle begins, and closes at the time of your server's daily login reset time on the day a battle ends. There are two World Boss battles per week: one from Monday to Thursday, and one from Friday to Monday. There is no World Boss battle on Thursday. Every time the World Boss returns, it does so with a new Enhanced Element in the following order: Fire → Ice → Earth → Light → Fire → Ice → Earth → Dark. Detailed Schedule: Global Server (PST) Battle 1: Monday 08:00 - Thursday 01:59 Battle 2: Friday 08:00 - Monday 01:59 Europe Server (UTC) Battle 1: Monday 09:00 - Thursday 02:59 Battle 2: Friday 09:00 - Monday 02:59 Asia/Korea Server (KST) Battle 1: Monday 09:00 - Thursday 02:59 Battle 2: Friday 09:00 - Monday 02:59
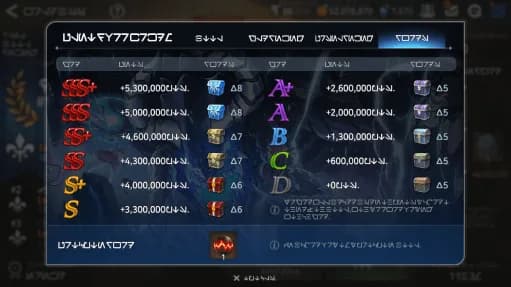
Battle Grade and Rewards Total Score is calculated based on your Heroes' Combat Power as well as any bonuses you received, and will be reflected in your Battle Grade. The higher your Battle Grade is, the better rewards you can receive.
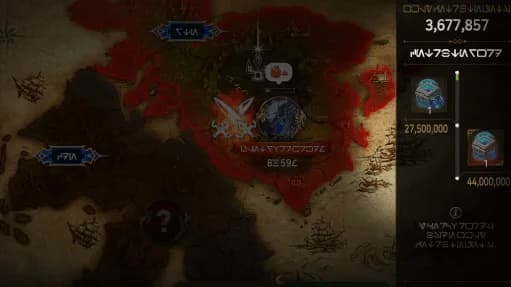
Weekly Contribution Points Points acquired from World Boss battles are accumulated as Contribution Points, and rewards can be received accordingly. Contribution Points reset at the server's weekly reset time.
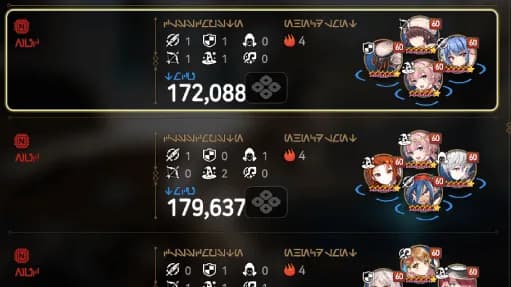
Supporters Supporters aid your team in battles against the World Boss, and consist of Heroes assigned to be Supporters by your fellow Guild members. The Supporters you select will fight alongside you once the battle begins, and will contribute towards bonus calculations and your Total Score. Therefore, finding the right combination of Supporters and Heroes is the key to receiving the best score possible. If there are no Supporters available from your fellow Guild members, you will be able to select NPC Supporters.
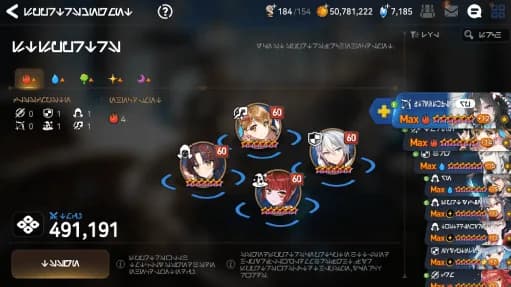
Supporters Management Supporters can be changed through the Supporters Management button in World Boss. Supporters must be assigned for each Enhanced Element. If four Supporters are not assigned for each Enhanced Element, the changes will not be saved, so make sure there are no empty slots when changing your Supporters.
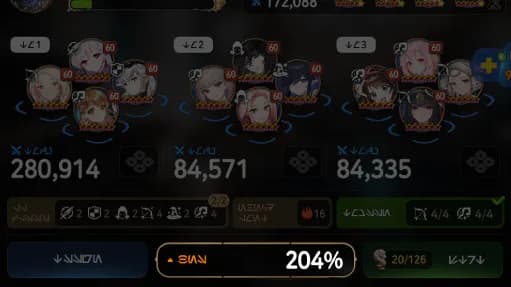
Bonuses Bonuses are divided into three categories: All Classes, Enhanced Element, and Team Mission. In order to receive a high Battle Grade, it is important to assign both Heroes with high Combat Power as well as Heroes who can fulfill many bonus requirements.
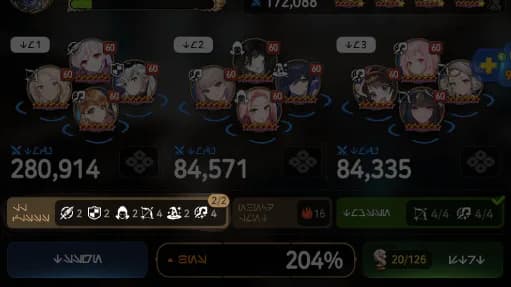
All Classes Bonus The All Classes bonus allows you to receive a bonus for assigning Heroes from every class. You will receive a 50% bonus if you assign 1 Hero from every class, and a 100% bonus if you assign 2 Heroes from every class.
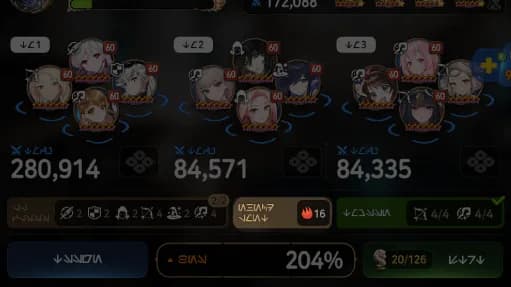
Enhanced Element Bonus The Enhanced Element bonus allows you to receive a bonus for assigning Heroes of the Enhanced Element to your team. For every one of these Heroes assigned to your team, you will receive an additional 4% bonus.
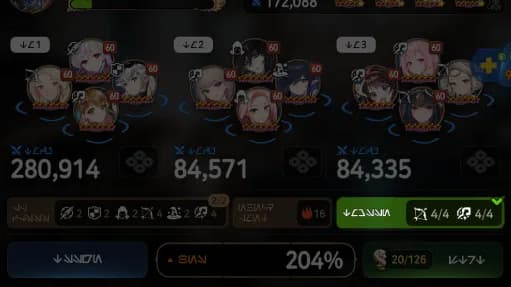
Team Mission Bonus Team Missions will change every time the World Boss reappears. When you assign four Heroes of the class specified by your mission, the Team Mission will be completed, and you'll receive a 40% bonus. The type of class needed to fulfill this mission is different for each Guild member.
Ancient Inheritance

Summary Ancient Inheritance is a season-based real-time PVE content where players cooperate with their Guild members. Accept the request of the Memory Chain and explore the hidden dimension. You can check for more details when you enter Ancient Inheritance.
Ancient Inheritance
20Ancient Inheritance

Summary Ancient Inheritance is a real-time PVE content where players cooperate with their Guild members. It is important to constantly communicate with Guild members while focusing on your own independant growth as you cooperatively clear the maps in order to compete with other Guilds for more rewards. One season will last for 2 weeks.
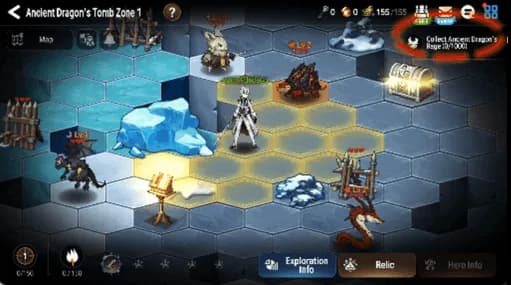
Ultimate Objective Exploration Provisions are consumed on every movement and action, and will reward you with Ancient Inheritance Exploration EXP. You can get stronger as you interact with various objects and battle against monsters while exploring the vast map together with your Guild members. Move to further zones by clearing the Guild Objective for each zone while communicating with your Guild members and growing individually as you enhance your Relic Effects and Element Levels. The ultimate goal is to reach the final zone, explore the entire map, and clear everything.
Basic Progression

Content Entrance Rule In order to access Ancient Inheritance, at least 16 Guild members are required. Having more Guild members will allow more diverse gameplay. After the initial entry, you can proceed even if the Guild members fall below the requisite of 16. However, Guild members under Account Rank 40 cannot participate.

Leave or Kick All individual progress, including exchange currency, will be reset for any Guild member who has left or been kicked from the Guild while participating in the Ancient Inheritance, even if they join another Guild. Equipment received as a Boss defeat reward cannot be obtained again, even if the player joins another Guild.
Entering Map

Starting Point When you enter Ancient Inheritance for the first time, you will spawn at a random Starting Point. Each zone has 1 to 4 Starting Points, and all Guild members will similarly also start at a random Starting Point. While you are free to choose to go down your own individual route, it will be difficult to clear the path alone. Therefore, plan the route beforehand with the Guild members that spawned at the same Starting Point and collaborate with them as you proceed to the Guild Objective. Each time you enter a new zone for the first time, you will spawn at a new Starting Point.
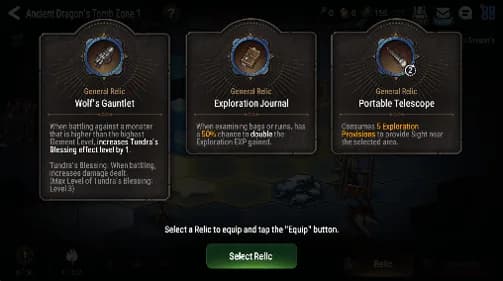
Starting Relic Selection Players will select a Starting Relic after entering the content for the first time. As it's a Relic with a permanent effect, the player's selection will have a significant impact on future gameplay. Players will be able to select 1 out of 3 Starting Relics.
Sight

Summary In Ancient Inheritance, there are three types of viewing mechanics: Player Sight allows you to check objects, Guild Sight allows you to check the locations of Guild members and the routes they passed through, and Fog indicates regions where no one has explored yet.
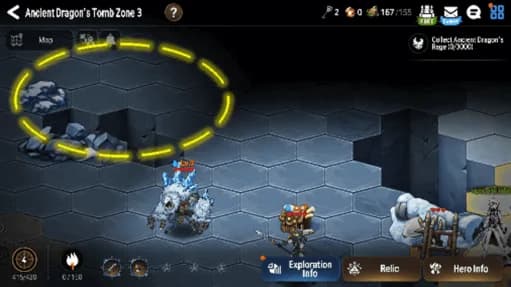
Player Sight Player Sight is a sight that lights up the regions where you have passed. It is the brightest view that allows you to check monsters and objects on the map. Up to 4 cells from your current position will be lit up, and the areas that have been revealed will remain lit.
Guild Sight Guild Sight is a sight that lights up regions on the map other than that of the Player Sight that Guild members have passed through. You can check the terrain and confirm the location of Guild members and Notes. Guild Sight is one level darker than Player Sight. With Guild Sight, all Wardens, Boss Monsters, and Teleportation Megaliths are revealed and you will be able to check their locations, regardless of whether or not they have been discovered. There is also a unique object that allows you to share the surrounding view with others.
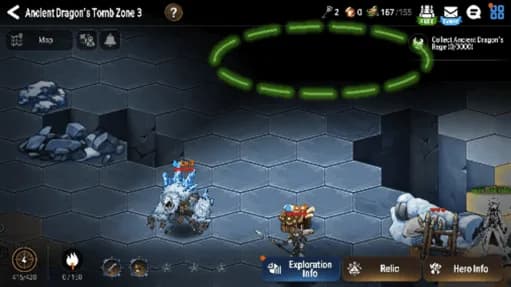
Fog All regions where no one has explored are covered with Fog. Here, you cannot check any information or terrain. You must light up the map with Player Sight and Guild Sight as you proceed.
Movement
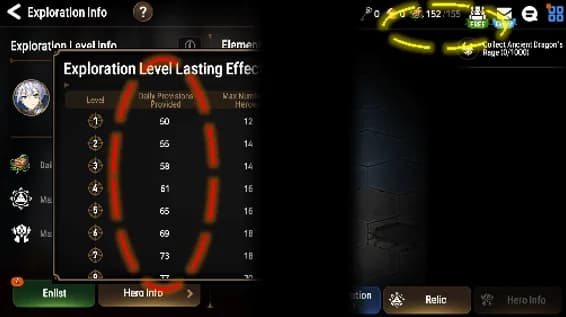
Exploration Provisions In Ancient Inheritance, Exploration Provisions are consumed for every movement and action. Exploration Provisions can be acquired through interactions with certain objects and will be recharged on daily reset. The daily reset recharge amount will increase according to your Exploration Level.
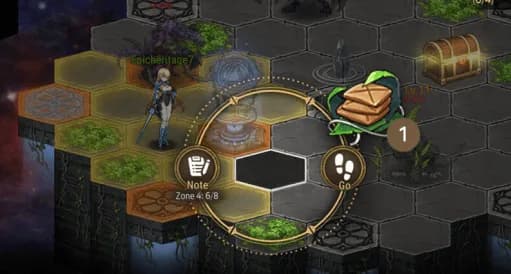
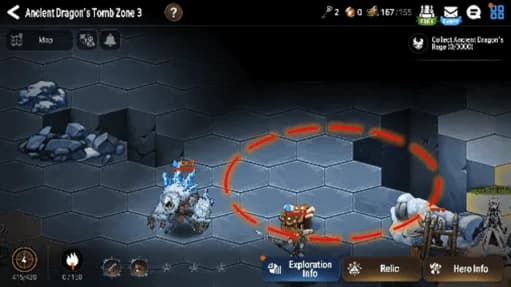
Movement Rules You can select one cell which is within 2 cells from your current position to move. Available cells will be outlined in yellow, and you can move by selecting a cell and tapping the "Go" button. Moving to another cell will cost you one Exploration Provision. You will not be able to move to cells with obstacles, objects, or monsters. However, after defeating the monster, they will be removed from the map, which will then allow you to move to that cell. Mobility range can be increased through Relics or Exploration Level Effects. You can move onto the same cell as other Guild members, and can check the information of the Guild members sharing the same cell with you by using the "View" button.
Interaction

Interaction Rules Interactions other than movement are available by using the button that appears when selecting the cell. Depending on the selected cell or selected Object, the way the Use/Battle/View/Note buttons are displayed will differ.
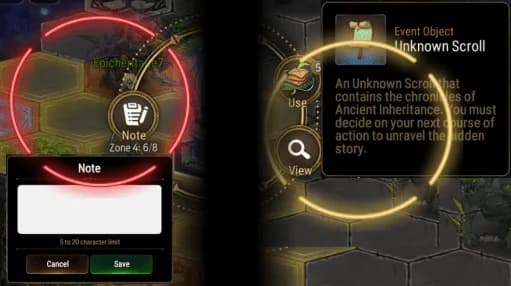
View Information You can check the information of objects with the "View" button. The role and reward information of the object identified via either the Player Sight or the Guild Sight will be displayed. The "Note" button is a function that allows you to leave indicators on the map by using a specific symbol. By using this function, you can share information and communicate with other Guild members. Any Guild member can freely set or remove notes.

Objects and Monsters To interact with objects or battle monsters, you must move to an adjacent cell, select the cell, and use the buttons that appear. When interacting with objects, the "Use" button and the amount of required items will be displayed. Interactions are available only when you have the sufficient number of required items. If you tap a cell with a monster on it, the "Battle" button will be displayed instead. You can enter the battle preparation screen with the Battle button, and the "Battle Start" button will display the amount of Exploration Provisions that will be consumed. "Use" and "Battle" actions immediately consume the required items. Certain Relics allow you to interact with objects that are not adjacent to you.
Relic

Summary Relics are exclusive buffs that can be equipped in Ancient Inheritance that grant you benefits for actions such as exploration, buff acquisition, and additional EXP. As your Exploration Level increases, the number of Relics you can equip will increase. If you reach the maximum amount of Relics you can equip, you can replace them. Replaced Relics will disappear.
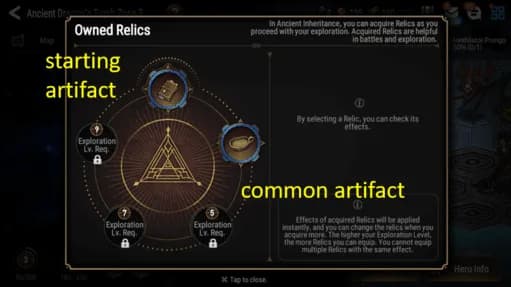
Relic Type and Grade There are two types of Relics: Starting Relics that can be obtained when starting the content, and General Relics that can be obtained by increasing your Exploration Level or interacting with Relic Chests on the map. The Starting Relics available come from three designated General Relics, and the player's selection will have a significant impact on future gameplay. When you enter for the first time, you can select one Starting Relic. General Relics can be replaced with other Relics when the equipable Relic slots are full, but Relics with the same effect cannot be equipped at the same time, and can only be replaced with those of the same or higher grades.
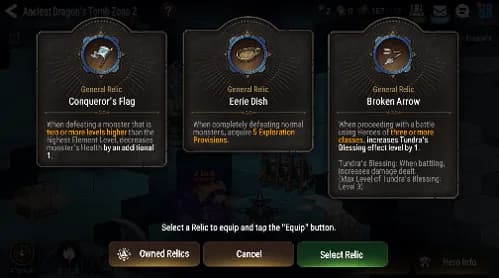
Relic Skills Each Relic has various skills. For example, some Relics give you extra rewards when battling, Relics that grant you buffs when meeting certain requirements, Relics that provide aid to your Guild members, and Relics that reduce penalties in battles or interactions. Depending on your preferred style of gameplay, you can replace Relics as you proceed.
Object
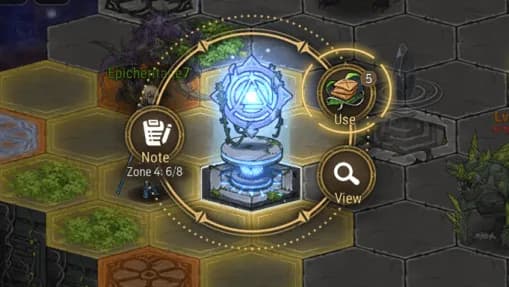
Summary Devices that you can interact with by tapping the "Use" button are called objects. Each object has a different function and consumes different amounts of required items, which you can check with the "View" button.
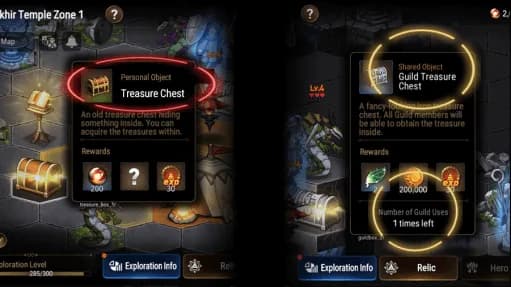
Object Type Objects are largely divided into personal objects and shared objects. Personal objects can be used once per player, while shared objects are objects that can no longer be used after a certain number of uses depending on their usage counts. Shared objects will no longer be available to you if you have already used them once, even if there are usage counts remaining.
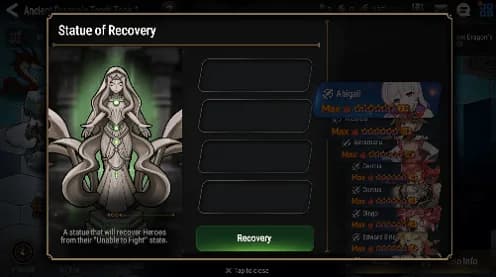
Object Effect Object effects can be largely divided into general objects that allow you to obtain rewards immediately upon usage, mobility objects that assist you in movement, and Relic objects that grant you buffs that may affect your gameplay. General objects give you set rewards according to their type, and you can check the rewards in advance with the View button.
Exploration Level

Summary In Ancient Inheritance, Exploration Level is the foundation of your personal growth. You can acquire Exploration EXP by moving, interacting, battling, and receiving rewards. With the acquired EXP, your Exploration Level will increase. Exploration Levels and applied effects are only applied in Ancient Inheritance.

Exploration Level Effect The higher your Exploration Level becomes, the greater the number of Heroes you can enlist. Similarly, the daily Exploration Provisions you can acquire, Relics you can equip, and mobility range increase. You can also acquire keys for opening treasure chests. Since the daily Exploration Provisions you acquire and the number of Heroes available for Enlistment increase with each level, you will be able to proceed further per day and participate in more battles.
Element Level

Summary This function allows you to strengthen the enlisted Heroes with the EXP acquired through battles with monsters, and is the core of your individual growth in Ancient Inheritance. It is beneficial to select and strengthen the element of the Heroes you primarily use, as each player has different Heroes they utilize and numbers of Heroes for each element. When defeating a monster, you will acquire Element EXP corresponding to the advantageous element of that particular monster.

Element Level Enhancement and Effects You can increase Element Level by gaining Element EXP through battles with monsters. When Element Level increases, the stats of the Heroes of that particular element among your enlisted Heroes will increase. As Element Level increases, the required Element EXP also increases.
Hero
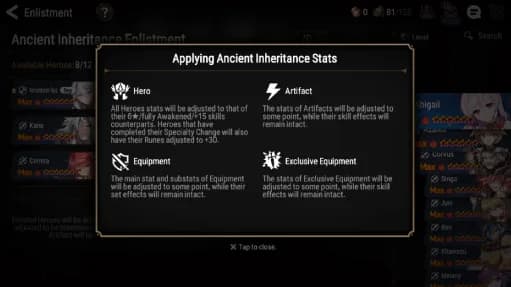
Summary The stats of Heroes used in battles for Ancient Inheritance are partially adjusted. Heroes will have their stats enhanced to each of their respective maximums, and only some of their Equipment stats will be adjusted. Therefore, you can use Heroes who have not completed their growth.

Utilizing Hero Stats Enlisted Heroes' stats will be adjusted to that of their 6★/fully Awakened/+15 skills counterparts, and those that have completed their Specialty Change will have their Runes adjusted to +30, all while having their respective stats adjusted to be maximized. Although the main/sub stats of Equipment, Exclusive Equipment, and Artifacts are applied with adjusted values, the set effects of Equipment and the skill effects of Exclusive Equipment and Artifacts are applied without any changes.
Enlistment
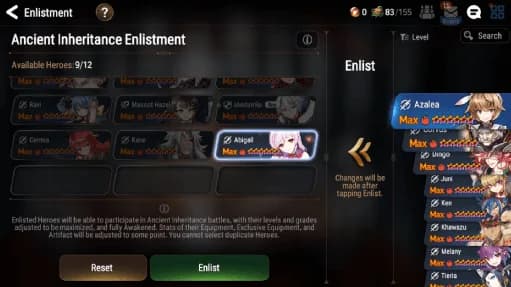
Summary To use Heroes in Ancient Inheritance, you must register them via the Enlistment process. Enlisted Heroes will have their stats maximized, and this effect will be applied only in Ancient Inheritance. As your Exploration Level increases, the number of Heroes you can enlist will also increase. Enlisted Heroes cannot be transmitted or used as materials, nor can they be recalled or sent to the Waiting Room.

Enlistment Restrictions Identical Heroes, Ingredient Heroes, and Heroes who have not been fully unlocked via Moonlight's Blessing cannot be enlisted. As Specialty Change Heroes are categorized under Identical Heroes, you cannot enlist Specialty Change Heroes at the same time as their original counterparts.
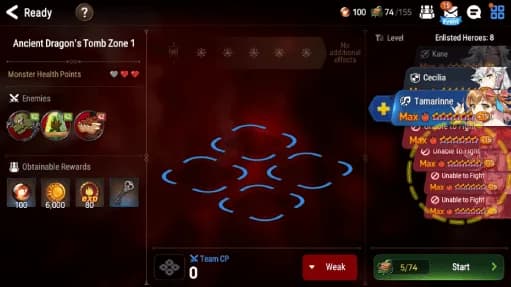
Battle Description Only Enlisted Heroes can participate in battles. Heroes who have participated in a battle once will become Unable to Fight for that day and cannot be used again until after the daily reset. If you have no enlisted Heroes or have used all enlisted Heroes already, you cannot participate in battles until Heroes' Unable to Fight state is reset.
Enlistment Withdrawal

You can withdraw up to 10 Heroes on the Hero Enlistment screen by selecting the enlisted Heroes. Heroes that are Unable to Fight will not recover until after the daily reset time even if they are withdrawn. Since you cannot withdraw more than 10 Heroes during each season, you need to be cautious when withdrawing Heroes. All Heroes will be automatically withdrawn once the season ends.
Battle

Summary In Ancient Inheritance, there are Normal Monsters that you must defeat on your own, and Elite/Warden/Boss Monsters that Guild members must work together to defeat. Heroes who have participated in a battle once will become Unable to Fight for the rest of the day. You can earn various rewards and Element EXP through battles.
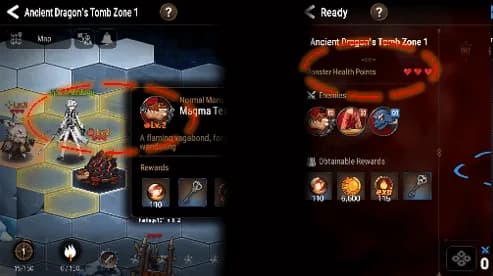
Normal Monster Battles Normal Monster battles are individual battle content that can award you with Element EXP. You can gauge the appropriate difficulty by comparing the level displayed on the map to your Exploration Level. When you succeed in battle, the displayed amount of Exploration Provisions will be consumed, the Heroes who participated in the battle become Unable to Fight on that day, and you will obtain the Clear Reward. However, if you fail to defeat the monster, only a portion of your Exploration Provisions will be consumed and Heroes will not become Unable to Fight. With each successful battle, the heart-shaped Health Points will decrease, and when all Health Points are removed, the monster will disappear from the map.
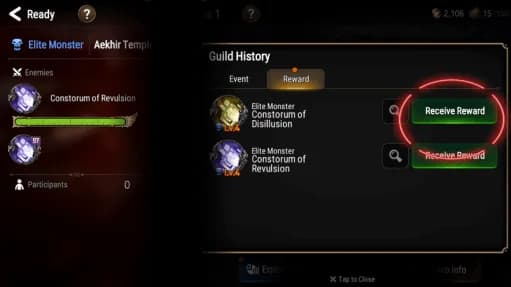
Elite Monster Battles Elite Monster battles are cooperative content where you join forces with other Guild members. Heroes who have participated in the battle will become Unable to Fight for the rest of the day, and you will gain Participation Rewards every time you participate. You can claim Clear Rewards through the Reward Notice once the Elite Monster is defeated. Only the Guild members who have participated in the battle will be able to claim rewards through the Notice.
Guild Objective
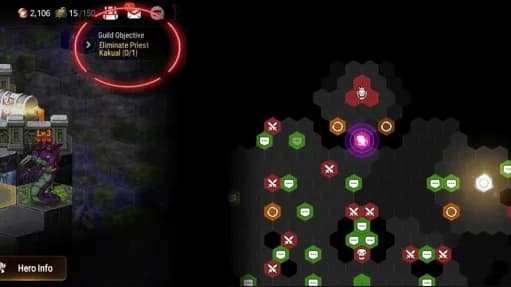
Summary Guild Objectives for each zone will be displayed in the upper right corner of the map. Boss Monsters and Wardens will gradually appear on the map according to progression, and the locations of Wardens and Boss Monsters are marked on the map even if the area is covered by fog. Guild members must work together to complete each goal one by one.

Warden Battles There are 2 to 4 Wardens for each zone, and you can confirm this via the objective. After defeating all Wardens indicated by the objective in a zone, you will be able to battle the Boss Monster, and only the Guild members who have participated in the battle will be able to claim rewards through the Notice.

Boss Encounter and Teleportation Megalith After the Boss of a zone appears, the Teleportation Megalith will be activated. From that moment forward, the Teleportation Megalith and the Starting Points will become available for you to move to their respective positions. You can further explore uncharted areas via the Teleportation Megalith.
Move to the next zone

Boss Battles According to the Guild Objective, you will be able to battle the Boss Monster. Unlike other monsters, Bosses use various skills that are set depending on specific turn orders. Therefore, it is important to remember all the skills' effects and be prepared before the Boss takes their turn. You can acquire Participation Reward for every time you participate, and Clear Rewards are given to all Guild members via the Notice regardless of their participation.

When you successfully defeat a Boss, the "Portal to the next Zone" will appear where the Boss disappears, and the Boss Defeat Notice will be sent out to all Guild members. You will be able to proceed to the next zone by using the portal. However, since you will not be able to come back to the current zone, please make sure you finish everything that you planned to do in the current zone before you proceed to the next one. Try clearing the Boss quickly and leave a record on the Ranking Board!
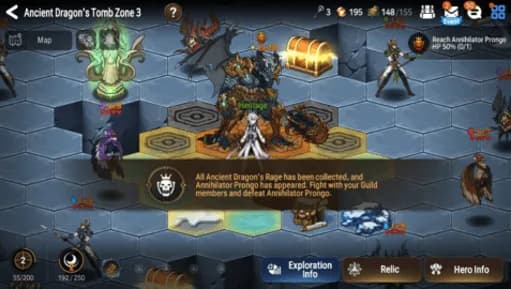
Final Zone Clear When you defeat the Boss in the final zone, a stronger Boss will appear at the same location. Join forces with other Guild members and challenge the Boss' final level!
Reward
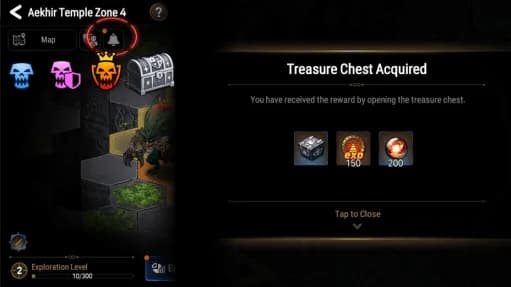
Acquiring Each Reward General objects and Normal Monster Defeat Rewards will be distributed immediately after their respective interactions. Participation Rewards for cooperative content will be given immediately after the battle, but Clear Rewards can be claimed only through the Notice after clearing the content. On the Reward Notice, you can claim both Elite/Warden Clear Rewards and Boss Clear Rewards for battles that you participated in, as well as Guild Treasure Chest Rewards for every Guild member.
Event/Reward Notice
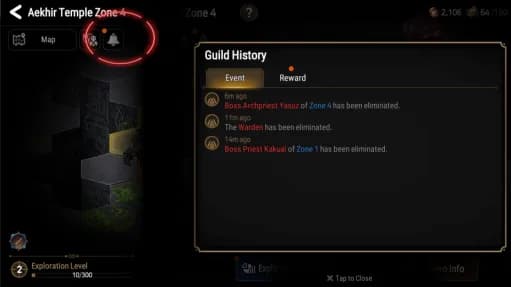
Event Notice This is a place that records all of the events. Information such as Elite Monster and Warden Defeat Notices, Boss Encounter/Defeat Notices, and Guild Treasure Chest Rewards will be listed in chronological order.

Acquiring Notice Rewards This is the place where you can claim cooperative monster battle rewards and Guild Treasure Chests. Battles against Elite Monsters and Wardens that you have participated in will be displayed here, and you can check damage contribution rankings with the magnifying glass button. Once monsters are defeated, they will disappear from the list after you receive the rewards. Boss Monster rewards are displayed regardless of participation and can be claimed upon defeat.
Status

Guild Log This is a log where you can check some loose information of Guild members who are playing the content. You can see their Exploration Level, the Class Levels of two of their most-used classes, and their remaining Exploration Provisions. This will allow for easier cooperation and planning since you will have better insight to strategize based on the remaining stronger members of the Guild and the Guild's overall remaining Exploration Provisions.
Ranking Board

Ranking Board Rewards The Ranking Board is content mainly regarding honor and will display the top 10 Guilds and their clear times for each zone's Boss based on the season's starting time. The name and emblem of ranking Guilds and the first to clear the zone will be displayed on the Ranking Board for the whole season. Once a Guild is registered on the Ranking Board, every player can check the board and claim the rewards. Try clearing each zone quickly with your Guild members and record your Guild on the Ranking Board for glory!
Dimensional Exploration
10Dimensional Exploration
Summary In Dimensional Exploration "Journey of the Stars," you must explore unknown dimensions with Renoa and her companions, gathering resources needed to repair the Bridge. Through various battles and events, collect Loot and increase the exploration party's power to overcome the threats that hinder your exploration.
Bridge Hub
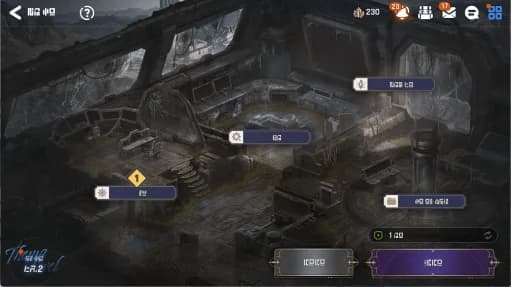
Composition The Bridge Hub is a base that can be developed through Dimensional Exploration. It consists of the Bridge, Research, Dimensional Core Resonance, and the Exploration Records Archive.
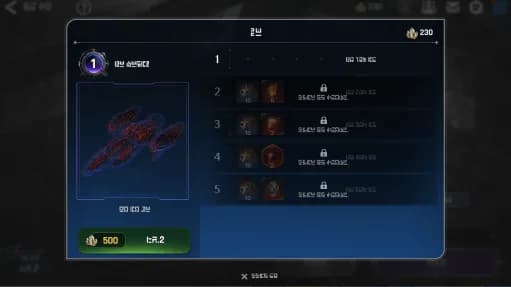
Bridge (SS Oath Astra) You can increase the Bridge Level using Astral Energy acquired from Exploration. Upon leveling up, you will earn rewards and new areas of the Research Lab will be unlocked.
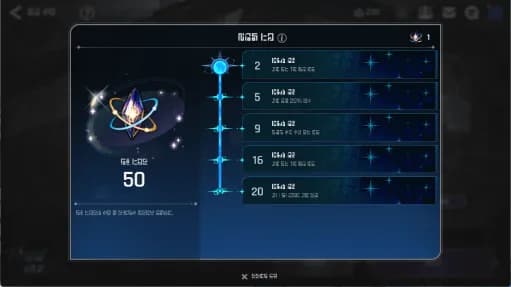
Dimensional Core Resonance Like Research, Dimensional Core Resonance is a permanently applied effect. During Exploration, you can acquire "Core Resonance Energy" through "Future Investment" section in the Shop. Every time you obtain Core Resonance Energy, your Accumulated Resonance increases. When Accumulated Resonance reaches a certain level, the effects of the next stage are activated and will be applied to the Shops you enter thereafter. Even if you use Core Resonance Energy through "Withdraw Investment," your Accumulated Resonance will not decrease.
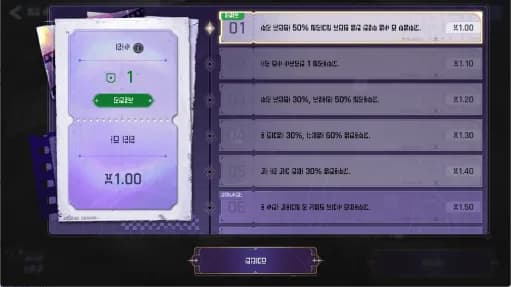
Choose Difficulty Select the difficulty to start your Exploration. The higher the difficulty, the stronger the monsters and the higher the score multiplier you will earn. When you select a difficulty, the effects of the previous difficulties are also applied. Each difficulty level is unlocked by clearing the previous one, and you cannot change it while an Exploration is in progress.
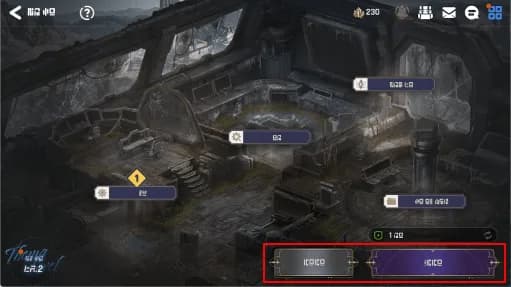
Progress and Give Up When you are not in combat, you can temporarily exit the Exploration. Your progress will be saved, and you can resume by tapping Continue. If you tap Give Up, you will end the current Exploration and can start a new one.
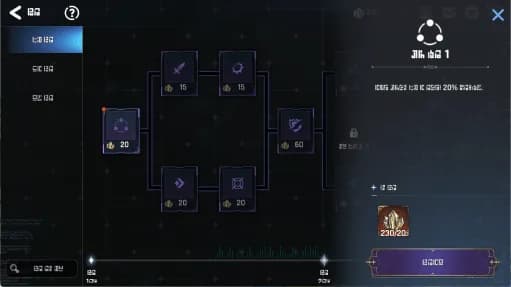
Research By using Astral Energy, you can obtain permanent growth effects. Research is structured like a tree, meaning you must complete earlier stages before proceeding to the next. You cannot conduct Research during Exploration. Research areas are sequentially unlocked by increasing the Bridge Level.
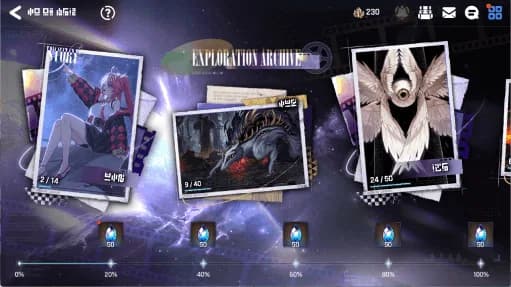
Exploration Records Archive These are Exploration Records consisting of four categories: Story, Monster, Event, and Loot. Each category is unlocked when encountered or acquired during Exploration, and you can receive rewards based on your unlock progress.
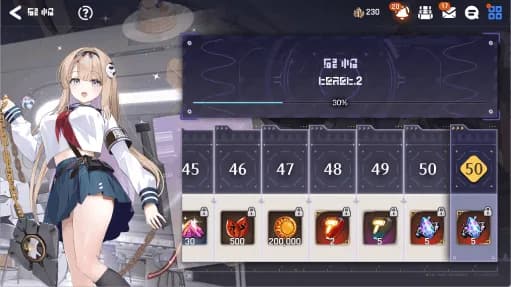
Theme Level Every time you complete an Exploration, you will earn Theme Level EXP. You can receive rewards each time your Theme Level increases.
Expedition Preparation
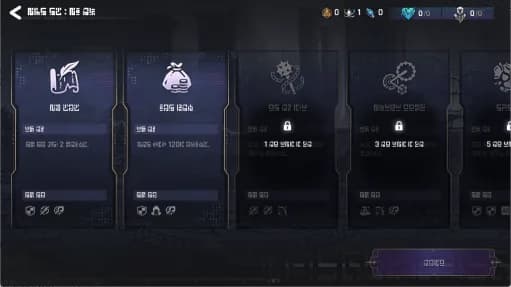
Expedition Supply When starting an Exploration, you select the "Expedition Supply," which is an effect that will be applied to the current Exploration. Each Expedition Supply offers different Hero Classes for recruitment and different effects. Some are unlocked only by clearing specific difficulties.
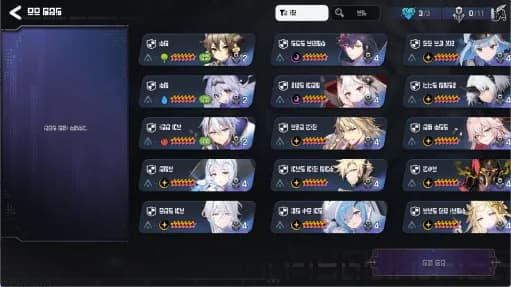
Recruit Hero You can recruit your own Heroes or Support Heroes as members of your exploration party. Only Level 60 Heroes will be available as recruitment candidates from your own roster. Recruitment is only possible within the Recruitment Cap, and the Recruitment Cap required for each Hero varies depending on their Starting Grade and Element. If a recruited Hero leaves the exploration party, the Recruitment Cap they were using will be freed up for use again. There are three types of Recruitment Tickets: Random Class, Class, and All-Class. You can recruit Heroes corresponding to each ticket type. As you progress through Exploration, you will have various opportunities to recruit Heroes, and you can increase the Recruitment Cap by raising your Exploration Level.
Exploration Info
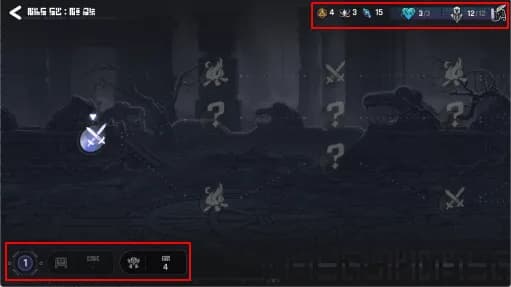
Summary You can check information about the currently ongoing Exploration.
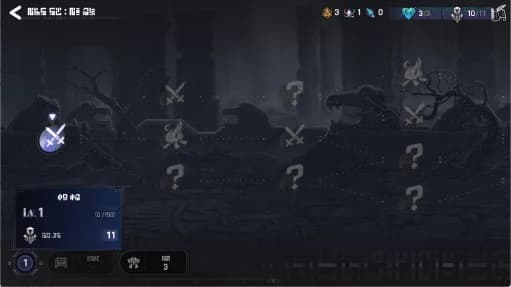
Exploration Level The Exploration Level is the level applied to the current Exploration and is reset when the Exploration ends. You can level up by acquiring Exploration EXP from battles, events, and more. As your Exploration Level increases, the Recruitment Cap also increases, allowing you to recruit more Heroes.
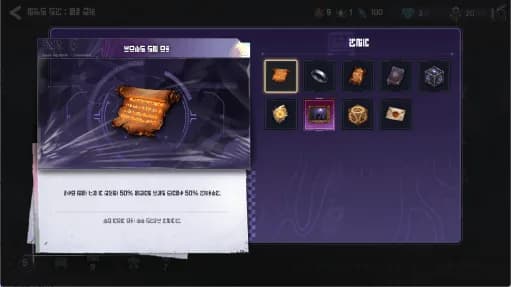
Loot Loot are items that apply their effects when in your possession. They can be acquired through various ways during Exploration and are divided into Normal Loot and Boss Loot. Effects granted by Loot ignore Effect Resistance.
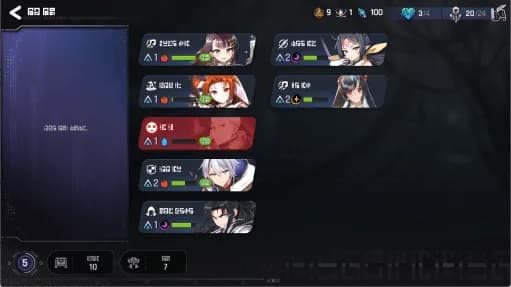
Hero You can check the list and status of Heroes recruited to your exploration party. Defeated Heroes can also be seen here. Heroes' Attack, Defense, Health, and Speed increase through Rank Up. These increased stats are only applied during the current Exploration. You can Rank Up Heroes as a reward from certain events, or by selecting the option at a Rest Node.
Dimensional Dice Upon winning a battle and acquiring Loot, 3 random Loot items will appear. You can spend Dimensional Dice to swap each Loot item for a different random one. Dimensional Dice can be obtained through various ways while exploring.
Core Resonance Energy You can check your currently possessed Core Resonance Energy. You acquire it through "Future Investment" in the Shop, and use it via "Withdraw Investment". It does not disappear when Exploration ends and can be used in your next Exploration.
Dimensional Fragment Currency that can be used during Exploration. It immediately disappears when Exploration ends. Dimensional Fragments can be acquired through various ways as you progress through Exploration.
Vitals This is the Health shared by the exploration party. It decreases by the number of allies defeated in battle. Even if a Hero is revived, the Vitals already deducted will not be recovered. If Vitals reach 0, the Exploration immediately fails. Vitals cannot exceed the maximum limit.
Node
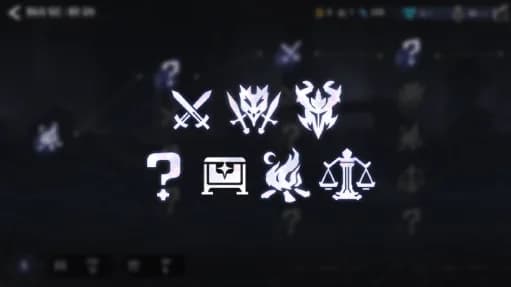
Summary The Exploration map consists of Battle, Event, Supply, Rest, and Shop Nodes. When you select a Node, you can preview information such as the appearing monsters or available rewards.
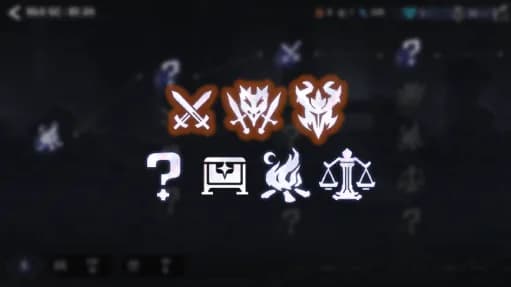
Battle Battles are divided into Normal Battles, Elite Battles, and Boss Battles. You can acquire Exploration EXP and Dimensional Fragments through Normal Battles. You can acquire Exploration EXP, Dimensional Fragments, and Loot through Elite Battles. You can acquire Boss Loot through Boss Battles.
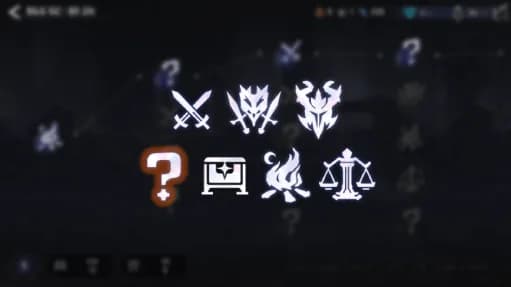
Event Node This is a Node where you encounter various events during Exploration. Depending on your choices, you may receive rewards or face danger, and battles may also occur. Consider the status of your exploration party when making your choice.
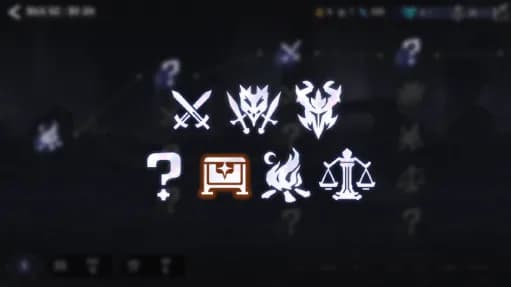
Supply Node This is a Node where you can choose to acquire either a Hero Recruitment Ticket or Loot.
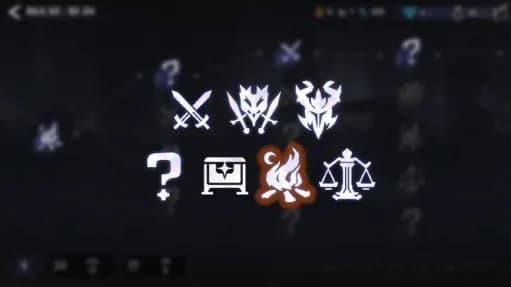
Rest Node This is a Node where you can proceed by choosing what you need from options such as Hero Revival, HP Recovery, Restore Vitals, or Rank Up.
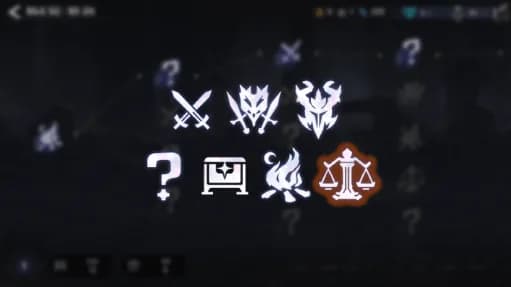
Shop Here you can spend Dimensional Fragments to recruit Heroes, purchase Loot, or recover Vitals. Item prices may rise or fall depending on Dimensional Core Resonance effects, difficulty, or the Loot you possess.
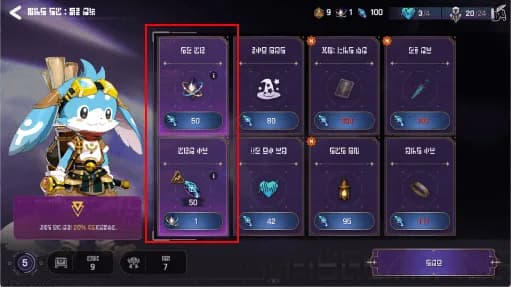
Future Investment During Exploration, you can acquire Core Resonance Energy with Dimensional Fragments at a Shop Node. Your Accumulated Resonance will increase by the amount acquired, allowing you to unlock the next stage of Dimensional Core Resonance.
Withdraw Investment Conversely, you can use Core Resonance Energy to regain Dimensional Fragments. The more times you withdraw, the more Core Resonance Energy will be required for the next withdrawal. Using Core Resonance Energy for withdrawal does not decrease your Accumulated Resonance.
Ready
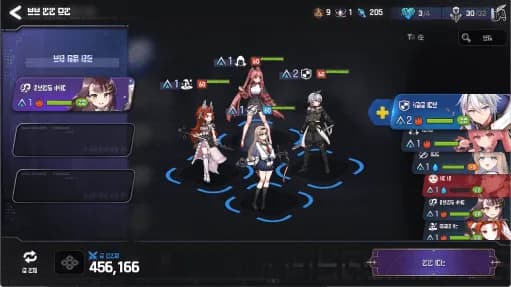
Summary Assign up to 4 Heroes for battle, and up to 3 Tag Heroes who can be swapped in during combat. You cannot start a battle if no Heroes are assigned.
Tag System

Summary Up to 3 Tag Heroes assigned during the Battle Preparation phase can be swapped in during combat. The Tag button is always visible and must be tapped manually to swap. When Tagging Out, all debuffs and buffs are dispelled, but the Hero's other status remains unchanged.
Tag Cooldown Tagging has a cooldown, and the 3 Tag slots share this cooldown. Every time an ally's turn begins, the Tag cooldown decreases by 1 turn.
Element Gauge
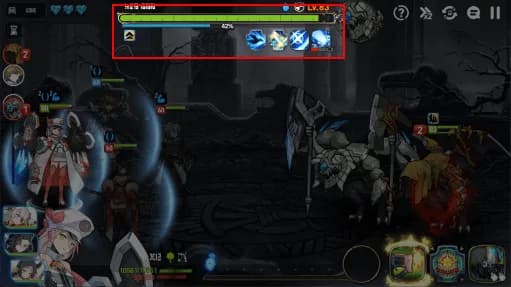
Enemies encountered during Exploration have an Element Gauge. Enemies with remaining Element Gauge are granted damage reduction for all types of attacks. Elite and Boss monsters have an Element Gauge twice as large as that of normal monsters.
Decrease Element Gauge Attacking an enemy can decrease their Element Gauge, and attacking with an elemental advantage will decrease it by a greater amount. When the Element Gauge reaches 0, the damage reduction effect against all types of attacks is dispelled, dealing additional damage proportional to the enemy's max Health, before their Combat Readiness is reset to 0.
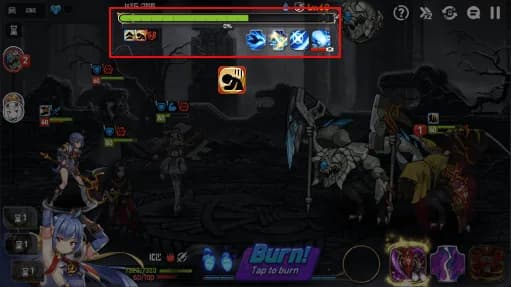
Vulnerable When the Element Gauge reaches 0, the enemy is inflicted with vulnerable (unique effect). Enemies inflicted with vulnerable suffer increased damage when attacked and cannot receive Combat Readiness increase effects. At the start of a vulnerable enemy's turn, the vulnerable state is dispelled and their Element Gauge is reset to maximum.
Battle Results
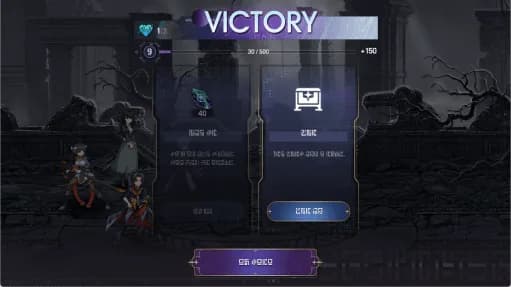
Victory and Defeat When you win a battle, you acquire the rewards provided by the stage. If you lose a battle, the Dimensional Exploration will result in failure and end.
Hero HP The remaining HP percentage of Heroes who participated in the battle will carry over to the next battle. Defeated Heroes cannot be assigned to battles until they are revived.
End Exploration and Calculate
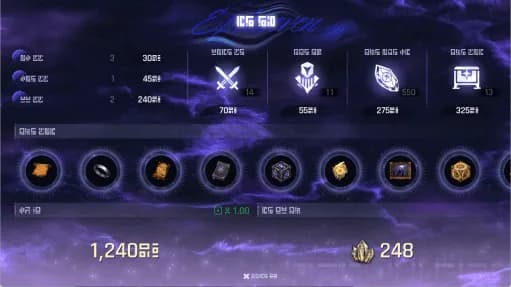
End Exploration The Exploration ends if your Vitals reach 0 or if you lose a battle. (Exploration Failure) The Exploration also ends when you achieve victory in the final Boss battle. (Exploration Success)
Calculation Method When Exploration ends, calculation is performed based on your progress. Calculation score is calculated based on the number of cleared battles and nodes and acquired resources, and a multiplier is applied depending on the difficulty. You earn Theme Level EXP with this score.
Expedition
Expedition
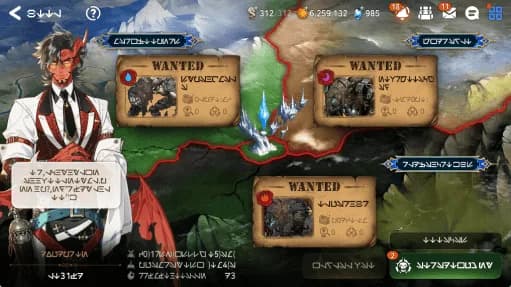
Summary In Expedition, you get to work together with other Heirs to defeat a boss monster. Expeditions are unlocked when clearing Hunt on Normal difficulty. Fight together with other Heirs, defeat the boss, and collect your rewards!
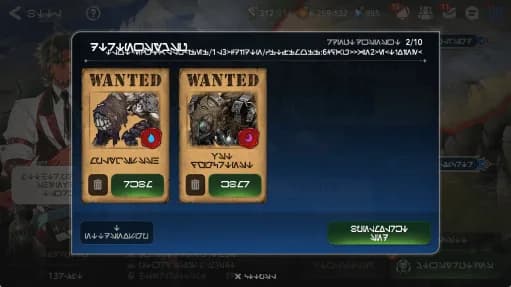
Wanted Posters In order to start an Expedition, you will need a Wanted Poster. You have a certain chance of finding a Wanted Poster when clearing Hunt on Normal or above. There are three types of Wanted Posters, and when you find one, it will be of a random type. Acquired Wanted Posters can be found in My Wanted Posters, where you can select one to start an Expedition.
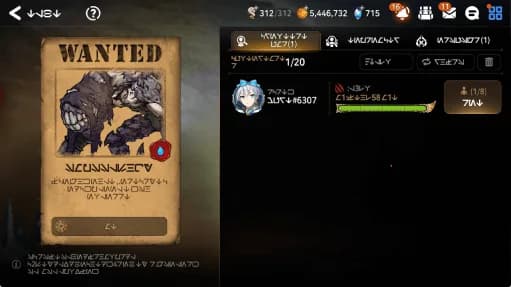
Private Recruitment Private Recruitment shows a list of Expeditions created by your friends and Guild members. Up to 8 players may join an Expedition. From the list, you can see an Expedition's level, remaining time, and the number of players participating in the Expedition before you join.
Open Recruitment Open Recruitment shows a list of Expeditions registered as Open Recruitment. Up to 5 Expeditions for each level will be displayed on the list, and if you cannot find ones that you want to participate in, you will be able to see new ones by tapping the "Refresh" button. However, you will not be able see those where you have not met the requirements yet. [Host/Participant Requirements] Level 1: Achieve at least 50,000 damage dealt in a single entry on Level 1 for the Expedition you want to join. Level 2: Achieve at least 150,000 damage dealt in a single entry on Level 2 for the Expedition you want to join. Level 3: Achieve at least 350,000 damage dealt in a single entry on Level 3 for the Expedition you want to join.
In Progress In Progress shows the list of Expeditions you've joined. You are able to see a boss's remaining Health, the Expedition's remaining time, the amount of Bonus Points you are to receive, and the outcome of any successful or failed Expeditions. Tapping on the Results button on a successful or failed Expedition will reveal the list of participants and rank of damage dealt before receiving rewards. Regardless of whether an Expedition was a success or failure, it will stay on the list for 24 hours, and its rewards will be automatically redeemed when entering the Expedition menu after its expiration.
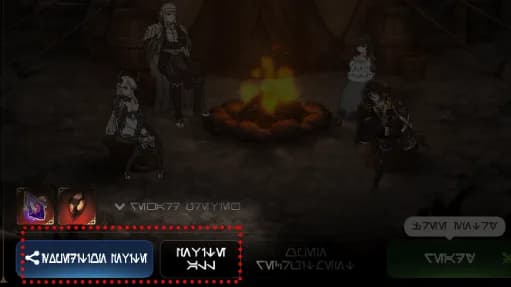
Invite With the "Expedition Invite" button, you can select friends and Guild members to join your Expedition, and with the "Invite All" button, you can invite all your friends and Guild members at once.
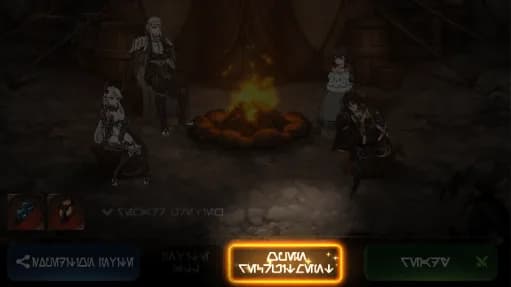
Host Open Recruitment Open Recruitment allows all Heirs, including friends and Guild members, to join the Expedition. You can only use this function after you clear a battle at least once, and have met the qualifications for hosting/participating in Open Recruitment. [Host/Participant Requirements] Level 1: Achieve at least 50,000 damage dealt in a single entry on Level 1 for the Expedition you want to recruit. Level 2: Achieve at least 150,000 damage dealt in a single entry on Level 2 for the Expedition you want to recruit. Level 3: Achieve at least 350,000 damage dealt in a single entry on Level 3 for the Expedition you want to recruit.
Brawl
2Brawl
Summary Brawl is a round-based automatic battle PVE content where players can deploy Heroes on a team to defeat enemies and win. You can summon and deploy Heroes using Brawl Coins, a type of currency you can acquire from the Brawl. Referring to each Hero's element and affiliations, you can create Synergies, which will allow you to form a stronger team. Use it wisely to win and earn various Reputation rewards.
Difficulty There are two different levels of difficulty in the Brawl: Normal and Challenge. You'll begin with Normal difficulty, and upon becoming the Champion once, you'll unlock the more demanding Challenge difficulty.
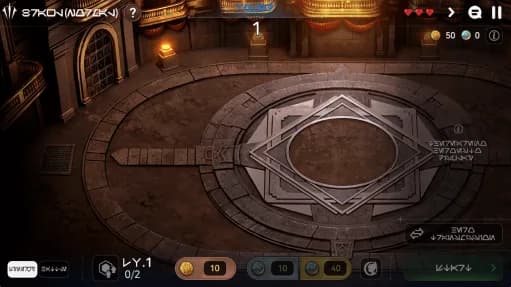
Ultimate Objective In the Brawl, you will encounter a total of 25 rounds of enemies. Form a strong team by fulfilling Synergies between Heroes, and once you defeat all enemies on the last 25th round, you'll be the Champion. When the Brawl is over, make sure to check the Reputation. Complete various achievements and receive handsome rewards.
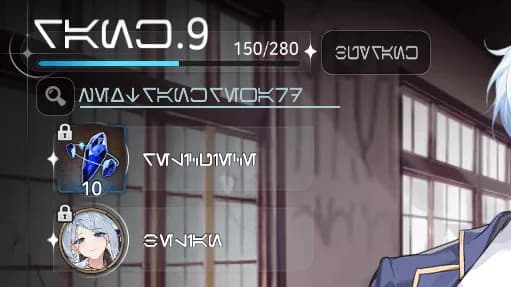
Rank Up Your Brawl rank increases through repeated play, with EXP awarded after each battle. The higher the difficulty level and the further you progress, the more EXP you'll earn. If you wish to acquire the rank rewards faster, you may purchase rank levels with Skystone.
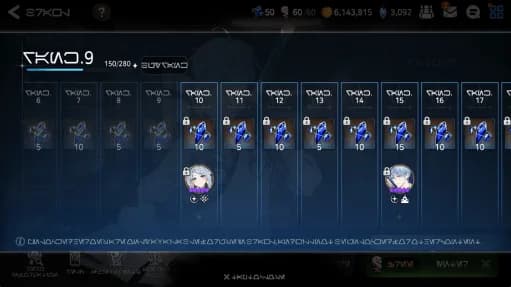
Rank Reward Brawl offers two types of rank rewards in the Brawl. 1. Relic Piece: Acquired with each rank up. You can use it to upgrade Relics, which grant you various advantageous effects during Brawl battles. 2. Hero Unlocks: When you reach a certain Rank, a new Hero will be unlocked and available to participate in the Brawl.
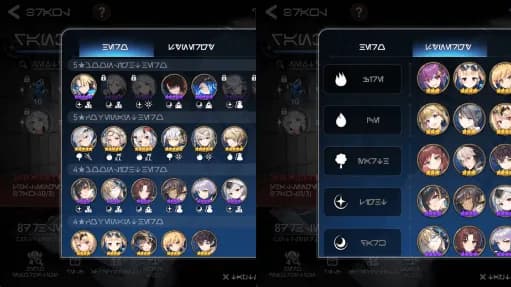
Hero Information Before you proceed with any battles, you can check the information of Heroes that will appear in advance. In the Hero tab, you can preview the available Heroes for each grade, and in the Synergy tab, you can check the list of Heroes in each element and affiliation. Tap the Hero's icon to view more details. Some Heroes are unlocked as your Brawl Rank increases, and they appear from the moment they're unlocked.
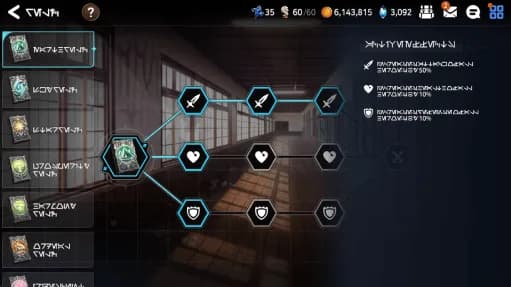
Relic Relics provide advantageous effects in the Brawl. You can upgrade them using Relic Pieces acquired as Rank Rewards. You must enhance all connected effects in the previous grade before advancing to the next grade. Choose your enhancement order carefully to devise your own winning strategy!
Brawl Participation
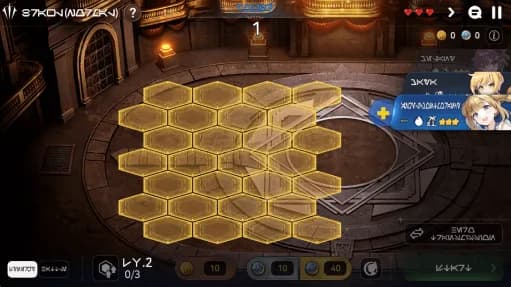
Deployment Stage After entering the Brawl, during the deployment stage, you can summon and deploy Heroes, and form a team to participate in battles. Try to make the best team with good Synergy effects using the summoned Heroes and join the battle.
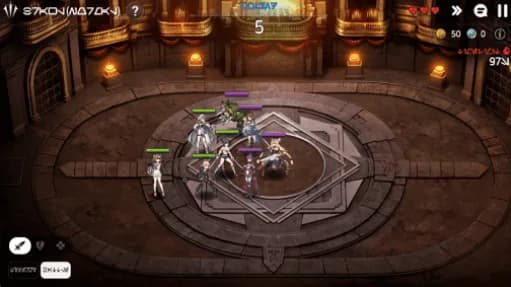
Battle Stage When the battle begins, your team will battle with the designated team of the current round. Every process of the battle including attacks and skill usage will be done automatically without any manual operation. Make sure to check the team formation and see which Heroes performed best to come up with a winning strategy for the next battle.
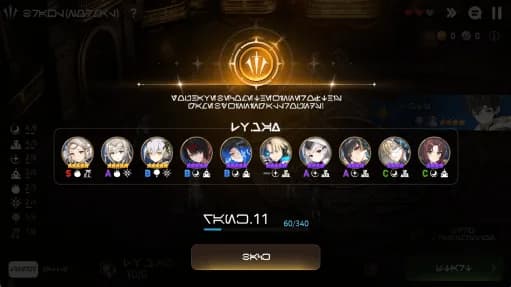
Quit Game The game ends either when you win every round, or when you are defeated after losing all 3 lives. Reputation information will be refreshed according to the round and the state of the team when the battle ends. If your latest game achieved the best score, the information will be displayed in the main page of the Brawl.
Hero Summon You can proceed with three different types of summon here, from left to right: Normal Summon, Lesser Connection Summon, Greater Connection Summon. Normal Summon - Requires Brawl Coins. Your chances of summoning higher-grade Heroes increase as your Brawl level rises. Connection Summons - Requires Connection Tokens acquired through Hero Transmission. You can summon 4★ Heroes from Lesser Connection Summon and 5★ Heroes from Greater Connection Summon.
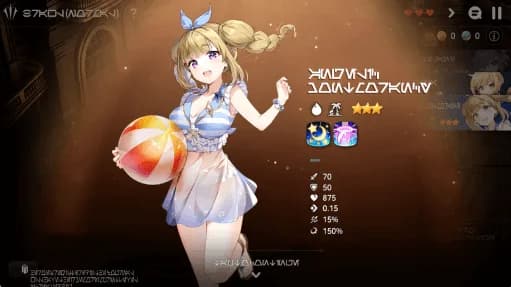
Summoned Hero After you check the information on the Hero you summoned, the Hero will be automatically sent to the Waiting Room. When you summon a Hero already registered in the Journal, they will be summoned while being Memory Imprinted once. When you summon duplicate Heroes who are already on the battlefield or in the Waiting Room, they will be Memory Imprinted automatically, increasing their stats. Some Heroes unlock skills after reaching specific Memory Imprint levels. When the Hero has already reached SSS grade, the Hero who has just been summoned will be automatically transmitted.
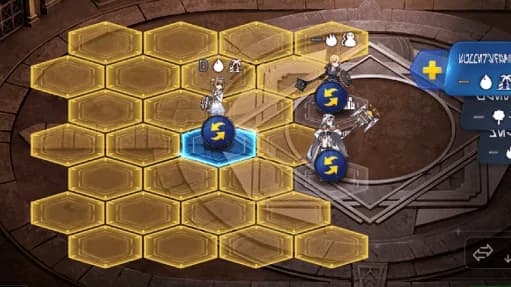
Hero Deployment By tapping the Hero Deployment button, you can assign summoned Heroes to the battlefield. Check the Hero's information and strategically arrange them to have the most efficient battles. You can select deployed Heroes to move them to different positions, send them to the Hero Waiting Room, or review their information again. Optimize Hero placement to enjoy strategic battles.
Brawl Level If you've reached the deployment limit but want to add more Heroes to your team, you can expand the limit by levelling up. You can increase your level up to Lv. 9 using Brawl Coins, starting with two deployable Heroes and reaching up to ten at Lv. 9. As your Brawl level increases, your chances of summoning higher-grade Heroes in Normal Summon also improve. Leverage this system strategically to build a stronger team and gain the upper hand in battles.
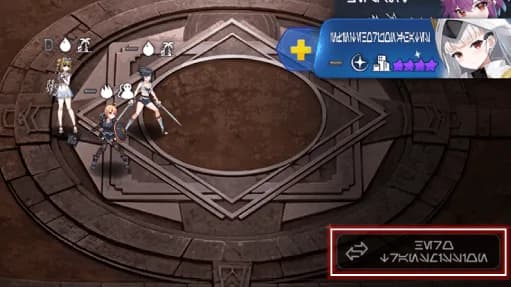
Hero Transmission If your team does not require a certain Hero or if you need to organize the Waiting Room, you can transmit them by tapping the button at the bottom of the Waiting Room. Depending on the Hero's grade and Memory Imprint level, the number of Brawl Coins and Connection Tokens you gain upon Hero Transmission may vary. Use this function to efficiently manage resources and optimally organize the Heroes you need in battles.
Synergy Information The Synergy information displayed in the lower left corner shows the Synergy effects of the deployed Heroes. Activated Synergies have special effects in battles. Tap the Synergy icon to see how the Synergy works and what Heroes are needed to fulfill a certain Synergy even during battles. Using Synergies, you can optimize Hero placement and strategy to increase your chances of becoming the Champion.
Battle Info The battle information at the bottom left shows each Hero's performance numerically. This information varies depending on what stage you are in. If you check the information during the deployment stage, it displays information from the previous battle. If you check the information during the battle stage, it displays information from the current battle. The displayed information includes: 1. Damage dealt: Total damage each Hero has inflicted on enemies 2. Damage received: Total damage each Hero has taken from enemies 3. Recovery/barrier granted: Total amount of recovery and barriers each Hero has provided to allies.
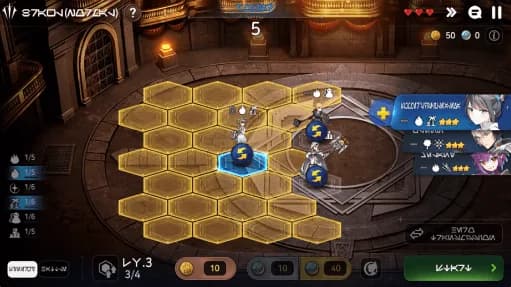
Auto-Battle When you enter the battle stage, the deployed Heroes automatically battle against the enemies of each round. No manual operations are needed, but you can analyze Hero performance according to the deployment, the skill combination between Heroes, and the battle information. At this stage, you can strategically prepare for the next battle while keeping an eye on the current battle.
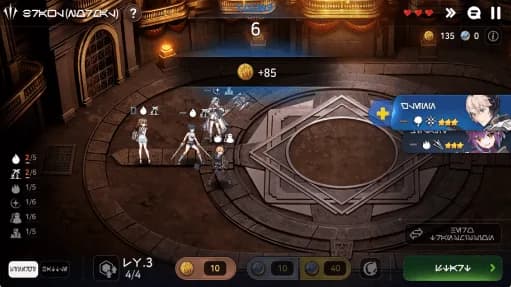
Victory and Defeat For each round you win, you can acquire Brawl Coins as a victory reward. There is a fixed number of Coins as a base reward for winning, and if you lose the round, you will earn half the victory reward, lose one life, and have the opportunity to challenge the round again. Win more battles and gain as many rewards as possible! Once a battle is lost and remaining Life reaches 0, the game will end.
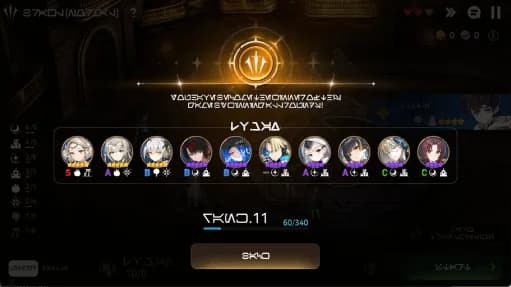
Results After finishing all the battles, you will be able to see the results depending on the round. If you have cleared the 25th round, it means that you're the Champion! If your latest game achieved the best score, the information will be updated in the main page of the Brawl.
Sanctuary and pets
5Sanctuary
Summary The Sanctuary is home to the Heart of Orbis, a god who was brought back to life as the world of Orbis by Goddess Diche. Its power represents the power of Orbis. You must clear the following stages in order to unlock Main Buildings in the Sanctuary. Forest of Souls: Clear Episode 1, Chapter 1, World of Chaos Heart of Orbis: Clear Episode 1, Chapter 4, Love, Remembrance, Eternity Alchemist's Steeple: Clear Episode 1, Chapter 5, A Wish to Protect the World
Heart of Orbis
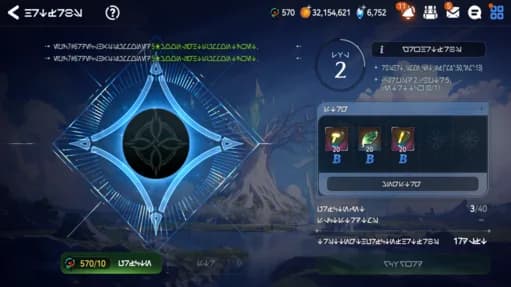
Summary The Heart of Orbis is a place where you can purify Tainted Relics and obtain rewards. Tainted Relics are distributed every Monday and on the 1st of each month, and can be purified to enhance the rewards. Tainted Relics are removed at the server reset on the 1st of each month.
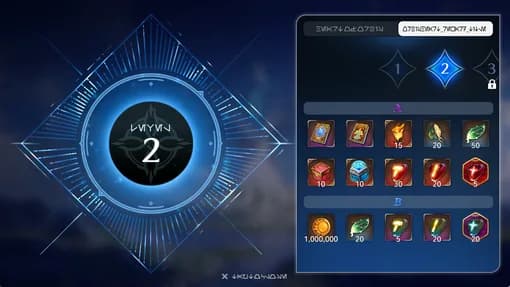
Level By purifying Tainted Relics, you can raise the level of the Purified Sanctuary's Boon. As the level increases, the rewards you receive will improve. If your EXP is full but you haven't leveled up, further Purification will not grant Purification EXP.
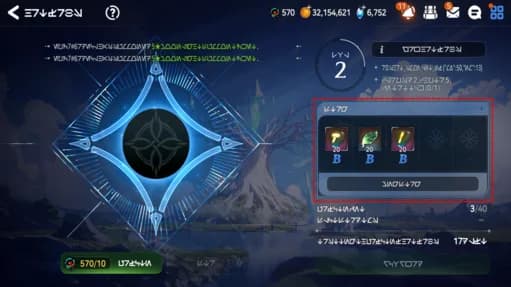
Store You can purify Tainted Relics and store the rewards. You can store up to 5 rewards in the storage and clear it by using the Manage Storage feature.
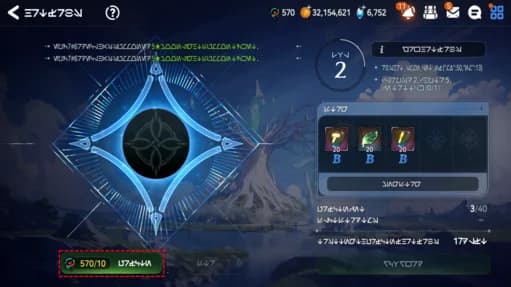
Purification By purifying Tainted Relics, you can select one reward from a variety of rewards.
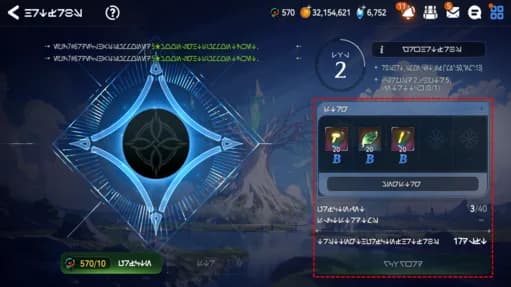
Receive Reward Purified Rewards can only be claimed if they are stored in the storage and you have completed the required number of Purifications. You may claim one Purified Reward per month. This limit resets on the 1st of each month at the server reset. After claiming the reward, Tainted Relics scheduled to be acquired this month will be immediately paid as Heart of Orbis EXP.
Forest of Souls
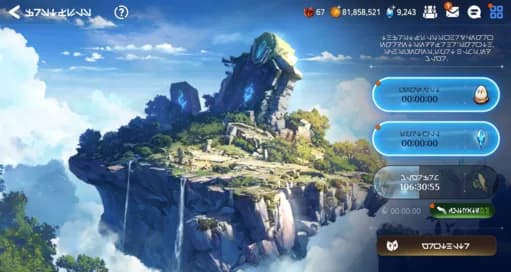
Summary The Forest of Souls is where you can grow ingredients needed for a Hero's growth, such as Penguins, Spirit Blooms, and MolaGora. Materials obtained from the Forest of Souls can be used to nurture your Heroes and make them stronger.
Penguin Nest The Penguin Nest is where you can obtain Penguins. Penguins provide extra EXP when used as an Enhancement ingredient. When they are fully grown, you will acquire 3 Penguins from the Penguin Nest.
Spirit Well The Spirit Well is where you can obtain Spirit Blooms. Spirit Blooms are used as materials for Hero Promotion. When they are fully grown, you will acquire 3 Lesser Spirit Blooms from the Spirit Well.
MolaGora Farm The MolaGora Farm is where you can obtain MolaGora. MolaGora is a material used for Skill Enhancement. When it is fully grown, you will acquire 1 MolaGora from the MolaGora Farm. You can obtain 1 MolaGora every 7 days and can cultivate them 3 times over the 7 day period, which will speed up the growth. If you harvest MolaGora earlier than the 7th day, the farm will enter into a resting phase, and you will be able to nurture the next MolaGora after the resting phase is over.
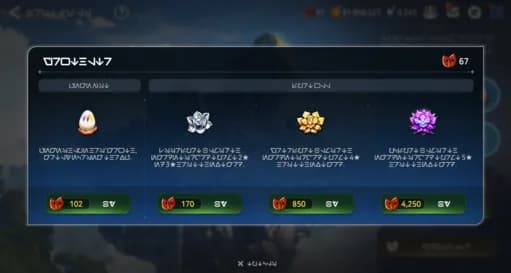
Growth Altar The Growth Altar is where you can obtain desired materials by using Stigma. You can obtain Penguins and Spirit Blooms from the Growth Altar.
Alchemist's Steeple
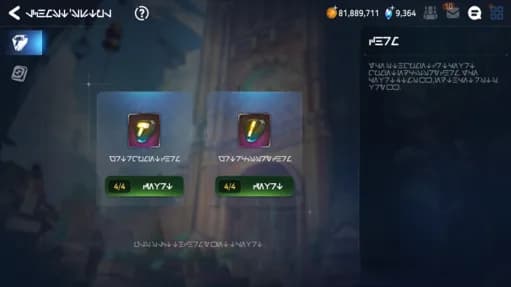
Summary You can craft various items in the Alchemist's Steeple using Gold and specific ingredients. Some items may only be crafted a limited number of times.
Pet
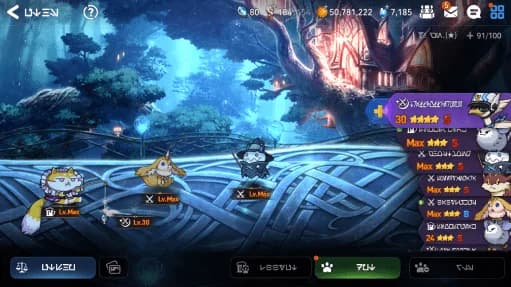
Summary Pets have various abilities that will help you in your adventures around Orbis, and can be divided into Lobby type and Battle type. You can receive help from your Pets by assigning them to the places their skills will help you the most. Each Pet comes with their own different appearance and abilities, and you can choose between these to create your own perfect Pet. You can Adopt them at the Pet House from Mina, and if you're lucky you might even meet a "Special Form" with a unique appearance.
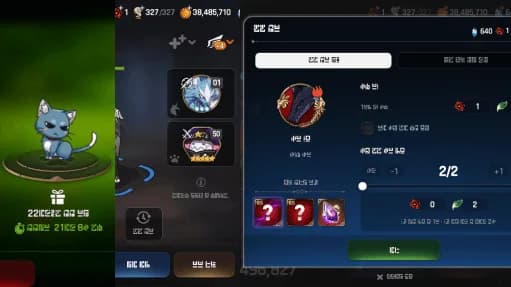
Type Pets can be divided into Lobby Pets and Battle Pets. Lobby Pets will regularly give you random gifts and offer you benefits for non-battle content such as Enhancing Heroes or Equipment. Battle Pets, on the other hand, allow you to do Background Battling and grant you additional rewards in battle-related content. One Lobby Pet can be placed in the lobby and one Battle Pet can be assigned per team.
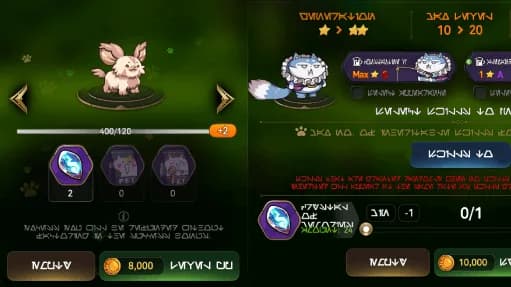
Generation The Generation of any Pet can be increased through Synthesizing. A Pet's max Affinity and the number of skills they can possess increases in accordance with their Generation. Therefore, the higher a Pet's Generation, the more skills it can possess. A Pet's appearance also changes upon reaching Generations 3 and 5 respectively.
Enhance To proceed with Pet Synthesis, you must first level your Pet to its max level, which can be done by feeding Crystals of Memories or Pet Food via the Level Up menu. While Leveling, you will have a low chance to activate a Good Success or Great Success, allowing your Pet to receive greater EXP, and any excess EXP will be refunded as Normal Food. You may use the Auto Select function to quickly select the required materials to Level Up.
Synthesize Synthesize is used to acquire a Pet of a higher Generation. This function is available when you have two Pets of the same Type and Generation, and at least one is at max level. You may select a designated number of skills and the appearance that you would like the new Pet to acquire from the existing skills and appearance of the Pets you use to Synthesize, thus granting you a specific chance to acquire a Pet of a higher Generation. The Level and Affinity of the new Pet will follow that of the previous Pet that had the higher value, and the chosen appearance and skills will be inherited even if the Generation does not increase. When Synthesizing, if you do not choose an appearance to inherit, the appearance will be determined randomly among the two Pets at a 50% chance, respectively. Before Synthesizing, you can add Crystals of Memories as extra ingredients to increase the chance of acquiring a higher Generation Pet.
Affinity Pets have a friendship meter called Affinity. Playing with your Pets will improve your relationship with them, increasing their Affinity. Max Affinity increases according to a Pet's Generation, and higher Affinity will enhance the efficiency of their skills. If you have a favorite Pet, play with it using Stigma to increase its Affinity. You can play with your Pet using Stigma once per day or a Toy.
Skill Summary Pets can learn various skills on top of their basic abilities of gift-giving, Background Battling, or interacting with objects. Skills are granted randomly when adopting or Synthesizing and are given a rank from D to S. The effectiveness of a skill will be decided depending on this rank; therefore, it's crucial to have skills of higher rank. Different skills have different chances of being granted.
Lobby Lobby Pets can have six different types of non-battle skills: - Increased Hero Level Up EXP - Increased Equipment Enhance EXP - Decreased Equipment Enhance cost - Increased Gold earned from selling Equipment - Increased Equipment Enhance Good Success chance - Increased Equipment Enhance Great Success chance
Battle Battle Pets have skills that can enhance the rewards earned from battle. There are 19 different types of battle skills: - Increased Event Currency earned (Side Story) - Increased chance to receive double AP - Increased chance to receive 1 additional Rare Catalyst (Episode/Side Story) - Increased chance to receive 3 additional Common Runes (Spirit Altar Easy difficulty and above) - Increased chance to receive 2 additional Greater Runes (Spirit Altar Normal difficulty and above) - Increased chance to receive 1 additional Epic Rune (Spirit Altar Hard difficulty and above) - Increased chance to receive double Crafting Materials (Hunt) - Increased chance to receive 1 additional piece of Equipment (Hunt/Otherworldly Hunt/Otherworld Breach) - Increased chance to receive 1 additional Lesser Charm (Hunt/Otherworldly Hunt/Otherworld Breach) - Increased chance to receive additional Reforging Materials (Hunt/Otherworldly Hunt/Otherworld Breach) - Increased chance to receive 1 additional piece of Equipment upon defeating the Boss (Rift) - Increased chance to receive 1 additional Lesser Charm upon defeating the Boss (Rift) - Increased chance to receive additional Reforging Materials upon defeating the Boss (Rift) - Increased chance to receive double Rift Energy and Season Score upon defeating the Boss (Rift) - Increased chance to receive 1 additional Greater Charm upon defeating the Boss (Trial of Constellations) - Increased chance to receive 1 additional piece of Equipment upon defeating the Boss (Trial of Constellations) - Increased chance to receive additional Starfall Coins upon defeating the Boss (Trial of Constellations) - Increased damage dealt by allied Heroes (Trial of Constellations Nightmare and below) - Increased damage dealt by allied Heroes (Trial of Constellations Perdition)
House Management You can raise adopted Pets in the Pet House. Up to six Pets can be assigned to the house at one time, and housed Pets can by viewed by other users via the User Info window. The background image of the house can be changed using the same background packs as Heroes.
Quick Menu You can access the Quick Menu by tapping a Pet in the Pet House. It's possible not only to view the details of each Pet but also to Synthesize, Enhance, and play with them. Housing Pets that you use often or want to get closer with will help you interact with them more quickly.
Background Battling If you're on the Ready screen with a pet, you can set up Background Battling. While Background Battling, you can enhance Heroes, manage Equipment, or start another battle. Background Battling will continue for the specified number of times even when the game is offline. If you stop Background Battling or calculate results after completion, you can receive rewards based on the results achieved up to that point. Leave your battles to your Battle Pets as you enjoy other Epic Seven content.
Conditions Background Battling can be started from the Ready screen of each content. You must have a Battle Pet equipped and Hero placed in a team. For content you are playing for the first time, you must clear it once with a Pet equipped to measure your playtime. Only one Background Battling can be in progress at a time, and you cannot start a new Background Battling if there is one currently in progress or yet to be calculated. You can check the progress at any time by tapping the Background Battling button again on the Ready screen.
Leif Leif is a currency used to proceed with Background Battling. When starting Background Battling, you can manually select the number of Leif to use. The estimated completion count and progress time are determined based on the selected quantity. The higher the Generation of your equipped Battle Pet, the higher the maximum number of Leif you can use at once (up to 100). Depending on the nature of the content, the usable quantity may be further restricted. For permanent content, you can use up to the maximum quantity based on your Pet's Generation. For content with an entry/battle limit, it will only proceed up to the remaining count, and any currency used beyond the remaining count will be refunded upon calculation. For non-permanent content with an operating time limit, you can only use a quantity that can be completed before the closing time. If you choose to use your available Energy or Spectral Cores together, those currencies will be consumed instead of your Leifs.
Background Battling Calculation Background Battling calculation is the process of confirming the results and claiming rewards. When you tap the Calculate button after completing or stopping Background Battling, rewards equal to the actual completion count will be calculated and sent to your Inventory. Rewards are not given before calculation, and the rewards displayed during the process are estimated information. Only buffs and event effects active at the starting time will be applied, and effects newly started during Background Battling will not be applied. If an active effect expires, it will not apply to the completion counts achieved after the expiration. If you stop Background Battling, you will only receive rewards for the completed counts, and any unused currency will be refunded. For limited-time content, calculating after the content has closed means you will not receive any rewards and all used currencies will be refunded, so it is recommended to calculate before it closes. Equipment rewards are processed according to the Auto-Arrange settings established when starting Background Battling. Equipment subject to arrangement will be converted into sale or extraction rewards.
Reputation and Missions Battles completed via Background Battling are also counted toward Reputation and Missions. However, since the battles are not actively played, conditions that require specific actions during battle will not be counted. Conditions that can be verified simply by the battle results, such as the number of stages cleared, clearing with a Pet, Energy and Spectral Core consumption, and currencies and materials obtained as rewards, will be counted according to the number of completed battles. Conditions that require checking the battle progress, such as clearing without dying, clearing with Heroes of specific elements or classes, defeating monsters, or inflicting status effects, will not be counted. Object acquisition, camping, and acquiring treasure chests will also not be counted. Reputation and Missions will be updated all at once based on the number of completed battles when the results are calculated. Uncalculated Background Battling results will not be counted. Time-limited tasks like Daily Missions are counted based on when they are calculated, so it is recommended to complete the calculation before the time period ends.
Change Appearance Change Appearance allows you to change the appearance of a Pet into another. You can select a Pet's appearance among the ones registered in the Pet Journal and change their appearance by consuming Crystals of Memories.
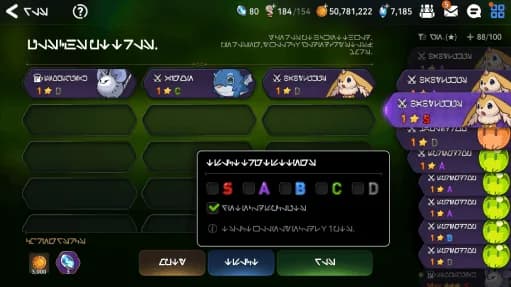
Release You may send your Pets back into the wild via the Release function, and they will leave behind Gold and Crystals of Memories. These Crystals of Memories are required when Changing Appearance, can be used when Leveling Up, and can also be used to increase your chances of success when Synthesizing. You may select up to 30 Pets to release at once and can quickly choose via the Auto Select function. Please note that once Pets are released, this decision cannot be reverted!
Summons and shops
4Summon
Summary In the Summon menu, you can summon Heroes and Artifacts. Different currency is required for each type of summon. Additionally, the Heroes available to be summoned and their drop rates are different for each type of summon, and can be checked by tapping the button at the bottom. You will receive one free Covenant Summon every day. Interrupting the summon animation during 10 Consecutive Summons does not affect the results of the summon.
Buttons You can check detailed information by tapping the following buttons: Summon Info: Shows you the list of available Heroes and Artifacts, as well as important notes for each summon type. (Drop Rate Up Banner Summons and Mystic Summon) Storage: Opens the Storage. Summon Settings: Allows you to configure how duplicate Heroes and Artifacts are transmitted upon summoning.
Summoning Mileage Players will receive one Summoning Mileage Point for every summon completed on a Drop Rate Up banner or Covenant Summon. Players can exchange 20 Summoning Mileage Points for 1 Gold Transmit Stone. Gold Transmit Stones can be exchanged for 5 Galaxy Bookmarks, a 4-5★ Hero Summon Ticket, or special Memory Imprint ingredients. Please note that special Memory Imprint ingredients will only appear in the Shop when you have a Hero who can use that ingredient.
Mystic Summon In Mystic Summon, you can summon specific Heroes and Artifacts, including 2 Moonlight Heroes. You can check the other Heroes and Artifacts that can be summoned by tapping the Summon Info button. 50 Mystic Medals are required for one summon, which can be acquired from Hunt, Guild War, Secret Shop, and by purchasing Mystic Packs.
Guaranteed Summon You can select either a 5★ Moonlight Hero or a 4★ Moonlight Hero from the current summon pool as a Guaranteed Summon target. The Guaranteed Summon count decreases by 1 every time you summon. When the count reaches 0, you will receive the Hero on your next summon. Summoning the Guaranteed Summon Hero will reset the count. In Mystic Summons, the Guaranteed Summon count does not reset when the summon pool changes.
Summon Info If you top on the Summon Info button, you can see a preview of what will be available to summon in the future. Heroes, Artifacts, and Moonlight Heroes all reset on different schedules, so be sure to check back often!
Guaranteed Summon Target Change In Mystic Summon, if the Guaranteed Summon target icon has a change button, you can change the Guaranteed Summon target. - Guaranteed Summon count will not be reset even if you change the Guaranteed Summon target.
Moonlight Summon Moonlight Summon includes Heroes of the rare Dark and Light elements. You cannot summon normal Heroes and Artifacts from Moonlight Summon, and Galaxy Bookmarks are required for summoning here. You can purchase Galaxy Bookmarks with Gold Transmit Stones or obtain them by playing various content.
Upgraded Moonlight Summon Each time you summon a certain number of Moonlight Summons, you will be able to proceed with an Upgraded Moonlight Summon where drop rates for 4★ and 5★ Heroes are increased. The counter will not reset even if you pull a 4★ or 5★ Moonlight Hero before reaching the Upgraded Moonlight Summon, and will only reset when specifically summoning with the Upgraded Moonlight Summon.
Element Summon In Element Summon, you can acquire Heroes of a designated element by using Connections. The summonable Heroes via Element Summons are identical to those of Covenant Summons, and Artifacts will not be summonable. The Element Summon tab will be unlocked when you have acquired one or more Connection currencies or once World Boss content in Guild has been unlocked after reaching Rank 50.
Element Summon In Element Summon, each element consumes its distinct Connections, and you can use Greater Connections to have higher drop rates for 4★ and 5★ Heroes. Connections can be acquired by playing various content, such as World Boss and Guild Missions.
Secret Shop
Summary The Secret Shop sells a variety of items, including Equipment, Heroes, and Bookmarks. The grade and level of items available increases with the Secret Shop level, and the highest Secret Shop level is 13. Increasing the Secret Shop level requires increasing your Account Rank. Once your account meets the rank requirements, you can spend Gold to increase the Secret Shop level. Items for sale are chosen randomly and refresh every hour. If you don't see anything you want, you can spend Skystone to immediately refresh the list.
Reputation
Summary Play a variety of game modes to build your Reputation and gain Lasting Effects. As your Reputation Grade goes up, you can view more stories about each faction and improve your Lasting Effects. Complete achievements to level up your Reputation Grade.
Lasting Effect Lasting Effects are granted according to your Reputation Grades. You can increase these effects by tapping the Increase Effect button. Memory Chain: Increases Battle EXP of Heroes and Equipment enhance EXP Conclave: Increases Friendship Points Reward and Maximum Energy Merchant Union: Increases Battle Gold Earned and Equipment Enhance Good Success chance Phantom CIC: Increases Equipment Enhance Great Success chance and Max Energy
Dagger Sicar You can gain Reputation by taking on special missions requested by Dagger Sicar. Complete difficult missions in a variety of gameplay modes and collect rewards. Missions come in three levels of difficulty, and each difficulty provides corresponding rewards and points rewards. Dagger Sicar Points obtained from completing achievements can be exchanged for even more rewards. Completing Dagger Sicar missions does not count toward your total Reputation points nor provide Lasting Effects.
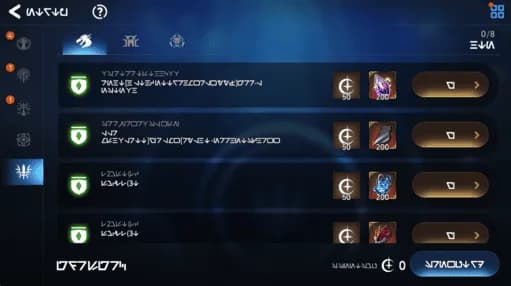
Achievement Difficulty Dagger Sicar achievements come in three levels of difficulty, and each difficulty provides a corresponding number of Mission Points. You can see an achievement's difficulty level by checking its icon.
Milestone of Radiance

Summary In the Milestone of Radiance, you can use Essence of Radiance to sequentially acquire rewards registered at each tier. Rewards include 4 types of chests that grant one of their contents, Heroes, Artifacts, and Coins that can be exchanged in the Shop.

Summary Essence of Radiance can be acquired from all content that consumes Energy, Spectral Cores, or Flags, and can be acquired upon winning in the World Arena. For content that consumes Energy, you can obtain it by consuming Energy in Episode, Side Story, and content under the General tab in Battle.

Chest Upgrade There are 4 types of chests in the Milestone of Radiance: Bronze/Silver/Gold/Diamond. Excluding the Diamond Chest, chests have a chance to upgrade to a higher grade when claiming rewards. You can acquire better rewards through upgrades.

Exchange In the Milestone of Radiance, you can acquire Coins when claiming rewards or obtaining duplicate Heroes. These Coins can be used in the Exchange to receive items you want. Collect Coins to acquire your desired rewards in the Exchange.