









Elements, stats, damage and the game's combat tutorials
Duet Night Abyss combat mechanics
Elements

Hydro
Counters Pyro

Pyro
Counters Anemo

Anemo
Counters Electro

Electro
Counters Hydro

Lumino
Counters Umbro

Umbro
Counters Lumino
How damage is worked out
- 1
Skill Intensity and Overflow
Skill damage is multiplied by the attacker's Skill Intensity, and Overflow damage by Overflow Intensity. Trigger Probability past 100% turns into Overflow Intensity at the weapon's Overflow Conversion rate.
- 2
Damage bonuses
Damage-dealt bonuses for the damage type apply here, along with Morale (more damage at high HP), Resolve (more damage at low HP), Multishot on ranged weapons and a random spread.
- 3
Critical hits
CRIT Chance sets a CRIT level: its whole part is guaranteed and the rest is the chance of one level more, so 130% is always level 1 and 30% of the time level 2. A crit multiplies damage by (CRIT Damage - 1) x level + 1: at 200% CRIT Damage, level 2 deals 3x.
- 4
Damage reduction
The target's damage-taken reductions apply.
- 5
Shield
Damage hits the target's Shield before its HP. The Slash bonus effect doubles Slash damage against Shield.
- 6
Defence
Damage that reaches HP is multiplied by K / (K + DEF), where DEF is the target's DEF after any DEF ignore. K is 300, less 10 for every level a character is below the target (at most 20 levels, so K never drops under 100; enemy levels count up to 80).
- 7
HP locks
Last, effects that stop HP from falling past a point (a boss's invincible phase) cap the result.
Stats
23- Hydro ATKWhat it does: Triggering Bonus Effect: Hydro applies 1 stack to the target for 6s, dealing periodic Hydro Damage. Stacks up to 6 times. Reaching maximum stacks consumes all stacks to deal 1 instance of Overflow Damage based on their total remaining periodic damage and apply 1 stack of Hydro Disruption. This effect can trigger once every 0.4s.
- Pyro ATKWhat it does: Triggering Bonus Effect: Pyro applies 1 stack to the target for 6s, dealing periodic Pyro Damage. Stacks up to 6 times. Reaching maximum stacks consumes all stacks to deal 1 instance of Overflow Damage based on their total remaining periodic damage and apply 1 stack of Pyro Disruption. This effect can trigger once every 0.4s.
- Electro ATKWhat it does: Triggering Bonus Effect: Electro applies 1 stack to the target for 6s, dealing periodic Electro Damage. Stacks up to 6 times. Reaching maximum stacks consumes all stacks to deal 1 instance of Overflow Damage based on their total remaining periodic damage and apply 1 stack of Electro Disruption. This effect can trigger once every 0.4s.
- Anemo ATKWhat it does: Triggering Bonus Effect: Anemo applies 1 stack to the target for 6s, dealing periodic Anemo Damage. Stacks up to 6 times. Reaching maximum stacks consumes all stacks to deal 1 instance of Overflow Damage based on their total remaining periodic damage and apply 1 stack of Anemo Disruption. This effect can trigger once every 0.4s.
- Umbro ATKWhat it does: Triggering Bonus Effect: Umbro applies 1 stack to the target for 6s, dealing periodic Umbro Damage and reducing the target's Stance recovery speed. Stacks up to 6 times. Reaching maximum stacks consumes all stacks to deal 1 instance of Overflow Damage based on their total remaining periodic damage and apply 1 stack of Umbro Disruption. This effect can trigger once every 0.4s.
- Lumino ATKWhat it does: Triggering Bonus Effect: Lumino applies 1 stack to the target for 6s, dealing periodic Lumino Damage and refreshing the Remaining Time of all Bonus Effects. Stacks up to 6 times. Reaching maximum stacks consumes all stacks to deal 1 instance of Overflow Damage based on their total remaining periodic damage and apply 1 stack of Lumino Disruption. This effect can trigger once every 0.4s.
- Slash ATKWhat it does: When triggering Bonus Effect: Slash, the Slash Damage dealt to the target's Shield is multiplied by 2.
- Spike ATKWhat it does: When triggering Bonus Effect: Spike, the Spike Damage dealt to the target's HP is multiplied by 1.5.
- Smash ATKWhat it does: When triggering Bonus Effect: Smash, the reduction to the target's Stance is multiplied by 2.
- Calamity AttackWhat it does: When a bonus effect is triggered, this instance of damage deals 2× damage to targets with an elemental type.
- WeaponWhat it does: When equipped with a corresponding weapon, increases the weapon's attack by 20%.
- Skill IntensityWhat it does: Affects Skill DMG and the effect magnitude of buffs/debuffs.
- Skill RangeWhat it does: Affects the range of skill effects.
- Skill DurationWhat it does: Affects the duration of skill effects.
- Skill EfficiencyWhat it does: Affects the Sanity Cost of a skill.
- Overflow IntensityWhat it does: Affects Overflow Damage dealt.
- MoraleWhat it does: The higher the HP percentage, the higher the damage dealt.
- ResolveWhat it does: The lower the HP percentage, the higher the damage dealt.
- CRIT ChanceWhat it does: When CRIT Chance exceeds 100%, it increases the CRIT Level, dealing higher CRIT Damage.
- Trigger ProbabilityWhat it does: The chance of triggering Bonus Effects upon a single hit. Once triggered, if the attack deals multiple types of damage, all relevant Bonus Effects will take effect at once.
- Overflow ConversionWhat it does: Trigger Probability exceeding 100% is converted into Overflow Intensity at a certain ratio.
- MultishotWhat it does: The chance of firing 1 additional projectile when shooting, which does not consume ammo. When it exceeds 100%, there is a chance to fire more than 1 additional projectile.
- Ammo Conversion RateWhat it does: The rate of ammo gained from the "Ammo Supply Chest" being converted into ammo for this weapon.
Combat terms
4- Additional DMGMeaning: Upon dealing weapon damage, inflicts additional damage 1 time of specific element. This additional hit can trigger bonus effects based on the weapon's trigger probability.
- Ultra ShieldMeaning: An additional shield that stacks independently. The Ultra Shield has a cap of 425+75×Character Level.
- Skill SPDMeaning: Determines how quickly skills are executed.
- TauntMeaning: Forces the target to focus its aggression on you.
Combat tutorials
18Ask's Retribution
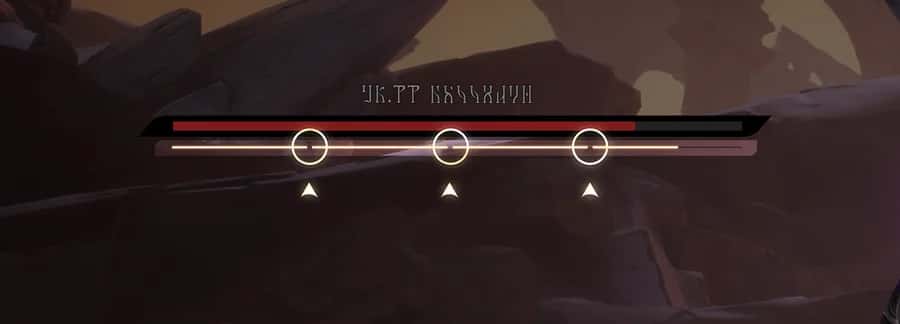
Combat Mechanics: Stance Powerful enemies will maintain their combat Stance, which can be weakened by attacks. The enemies will lose balance when their Stance is weakened to a certain extent, and once it's completely weakened, they will be briefly stunned.
Character Mechanics: "Ask's Retribution" Enemies being stuned will become vulnerable and reveal their weakness. At this point, they can be approached to perform a powerful strike. Some Daimons refer to this as "Ask's Retribution", which brings both destruction and opportunity.
Shield/HP
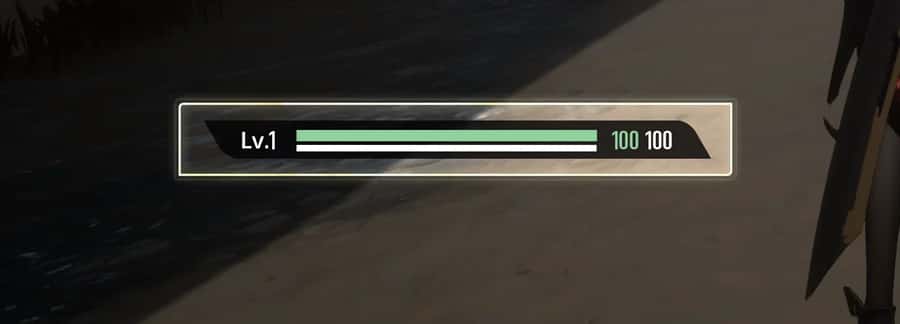
When a character is attacked, the Shield displayed below is usually consumed first. Once the Shield is breached, further attacks will reduce HP.
Ranged Weapons

Ranged Weapon Ranged weapons are ideal for defeating enemies far away or in an elevated position. Note the limits on their Magazine and Ammo.
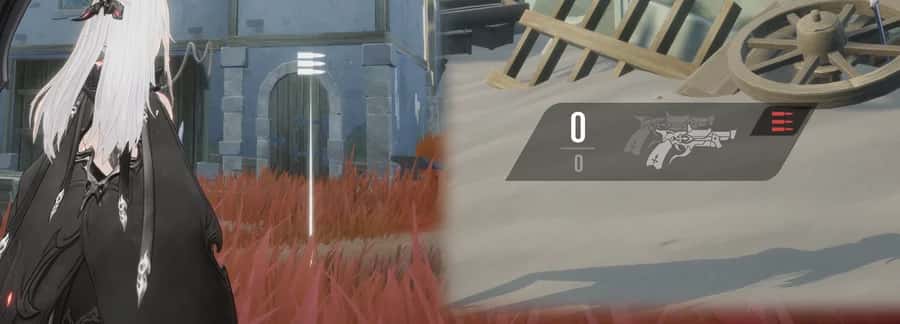
Ammo There is a chance to obtain ammo supplies by defeating enemies, opening chests, or destroying breakable objects, which can be used to replenish the projectiles for ranged weapons.
Combos & Charged Attacks

Combo Each time you deal damage to an enemy with a melee weapon, you gain 1 combo point. Gain a certain number of combo points to increase your Combo Level.

Charged Attack Hold &Attack& to perform a Charged Attack. The damage of this Charged Attack is increased according to the current Combo Level, and then the Combo Points will reset to 0.
Helix Leap
Press &Slide& and then &Jump& to Helix Leap over cliffs or cover long distances.
Tilt the camera upward and use Helix Leap to reach higher areas.
Wall Jump

When near any wall, repeatedly press &Jump& to jump up onto the wall.
Dodge & Sprint

Dodge Press &Avoid& to dodge incoming attacks. You can only dodge a limited number of times within a specified time frame. Consecutive dodges are possible when you have sufficient Dodge Attempts.

Sprint Hold &Avoid& to sprint.
Lock/Unlock Camera

Press &LockMonster& to lock onto a boss; press again to cancel.
Summon/Rescue Combat Partners
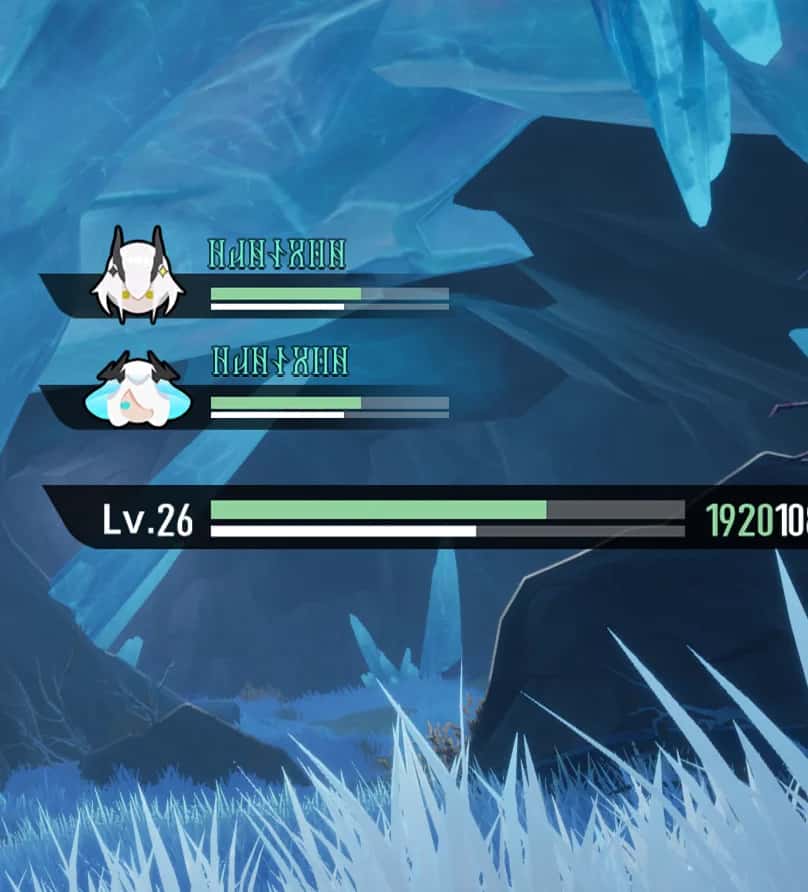
Summon Combat Partners During world exploration or a Solo Commission, you can summon up to 2 Combat Partners at the same time.
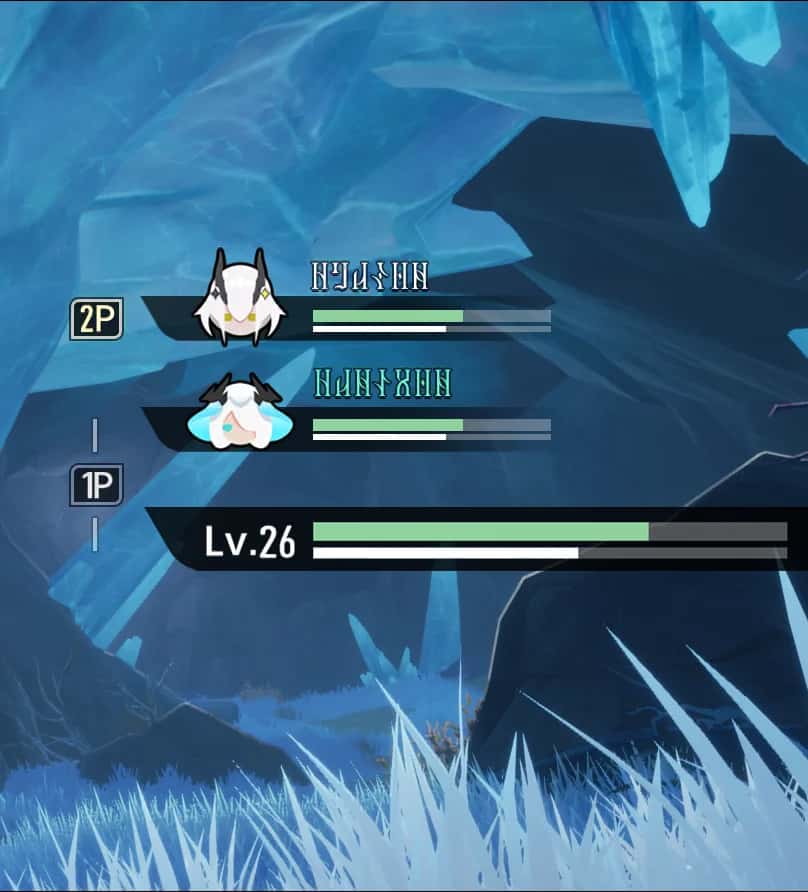
Summon Combat Partners During a 2-player Commission, each player can only summon 1 Combat Partner.
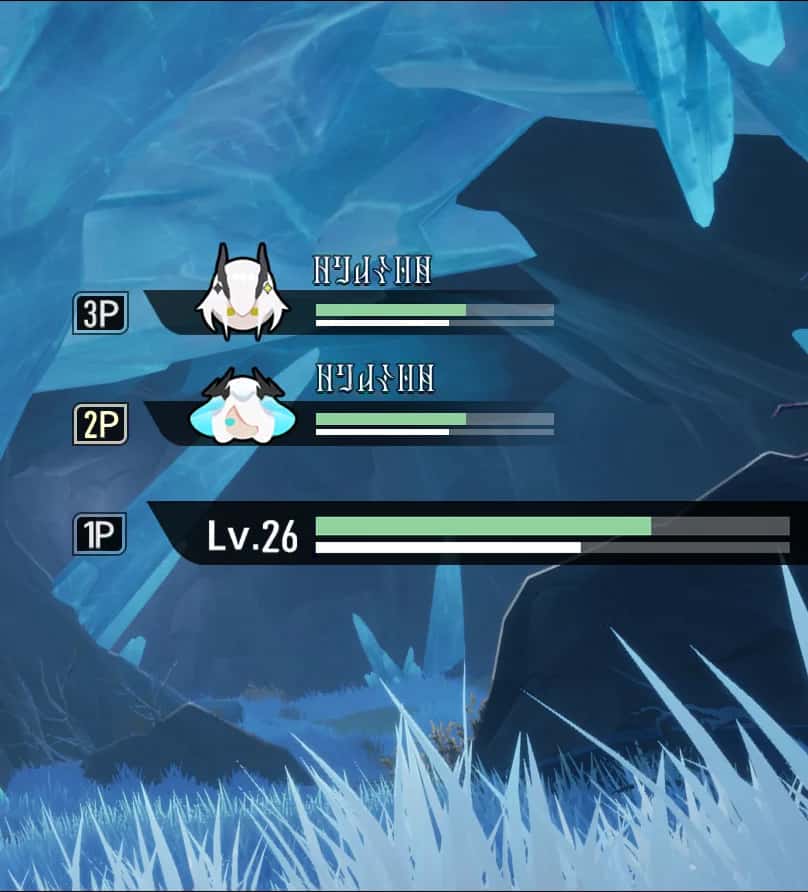
Summon Combat Partners During a Commission with 3 or more players, no Combat Partners can be summoned.
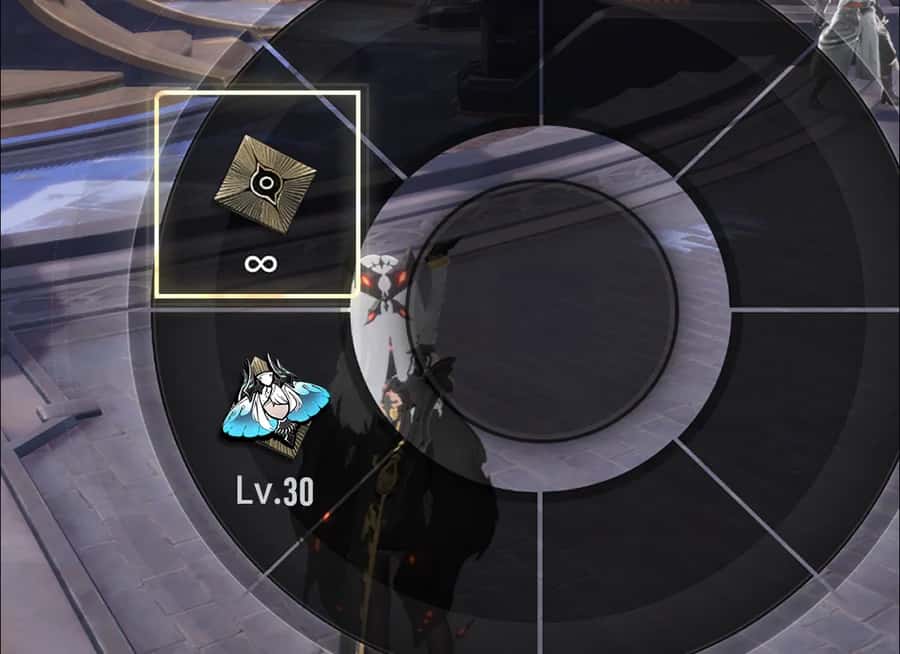
Cancel a Combat Partner Summon While exploring the world, you can use [Sigil: Void] to dismiss your Combat Partner(s) at any time.

Cancel a Combat Partner Summon During Commissions or when challenging Nocturnal Echoes, you cannot dismiss your Combat Partner(s).
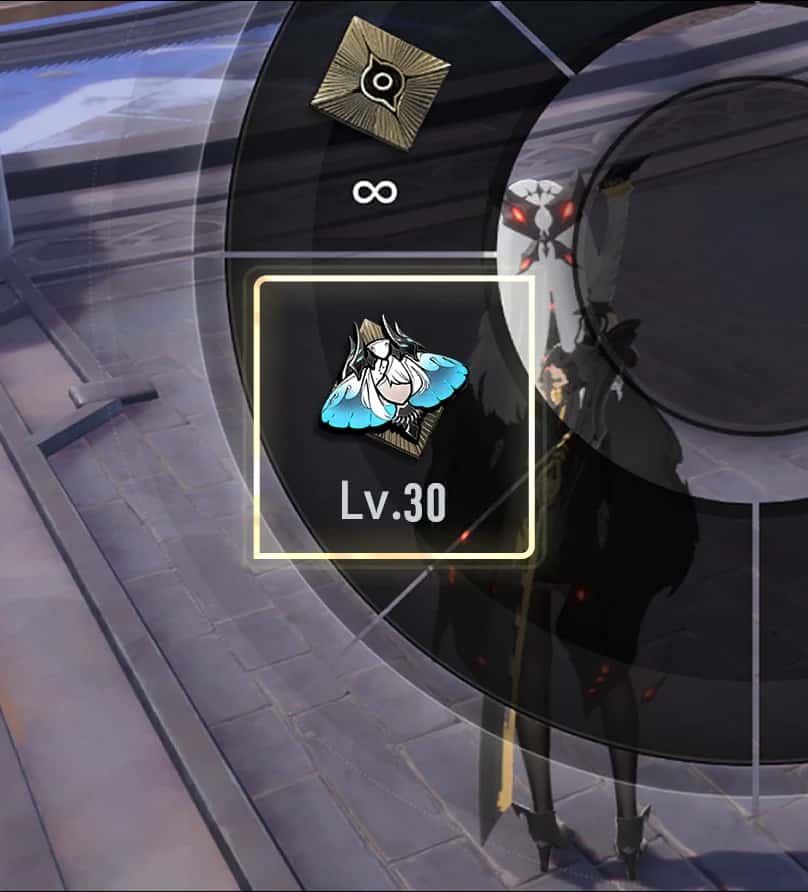
Rescue Fallen Combat Partners During world exploration, if a Combat Partner falls, they can be resummoned by the corresponding Sigil.

Rescue Fallen Combat Partners During Commissions, if a Combat Partner falls, approach them and hold &Interactive& to rescue them.

Rescue Fallen Combat Partners In Nocturnal Echoes stages, fallen Combat Partners cannot be resummoned or rescued.

Insufficient supplies for Combat Partners Combat Partners consume both Sanity and Ammo in battle. Approaching ammunition dropped by enemies can replenish their Ammo.
Geniemon Support

Geniemons provide a variety of assists in battle.
Sanity

The primary resource needed for using skills in battle. It recovers over time.
Additional Effects

When dealing damage with a weapon or certain skills, there's a chance to trigger elemental Bonus Effect. The chance is based on the weapon's Trigger Probability.

Characters have element types. There are six elements: Hydro, Pyro, Anemo, Electro, Lumino, and Umbro. Each element has its bonus effect that applies a debuff, dealing periodic damage: Hydro: Deals periodic Hydro DMG. Pyro: Deals periodic Pyro DMG. Electro: Deals periodic Electro DMG. Anemo: Deals periodic Anemo DMG. Lumino: Deals periodic Lumino DMG and refreshes the Remaining Time of all active elemental bonus effects. Umbro: Deals periodic Umbro DMG and slows the target's Stance recovery.

Weapons have Physical types: Slash, Spike, and Smash. Their bonus effects boost damage or slow Stance recovery: Slash: Deals more damage to the target's Shield. Spike: Deals more damage to the target's HP. Smash: Weakens the target's Stance more effectively.
Additional Damage
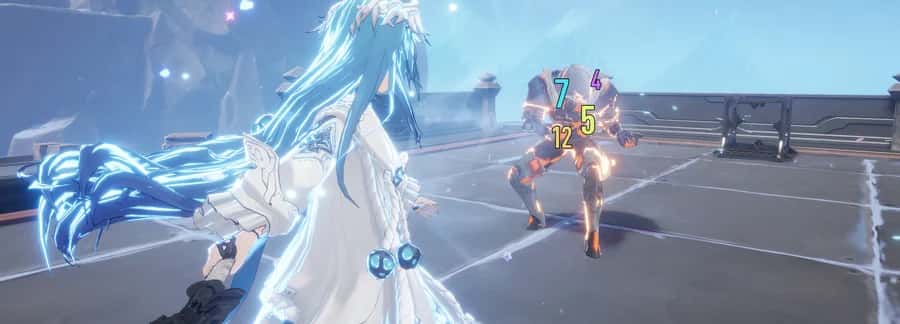
When dealing damage with a weapon, deals additional damage 1 time based on the type and amount of the original damage dealt. The additional damage may trigger the corresponding Bonus Effect based on the Weapon Trigger Probability.
Periodic Damage

Deals damage once every 2s for their duration. Periodic damage cannot trigger Bonus Effects.
Hold to Use the Skill

Hold to Release Skills Some skills trigger different effects based on whether they are held or pressed.
Protagonist's Perfect Dodge in Chapter Twilight
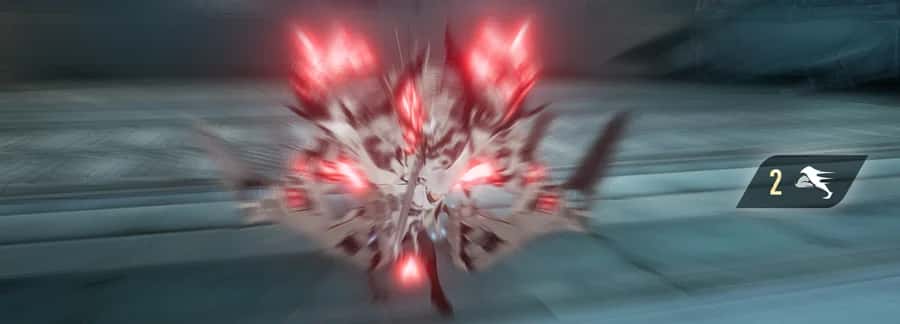
Perfect Dodge of Protagonist in Chapter Twilight When facing strong enemies In Chapter Twilight, dodging at the last moment before an attack hit will slow nearby enemies for a brief period.
Ultra Shield

A character's bonus shield gained through certain means. Ultra Shield will be consumed first when taking damage. The cap of Ultra Shield increases as the Character Level rises.
Sideways Climb

When near a climbable wall, hold a direction and press &Jump& repeatedly to leap sideways and perform consecutive wall jumps.
Enemy mechanics
32Destructible Parts

Combat Mechanics: Divide and Destroy Some enemies have glowing parts that are destructible, and each part has its own HP.

Combat Mechanics: Divide and Destroy When the HP of a destructible part is reduced to 0, the enemy enters Broken State, which significantly weakens the enemy's Stance.

Combat Mechanics: Divide and Destroy When their Stance is weakened to a certain extent, the enemy will lose their balance.
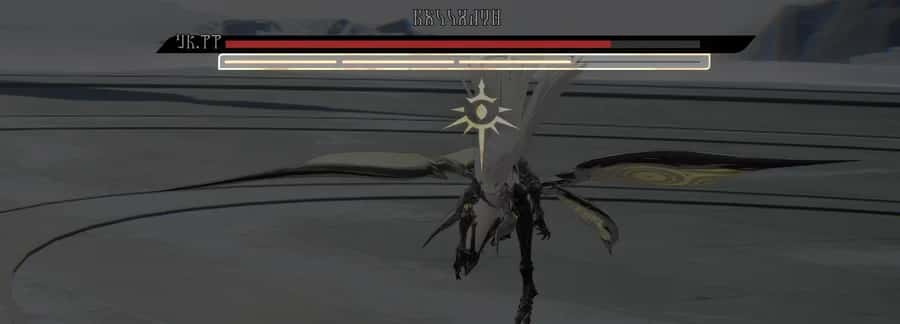
Combat Mechanics: Divide and Destroy Once an enemy's Stance is disabled, they'll be briefly stunned. During Stance recovery, the enemy's Weakness will be exposed and their damage taken will be greatly increased.
Destructible Parts: Crystalophile

Combat Mechanics: Divide and Destroy Crystalophile's armour is destructible, and each destructible part has its own HP.

Combat Mechanics: Divide and Destroy In the presence of any armour, Crystalophile remains invincible. When the HP of a destructible part is reduced to 0, Crystalophile enters Broken State and loses balance.

Combat Mechanics: Divide and Destroy When Crystalophile loses its balance, it will be stunned for a short period and lose its invincibility.
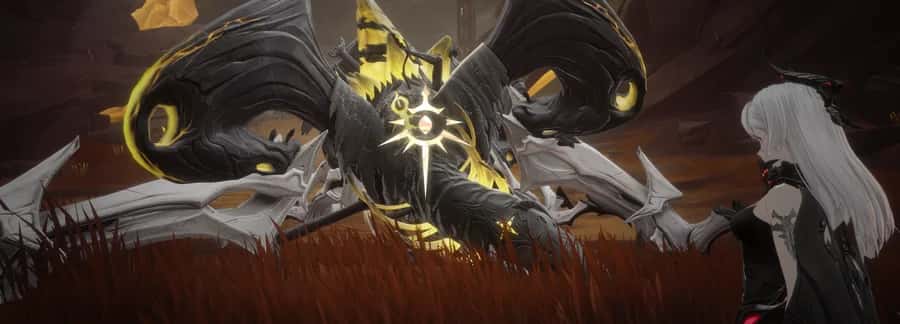
Combat Mechanics: Divide and Destroy When all the armour is destroyed, Crystalophile will be completely stunned and its Weakness will be exposed. Using "Ask's Retribution" on its head at this moment will immediately defeat it.
Primander - Frostbite

Primanders are powerful hostile entities with unique Primander abilities. When Primander, Frostbite is hit by a ranged weapon attack, it retaliates by firing icicles at the attacker, dealing damage on hit and applying 1 stack of [Slowness] for #1s, stacking up to #2 times.
Primander - Blast

Primanders are powerful entities among the hostile forces that wield unique Primander abilities. Primander, Blast periodically triggers an explosion centred on itself, launching nearby hostile units into the air.
Primander - Corrosion

Primanders are powerful entities among the hostile forces that wield unique Primander abilities. Primander, Corrosion periodically generates a pool of [Venom] beneath its feet. [Venom]: Inflicts a DEF reduction and deals periodic damage to targets within its area. Additionally, Primander, Corrosion accelerates Serum decay while alive.
Primander - Thunderclap

Primanders are powerful entities among the hostile forces that wield unique Primander abilities. Primander, Thunderclap periodically releases [Electro Orbs] that radiate outward. [Electro Orb]: Discharges electricity every #1s, dealing damage to nearby hostile targets. Disappears after being attacked.
Primander - Decay

Primanders are powerful entities among the hostile forces that wield unique Primander abilities. Primander, Decay periodically creates a [Decaying Swamp] around itself.

[Decaying Swamp]: Deals periodic damage to enemies within its radius, while simultaneously healing allies inside.
Primander - Wither
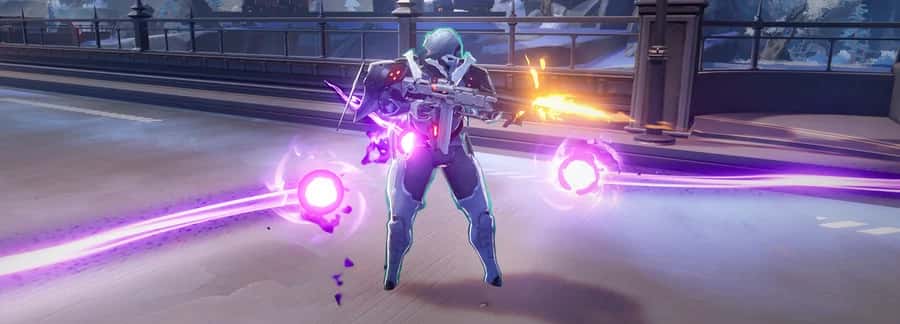
Primanders are powerful entities among the hostile forces that wield unique Primander abilities. Primander, Wither periodically unleashes 3 rotating [Withering Beams]. [Withering Beam]: Lasts for 10s. Circles the Primander, dealing damage to targets on contact and reducing their Sanity.
Primander - Guard

Primanders are powerful entities among the hostile forces that wield unique Primander abilities. Primander, Guard periodically summons a [Guardian Field] around itself. [Guardian Field]: Lasts for #1s and blocks all incoming hostile bullets and projectiles.
Primander - Revenge

Primanders are powerful entities among the hostile forces that wield unique Primander abilities. Primander, Revenge empowers nearby allies when defeated. [Empowered]: Increases ATK, DEF, Movement Speed, and Attack Speed for #1s.
Primander - Icehell

Primanders are powerful entities among the hostile forces that wield unique Primander abilities. Primander, Icehell periodically summons an [Icehell] beneath hostile targets. [Icehell]: Slows targets within its radius, then detonates after #1s, dealing AoE damage to all hostile targets in range.
Primander - Glimmer
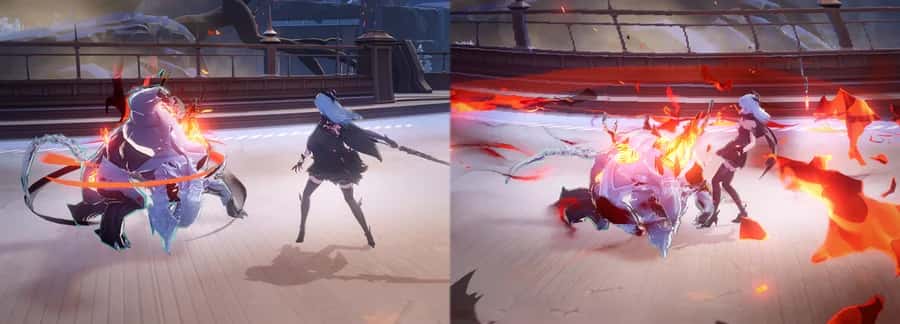
Primanders are powerful entities among the hostile forces that wield unique Primander abilities. Primander, Glimmer periodically applies [Glimmer] to itself. [Glimmer]: Lasts for #1s. During this time, taking damage will trigger an explosion that deals AoE damage to hostile targets within range.
Primander - Sacrifice

Primanders are powerful entities among the hostile forces that wield unique Primander abilities. Primander, Sacrifice explodes upon defeat, dealing damage to all hostile targets within range.
Primander - Thunderstorm

Primanders are powerful entities among the hostile forces that wield unique Primander abilities. Primander, Thunderstorm periodically summons multiple [Thunder Hells] around itself. [Thunder Hell]: Spins across the field relentlessly, dealing damage to any hostile target on contact.
Primander - Bloodbath

Primanders are powerful entities among the hostile forces that wield unique Primander abilities. Primander, Bloodbath restores its own HP when it deals damage.
Primander - Phantom

Primanders are powerful entities among the hostile forces that wield unique Primander abilities. Primander, Phantom summons #1 [Phantom(s)] at the start of battle. [Phantom]: Takes increased damage but mirrors its summoner's combat abilities.
Primander - Versatile

Some Primanders possess multiple Primander abilities.
Patrolhawk
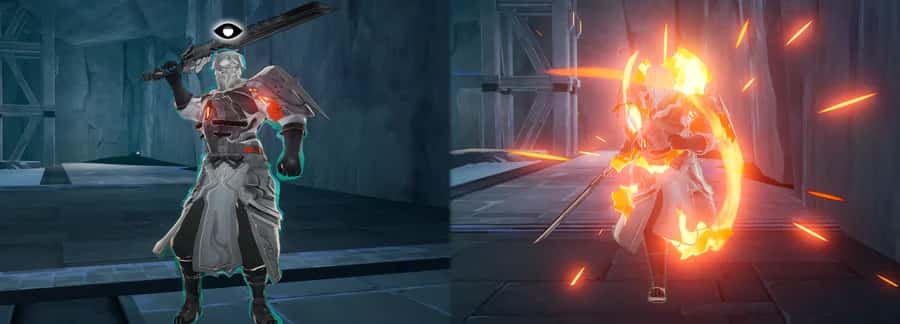
Patrolhawks are elite soldiers chosen from the Patrollers. Patrolhawks become vigilant when enemies approach and gradually ease off when threats recede.

When a Patrolhawk remains vigilant for too long, they will sound an alarm and initiate a hostage execution countdown.
Porter Filthoid
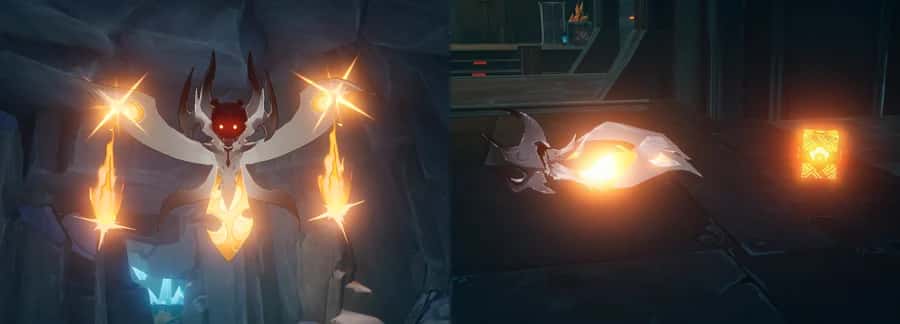
When defeated, Porter Filthoid drops Excavator Module that keeps the Excavator running.
Soul-Scorching Filthoid

Soul-Scorching Filthoid explodes upon defeat, dealing AoE Damage to allied and hostile targets within range.
Target: Sniper Private - Stealth
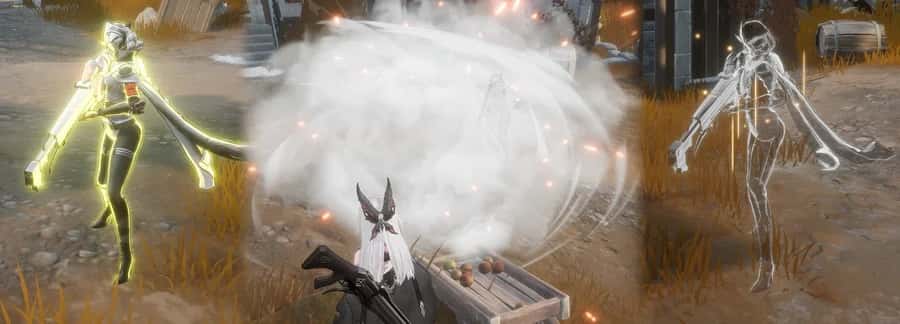
Sniper Private - Stealth periodically enters [Stealth] mode, increasing Movement Speed for #1s.
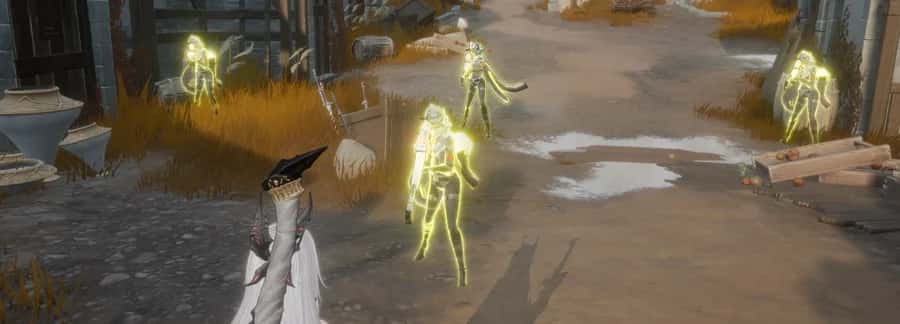
When Sniper Private - Stealth takes damage at below 80% Max HP, it enters [Stealth] mode and summons several identical [Decoys]. [Decoys]: look the same as Sniper Private - Stealth but take increased damage. When any of the [Decoys] is defeated, Sniper Private - Stealth will be inflicted with [Slackness]. [Slackness]: Decreases Movement Speed for #2s.
Target: Cleaving Private - Battlewise

When appearing in battle, Cleaving Private - Battlewise summons a [Healing Drone] and periodically summons a [Magnetix Drone] to assist in combat.

Healing Drone: Continuously links Cleaving Private - Battlewise. The linked target gains Movement Speed and ATK boosts, and continually recovers HP.

Magnetix Drone: Chases down hostile target and self-destructs, and then creates a [Magnetic Storm] centered on itself. [Magnetic Storm]: deals damage to and inflicts [Slackness] on hostile targets within range. [Slackness]: Decreases Movement Speed for #1s. Deals damage to and inflicts [Paralysis] on targets within range. [Paralysis]: Unable to move or attack for #2s.
Target: Expedition Private - Armed Assault

Expedition Private - Armed Assault periodically places a [Landmine] at their current location.
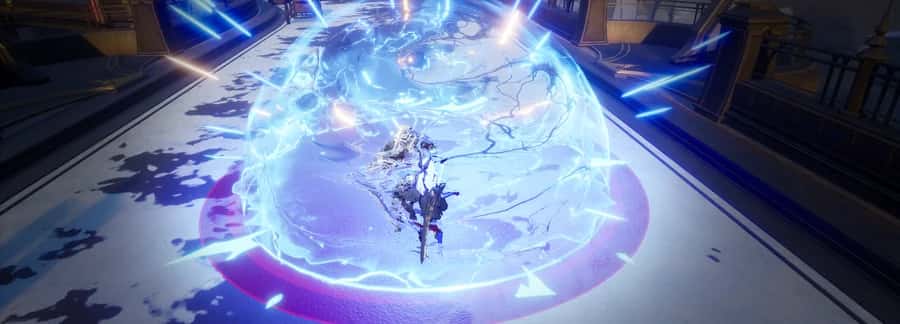
[Landmines] activate when hostile units enter their range and detonate after a brief delay, dealing damage and applying [Slackness] to hostile units nearby. [Slackness]: Loses Movement Speed for #1s.
Magnetix Drone Ⅱ
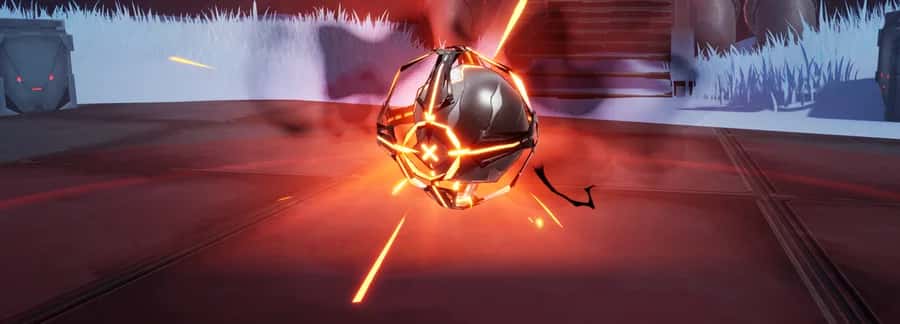
Some Magnetix Drones Ⅱ will approach vehicles and self-destruct, dealing substantial damage to vehicles and other hostile targets within range.
Elite Sergeant

Elite Sergeant can use Morale Boost to inspire allies around them.

When inspired by the allies, applies [High Morale]. [High Morale]: increases Movement Speed and damage dealt, and decreases damage taken.

When the Elite Sergeant is defeated, allies lose the [High Morale] effect.
Patrol Drone
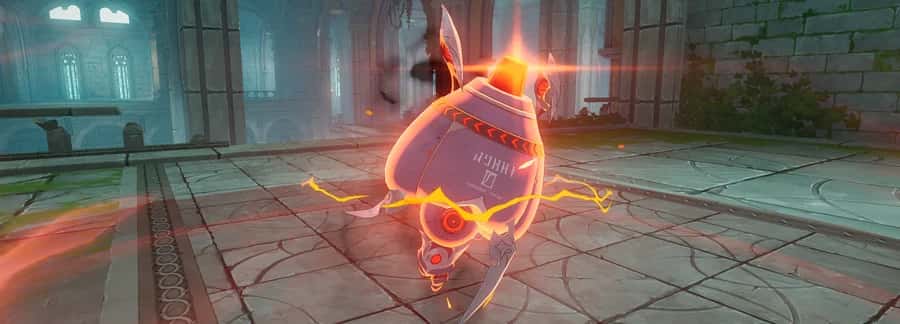
Patrol Drone explodes upon defeat, dealing AoE Damage to allied and hostile targets within range.
Battle Maven

Notoriously fierce, Battle Mavens use their aberrant abilities to relentlessly pursue their targets upon engagement.
The Devourer

When the Devourer unleashes Spore Burst or Scorching Breath, aim for its glowing head to briefly incapacitate it.
Toymaker

Toymakers belong to the "Soldiers" of The Forsakens. They are adept at modifying their surrounding environments and setting traps. In "Commission: Mediation", once a Toymaker is defeated, Bouncepads will appear on the retreat route to facilitate your retreat.
Bombaholic

Bombaholics belong to the "Soldiers" of The Forsakens. They are highly adept at manipulating explosives. In "Commission: Mediation", once a Bombaholic is defeated, the Max HP of Finale Flare is reduced by 30%.
Deceiver

Deceivers belong to the "Soldiers" of The Forsakens. They are adept at disrupting enemy formations and sowing chaos on the battlefield. In "Commission: Mediation", once a Deceiver is defeated, elite enemies will no longer spawn.
Lulu Lunoloot

Lulu Lunoloot appears briefly before attempting to flee. Defeat her quickly to secure a bountiful treasure hoard.