









Every boss with its stages, stats and how to beat it
RAID: Shadow Legends bosses
Dungeons
17 bossesThe Keeps drop Ascension potions, Dragon, Ice Golem, Fire Knight and Spider drop artifacts, the Minotaur drops Mastery Scrolls, the Iron Twins drop Soul Coins and Soul Essence, and the Sand Devil and Phantom Shogun drop the potions that ascend artifacts and accessories.
Void Keep: 20 stages
Loading the stages...
Spirit Keep: 20 stages
Loading the stages...
Magic Keep: 20 stages
Loading the stages...
Force Keep: 20 stages
Loading the stages...
Arcane Keep: 20 stages
Loading the stages...
Dragon's Lair: 25 stages
Loading the stages...
Dragon's Lair (Hard): 10 stages
Loading the stages...
Ice Golem's Peak: 25 stages
Loading the stages...
Ice Golem's Peak (Hard): 10 stages
Loading the stages...
Fire Knight's Castle: 25 stages
Loading the stages...
Fire Knight's Castle (Hard): 10 stages
Loading the stages...
Spider's Den: 25 stages
Loading the stages...
Spider's Den (Hard): 10 stages
Loading the stages...
Minotaur's Labyrinth: 15 stages
Loading the stages...
Iron Twins Fortress (Void): 15 stages
Loading the stages...
Iron Twins Fortress (Spirit): 15 stages
Loading the stages...
Iron Twins Fortress (Magic): 15 stages
Loading the stages...
Iron Twins Fortress (Force): 15 stages
Loading the stages...
Sand Devil's Necropolis: 25 stages
Loading the stages...
Phantom Shogun's Grove: 25 stages
Loading the stages...

Void Guardian
Void, Champion Proving Grounds, Void Keep
Skills: Grim Reaper, Bane, Almighty Immunity [P], Continuous Damage Resistance I, Grim Fortitude [P].
How to beat Void Guardian (4 steps)
How to beat Void Guardian
The Void Guardian puts out and exploits Poison debuffs to nuke down your Champions. Worse yet, his Poison debuffs can't be resisted.
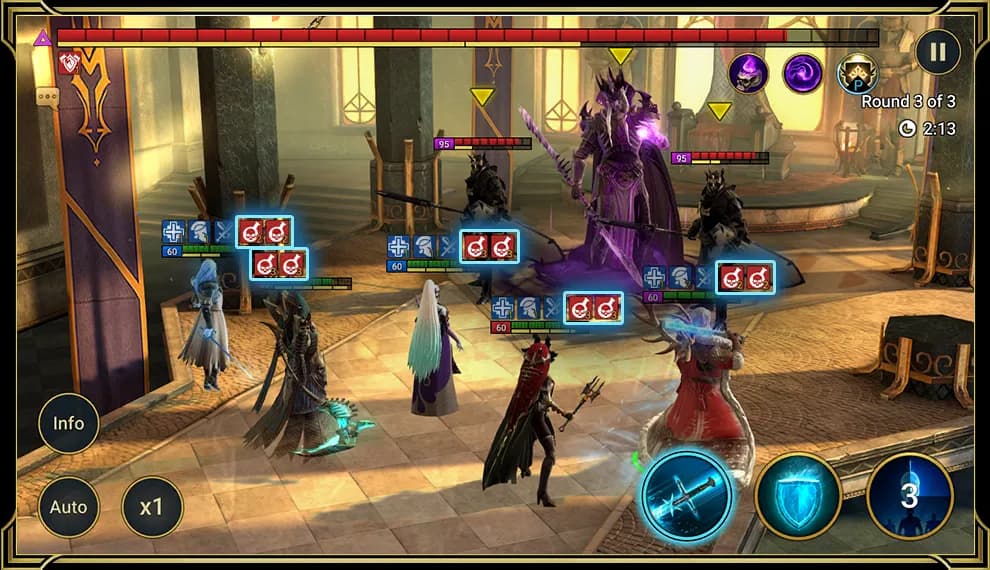
His two minions help him deal damage and hinder your team, the left minion places a 25% Weaken debuff on your Champions, and the right one places Block Buffs on your team.
The best Champions to take to this Keep are those who can remove debuffs, as well as those that can place Block Damage or Unkillable buffs on their allies. Start with killing the right minion, as it's very difficult to do much of anything if you can't buff your team.
Your main goal is to increase survivability. Choose Support Champions that will heal your team after the Poison debuffs hit, or Champions that can remove enough Debuffs to blunt the damage. However, if you can keep up Block Debuffs consistently, then you can cut the problem off at the source. No poison, no problems.

Spirit Guardian
Spirit, Champion Proving Grounds, Spirit Keep
How to beat Spirit Guardian (3 steps)
How to beat Spirit Guardian
The Spirit Guardian heals herself by a portion of her HP on each turn, protects herself with the Block Debuffs buff, and removes all debuffs from herself. The more HP she has, the more damage she inflicts.
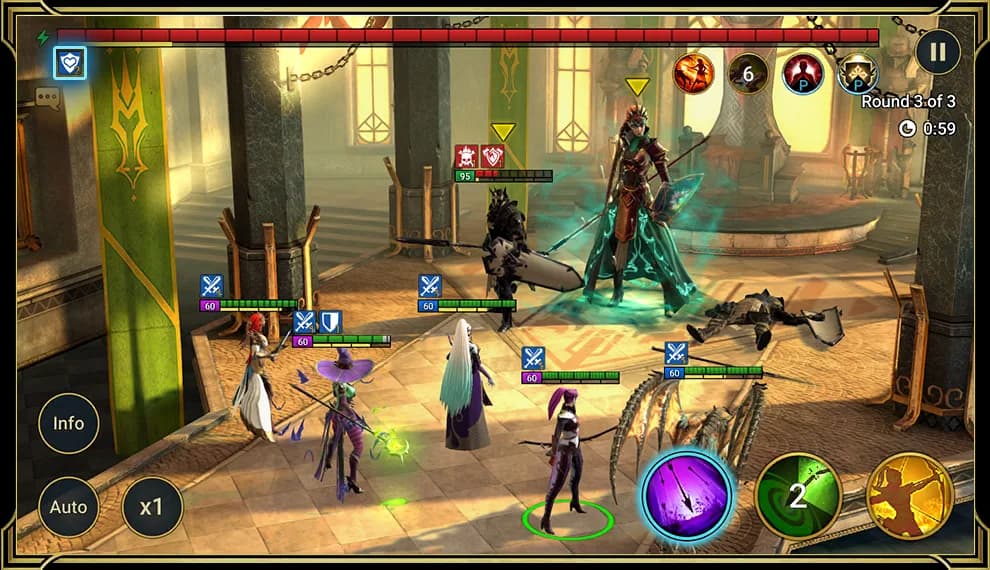
She has 2 minions to help her. The left one places Stun on all his enemies, while the right one decreases your Champions' ACC.
To defeat this boss you require Champions that can place Heal Reduction debuffs and remove buffs. You will also need Champions that can boost your team's DEF, SPD, and place Shields.

Magic Guardian
Magic, Champion Proving Grounds, Magic Keep
How to beat Magic Guardian (3 steps)
How to beat Magic Guardian
The Magic Guardian is all about buffs. She buffs herself with a massive shield that can double her health, then adds a bunch more buffs to protect her and increase her damage. Worse yet, for every buff she has on her, her damage increases even further.
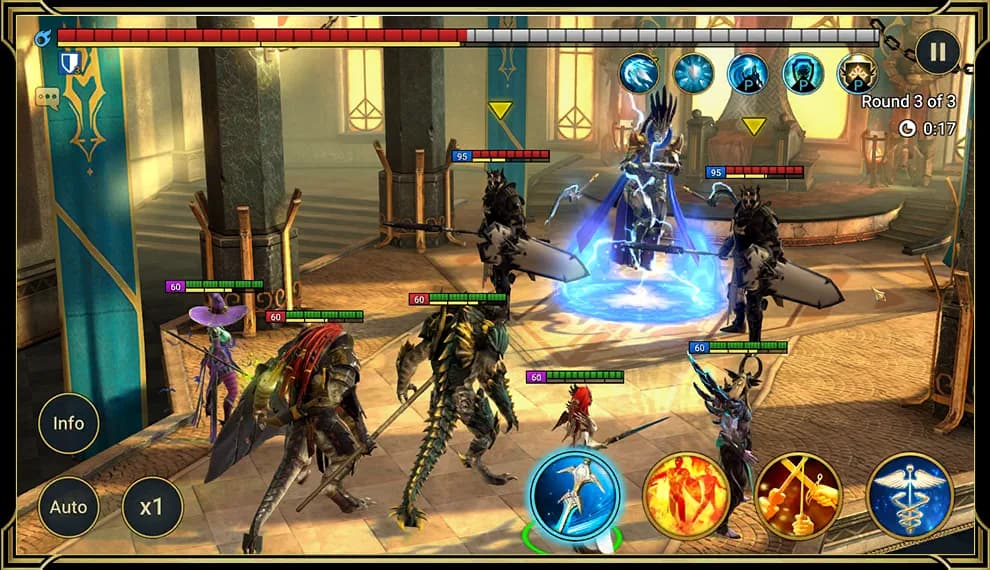
Two minions help her. The left one will place a 60% Decrease DEF debuff on your team, and the right one will remove all debuffs from the Magic Guardian before placing a Block Debuffs buff on her.
The real danger in this dungeon is the boss and her buffs, but the left minion can make the situation much worse. The best possible option is to get champions that can remove or block Buffs on the boss. Stealing buffs is also a viable technique, stealing the Magic Guardian's shield is a great way to keep your buff thief alive for a few turns, as it can have tens of thousands of HP.

Force Guardian
Force, Champion Proving Grounds, Force Keep
How to beat Force Guardian (3 steps)
How to beat Force Guardian
The Force Guardian can be tricky, as he can put out irresistible debuffs that will slow down your team, decreasing their attack and stunning them. He's also got an incredible amount of DEF, which must be dealt with if you're going to hurt him.
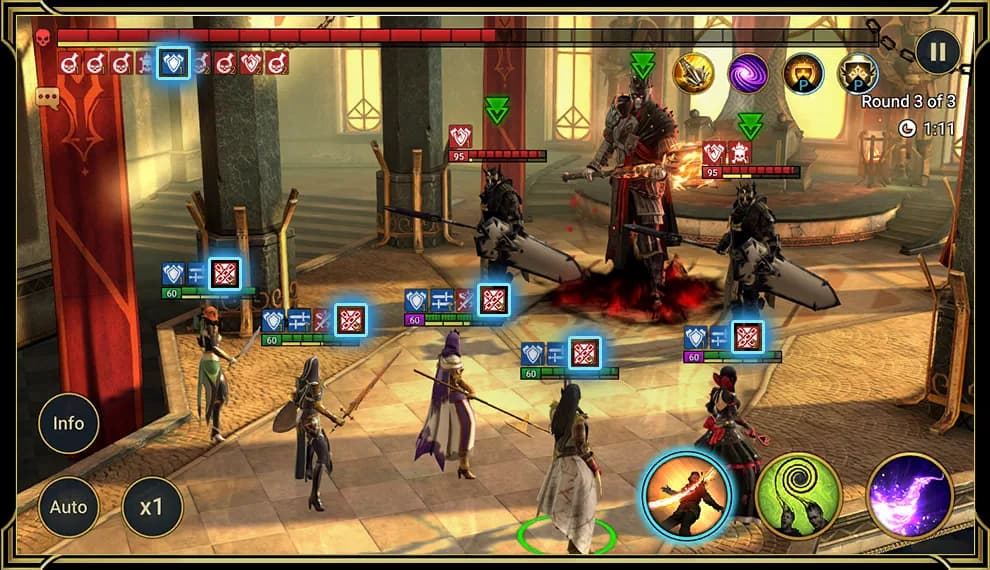
He is also assisted by two minions. The left one places a 50% Heal Reduction debuff on your Champions, while the right one places a 30% Increase DEF buff on the boss.
The best Champions for this Keep are the ones that decrease DEF and remove debuffs from their allies. You will also do well with strong healers and Turn Meter boosters, such as Diabolist and Apothecary or more powerful alternatives. If you have a Champion that can remove enemy buffs as well, then you won't have to deal with the boss' right minion, either.

Arcane Guardian
Void, Arcane Keep, Champion Proving Grounds
Skills: Wind Slash, Last Stand, Almighty Immunity [P], Continuous Damage Resistance I, Grim Fortitude [P].
How to beat Arcane Guardian (4 steps)
How to beat Arcane Guardian
The Arcane Guardian is pretty straightforward, but don't underestimate him. His attacks are usually pretty harmless, but that changes quickly if he hits Champions that don't have any buffs on them. He also places a 30% Increase SPD and a 60% Increase DEF buff on himself.

He has two minions to help him. The left one places a 50% Decrease ATK debuff on your team, and the right one removes all buffs from your Champions.
To defeat this boss you will need Champions that place buffs on all allies. Any buffs will do, as long as your team is buffed, the Arcane Guardian deals very little damage.
Make sure you kill the right minion first to keep your buffs intact, then move on to the other minion or the boss, whichever is convenient.

Hellrazor
Magic, Cobblemarket, Dragon's Lair
How to beat Hellrazor (5 steps)
How to beat Hellrazor
Dragon's Lair is pretty mechanically simple, and has both Speed and Lifesteal sets, some of the most important Artifact sets in Teleria. This makes building an effective dragon-slaying team very important and fairly simple.
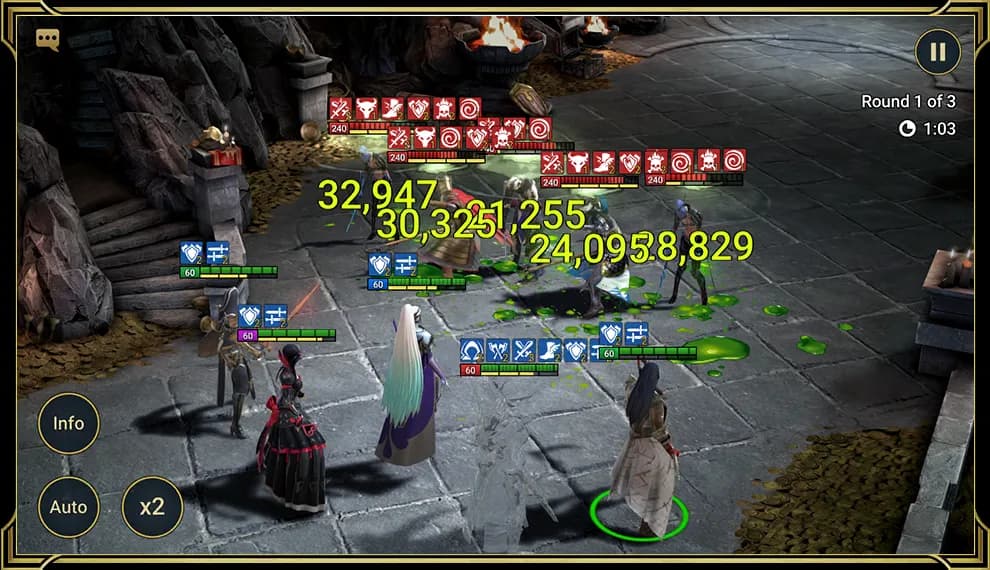
To get through the initial waves, you'll just need strong AoE attackers.
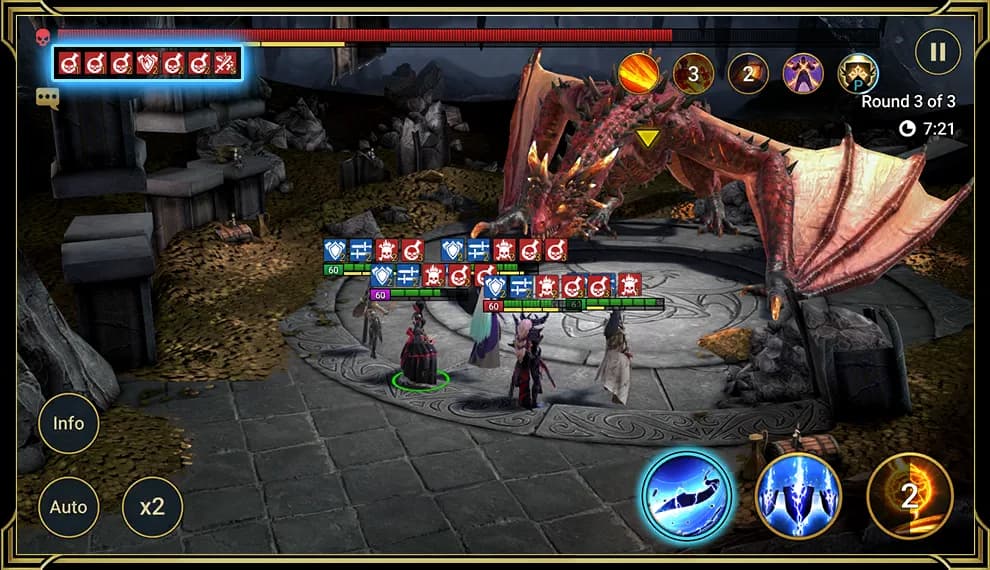
Once you get to the Dragon, you'll want to place Decrease DEF and Decrease ATK debuffs on him while healing your Champions and removing debuffs, though remember that he is immune to Decrease SPD debuffs and Turn Meter reduction effects.
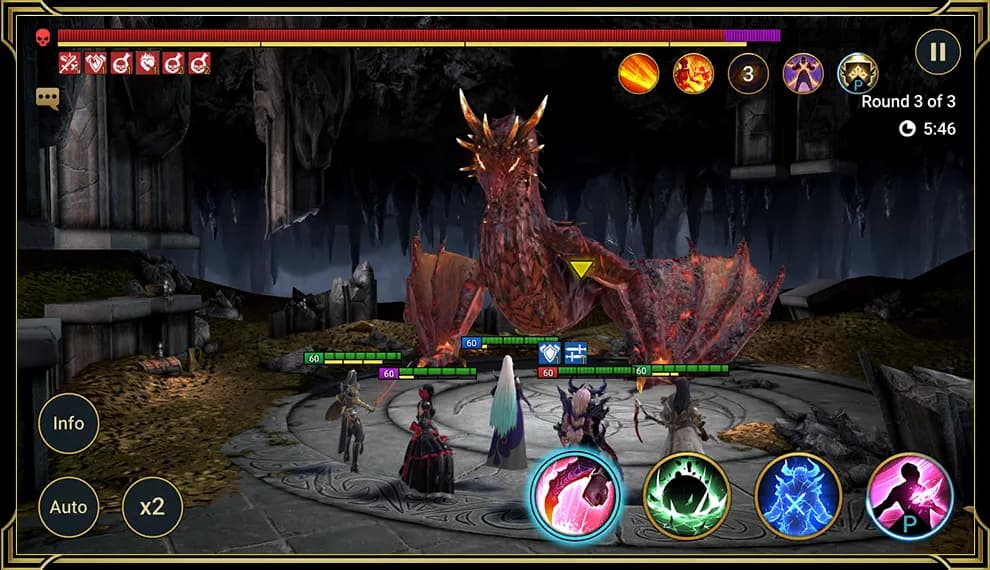
Hellrazor's signature skill is Inhale: a passive with a 3-turn cooldown that resets your team's Turn Meters and unlocks the Scorch skill for his next attack. Scorch deals incredible damage, and also places a team-wide Stun that can't be blocked or resisted. Effectively, it gives Hellrazor two attacks in a row and guts your whole team. You can stop him, though: when the boss uses Inhale, a chunk of his HP bar will be marked purple. Deal that much damage before his next turn, and Scorch will lock down again.
To make sure you beat him, save up your heavy hits for when the boss Inhales… or just have a team that deals so much damage, there's not a problem. At later Stages, Poison and HP Burn debuffs are a good way to make that happen.

Tainted Hellrazor
Spirit, Deadrise, Dragon's Lair, Plagueholme, Soulcross
How to beat Tainted Hellrazor (3 steps)
How to beat Tainted Hellrazor
Like on Normal Mode, the Dragon's Lair remains mechanically pretty simple. Once you overcome the initial waves and get to Tainted Hellrazor himself, you'll want to place Decrease DEF and Weaken debuffs on him, as well as Decrease ATK debuffs, since he hits really hard. Keep in mind that Tainted Hellrazor is immune to Decrease SPD debuffs and Turn Meter reduction effects. One of the key differences between Hellrazor and Tainted Hellrazor is that the latter places twice as many Poison debuffs, and that becomes a real problem when Tainted Hellrazor uses his Draconic Gaze skill.

Draconic Gaze completely empties your team's Turn Meters and unlocks the secret Toxic Incineration skill for Tainted Hellrazor's next attack. Toxic Incineration deals massive damage, and also places a team-wide Stun that can't be resisted. Effectively, it gives Tainted Hellrazor two attacks in a row and paralyzes your whole team. As if that weren't enough, Toxic Incineration also instantly activates any Poison debuffs placed by Tainted Hellrazor.
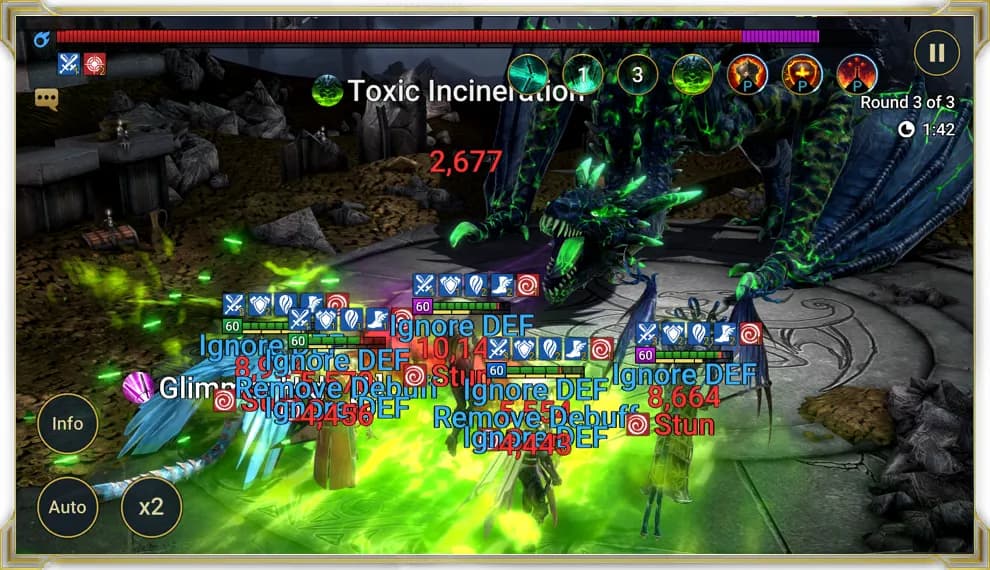
All hope is not lost though! Like on Normal Mode, when Tainted Hellrazor uses Draconic Gaze, a chunk of his HP bar will be marked purple. Deal that much damage before his next turn, and Toxic Incineration will lock down again. Having strong nukers in your team is therefore a must. Also make sure to boost your Champions' Turn Meters to attack more often, but save your heavy hits for when they're really needed. It's not enough to just deal damage; you've got to survive Tainted Hellrazor's attacks too. Placing Increase DEF and Shield buffs on your Champions will help, as well as equipping them with Bolster and Defiant Artifacts Sets to mitigate the damage from Tainted Hellrazor's AoE attacks. Also, you'll need to bring a cleanser or Block Debuffs Champion to deal with the many debuffs placed by Tainted Hellrazor, or else you'll be in trouble.

Klyssus
Spirit, Cobblemarket, Ice Golem's Peak
How to beat Klyssus (3 steps)
How to beat Klyssus
Don't be deceived by the apparent simplicity of this Dungeon at earlier Stages, it will take some careful strategizing to overcome the later Stages of the Ice Golem. The key is killing his minions, as they make the Frigid Vengeance P skill much more dangerous.

Whenever Ice Golem uses the Frigid Vengeance P skill while any of his minions are alive, the damage from the attack will be significantly higher. You'll want your Champions to focus on survivability over damage in the later Stages.

There are several tricks that you can use to defeat Klyssus. The first one is finding Champions that place Block Revive debuffs, once his minions are dead and gone, Frigid Vengeance P loses a lot of its bite. However, it can be difficult to get the timing right if you're playing on Auto Mode. You can also try and use Poison and HP Burn debuffs on him, enough damage all at once, and he can jump through multiple HP thresholds in a single go, only activating Frigid Vengeance P once. However, that's hard to predict and can be dangerous. The best way to kill Ice Golem is to set up a very resilient team that can heal itself, block revives, and steadily deplete the Boss's HP.
Tainted Klyssus
Spirit, Deadrise, Ice Golem's Peak, Plagueholme, Soulcross
How to beat Tainted Klyssus (4 steps)
How to beat Tainted Klyssus
The key to defeating Tainted Klyssus and his minions is using HP Burn debuffs: not only do they deal increased damage to Tainted Klyssus, but they also destroy his minions' MAX HP. HP Burn Champions like Ninja and Walking Tomb Dreng will be very efficient here.

Much like his Normal counterpart, Tainted Klyssus constantly revives his minions when his HP drops below a certain threshold. Old strategies still apply here; you can prevent his minions from reviving by using Block Revive debuffs. Alternatively, you can keep the minions alive, place HP Burn debuffs on them and continually extend their duration. This will not only reduce their MAX HP, but deal consistent damage to Tainted Klyssus as well. If you don't have a HP Burn Champion, the Brimstone Blessing can be very useful. The Smite debuff it places will deal extra damage to Tainted Klyssus and his team.
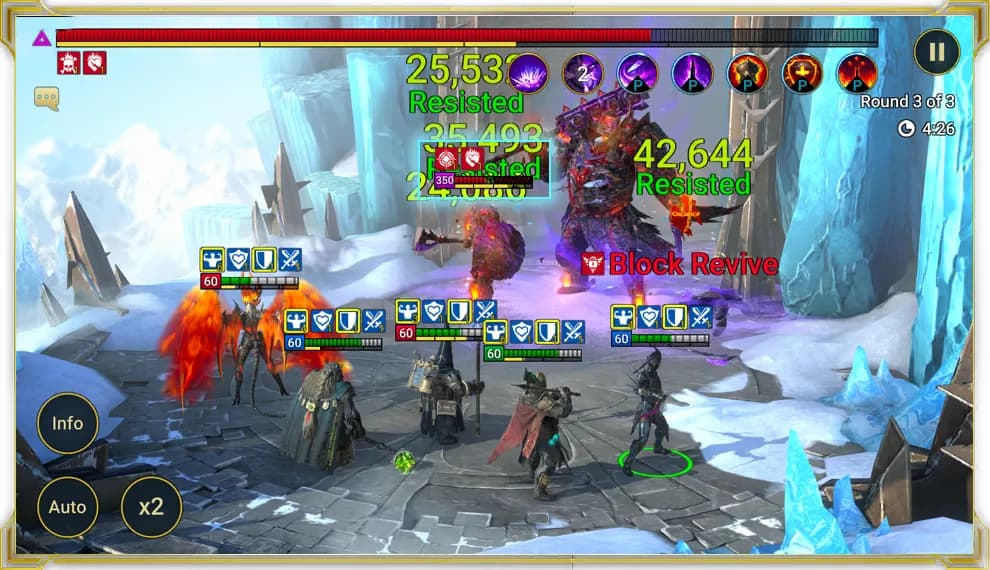
To survive Tainted Klyssus's attacks, you'll need to protect your Champions. For this, you want to place Increase DEF and Shield buffs on your Champions, and maybe consider equipping them with Bolster and Defiant Artifact Sets. Another must-have debuff is Decrease ATK. Tainted Klyssus hits hard, so you'll need to make his hits weaker in order to survive them.
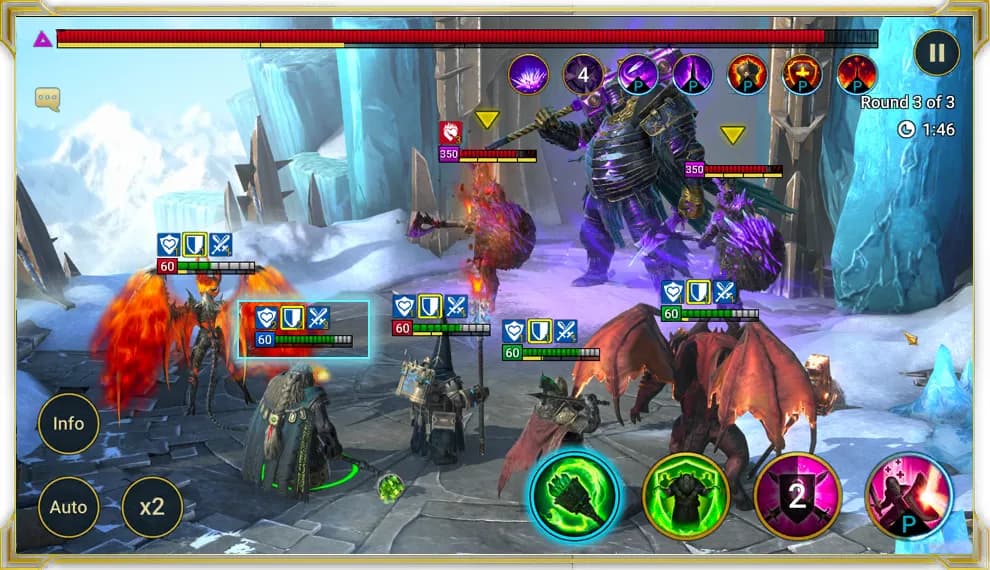
And, of course, you'll want to make sure that you're dealing loads of damage to Tainted Klyssus and his minions, Decrease DEF and Weaken debuffs will help you with that.

Fyro
Force, Deadrise, Fire Knight's Castle
How to beat Fyro (4 steps)
How to beat Fyro
Fyro the Fire Knight may seem tricky at first, but with the right Champions he can be overcome.

The key is to get Champions who hit multiple times in a single attack, preferably on their first Skill so that it's always available. This is the best way to ensure you can break the Fire Knight's Shield.
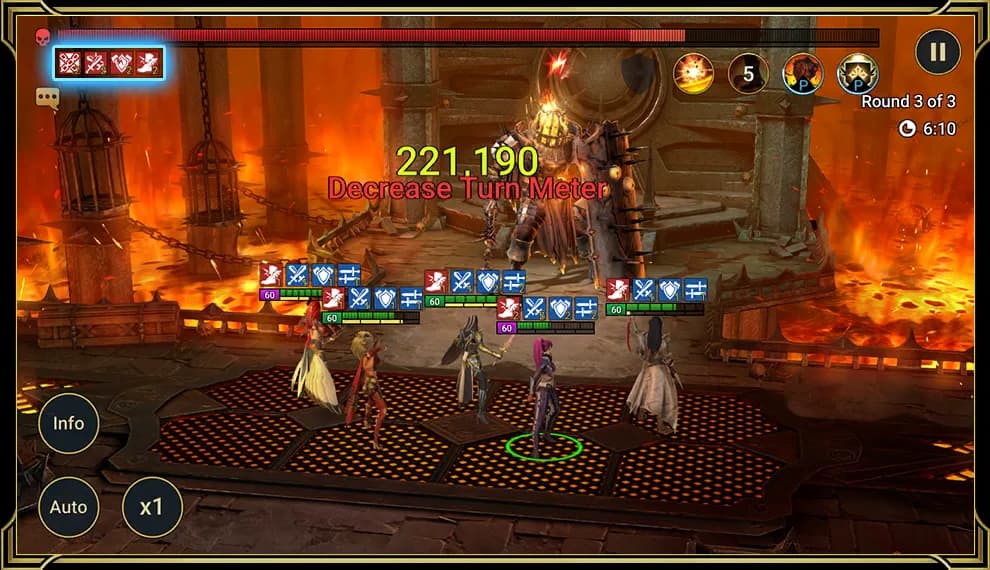
You'll need some powerful debuffs to be able to defeat the Fire Knight, but you can't apply them until his shield is broken. Once you've opened him up to attack, you'll want to place Heal Reduction, Weaken, and Decrease DEF. You'll also want to put out Decrease SPD and deplete his Turn Meter, to extend the amount of time you can deal damage before his shield comes back up.

Starting with Stage 20, you'll also need to plan for the waves of Champions leading up to the Fire Knight himself, they're much tougher than they were on earlier stages. For this, you will need Champions that can place AoE attacks and control multiple enemies. This means that your ultimate task is to find Champions that combine multiple hits, SPD and Turn Meter decrease, AoE attacks, and mass control skills.
Tainted Fyro
Spirit, Fire Knight's Castle, Plagueholme, Soulcross
How to beat Tainted Fyro (4 steps)
How to beat Tainted Fyro
Raiding the Fire Knight's Castle can be tough at the best of times, but taking on Tainted Fyro will really put your skills to the test. Luckily, he can be overcome with the right Champions in your team! The key is to fill your team with Champions who can hit multiple times in a single attack, preferably on their first skill so that it's always available. This is the best way to ensure that you can break Tainted Fyro's Bloodflame Cloak shield. Counterattack and Reflect Damage buffs will also come in handy, as well as the Phantom Touch and Ward of the Fallen Blessings. This time though, Tainted Fyro will destroy an attacking Champion's MAX HP by 1% every time they hit him while the shield is up. You'll need to keep track of how much MAX HP you've lost, and the perfect time to restore it.
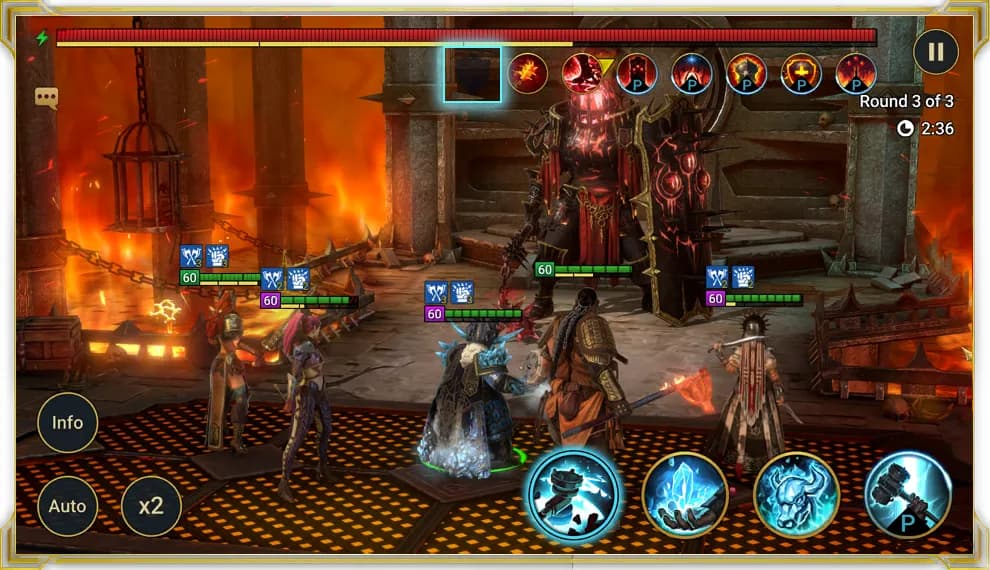
You'll also need powerful debuffs to defeat Tainted Fyro, but you can't apply them until his shield is broken. Once you've opened him up to attack, you'll want to place Heal Reduction, Weaken, and Decrease DEF debuffs to deal plenty of damage. You'll also want to make sure that this hot-headed foe doesn't get a chance to raise his shield again. Placing Decrease SPD debuffs on him is a must, and you should also look to put out Freeze debuffs. Tainted Fyro will instantly remove these Freeze debuffs, but his Turn Meter will be decreased by 15% for each one removed, keeping him out of the fight and preventing him from raising his shield again.

One of the main differences between Fyro and Tainted Fyro is that all of Tainted Fyro's attacks will destroy your Champion's MAX HP. Champions like Marichka the Unbreakable, or Blessings like Miracle Heal can help you restore that destroyed HP.

To defeat Tainted Fyro, you can use one of these two strategies depending on whether you have a fast team or a slower one. For the faster teams out there, you'll want to start with boosting your own Turn Meter before placing multiple hits on Tainted Fyro to break his shield. From there, you can start placing Freeze debuffs on Tainted Fyro to control the pace of the fight. Slower teams will have to rely more on the Counterattack and Reflect Damage buffs mentioned earlier. After placing them, just wait for Tainted Fyro to attack and watch as your team's counterattacks bring that shield down. After that, it's back to Turn Meter control and placing Freeze debuffs. You'll also need to plan for the waves of Champions leading up to Tainted Fyro himself. For this, you will need Champions that use powerful AoE attacks and can control multiple enemies at once. The Brimstone Blessing will come in helpful here.
Skavag
Void, Cobblemarket, Plagueholme, Spider's Den
How to beat Skavag (4 steps)
How to beat Skavag
Spider's Den is one of the tougher Dungeons in Teleria, as it requires specific mechanics to beat the boss, especially when using Auto Battle. Successful strategies also change wildly as you advance, as the AOE team compositions that work well early on just don't stay effective when you reach higher stages.
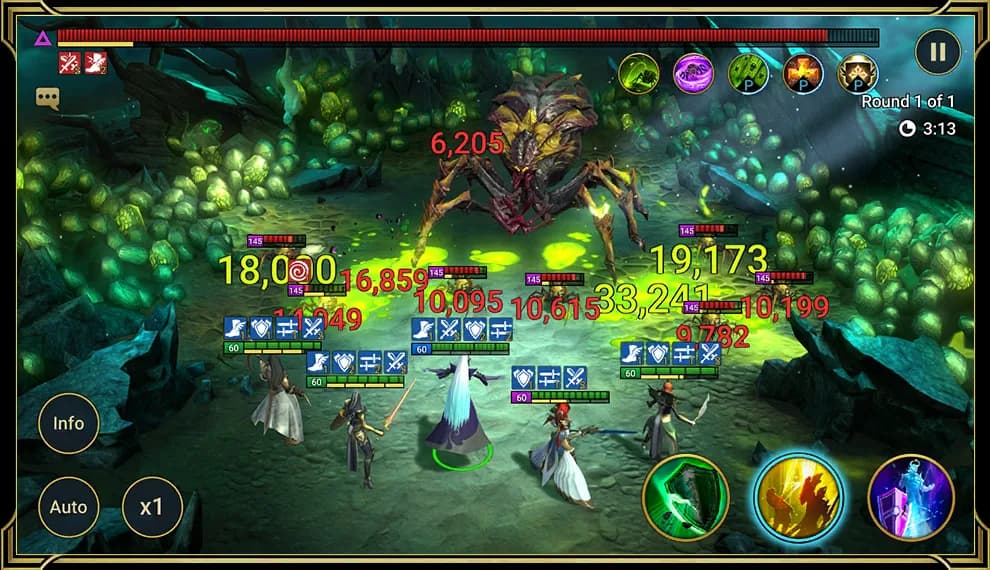
On Stage 20 and higher, you will need to focus on controlling the Spiderlings and depleting Skavag's Turn Meter.

There are several techniques for defeating this Boss. One of them is placing HP Burn on all Spiderlings to damage Skavag each time they take a turn; the other is using a Force Champion as bait on Stage 20, where all the enemies have the Spirit Affinity. If you equip your tank Champion with Lifesteal Artifacts and use Counterattack masteries or can keep a consistent Counterattack buff on them, it will help them stay alive.
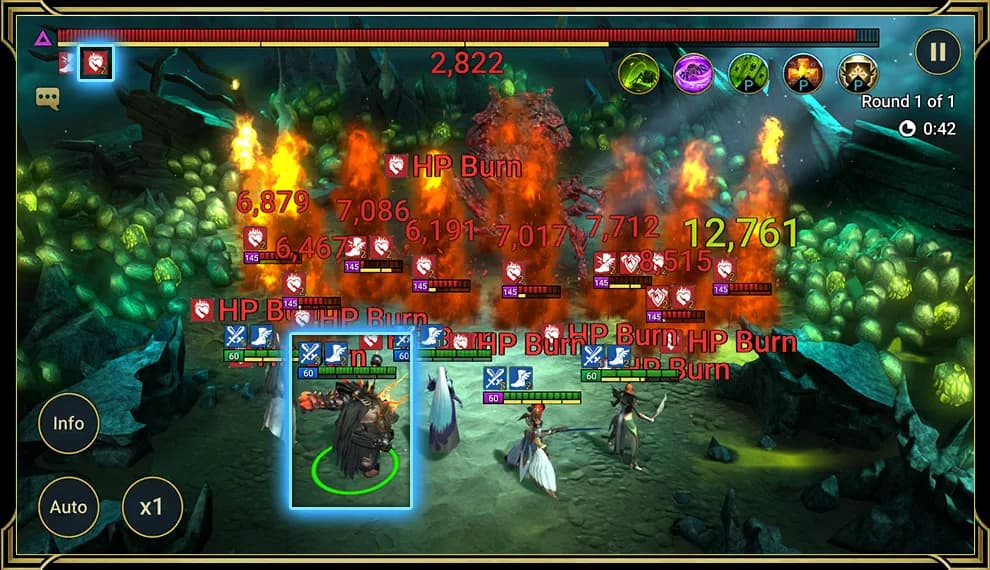
The best Champions at Stage 20 are the ones that can deal additional damage, soak up the inflicted damage, place debuffs, and control the Boss's Turn Meter.
Tainted Skavag
Spirit, Cobblemarket, Deadrise, Spider's Den
How to beat Tainted Skavag (4 steps)
How to beat Tainted Skavag
The Spider's Den on Normal Mode is one of the toughest Dungeons in Teleria, as it requires specific strategies to conquer. Tainted Skavag and her horde change these strategies completely, meaning those same tricks won't work here. Tainted Skavag is immune to Decrease SPD, Heal Reduction, and HP Burn debuffs, as well as Turn Meter reduction effects. In fact, HP Burn debuffs placed on the Tainted Spiderlings heal Tainted Skavag whenever they activate, so she's taking less damage from HP Burn ticks than you're used to.
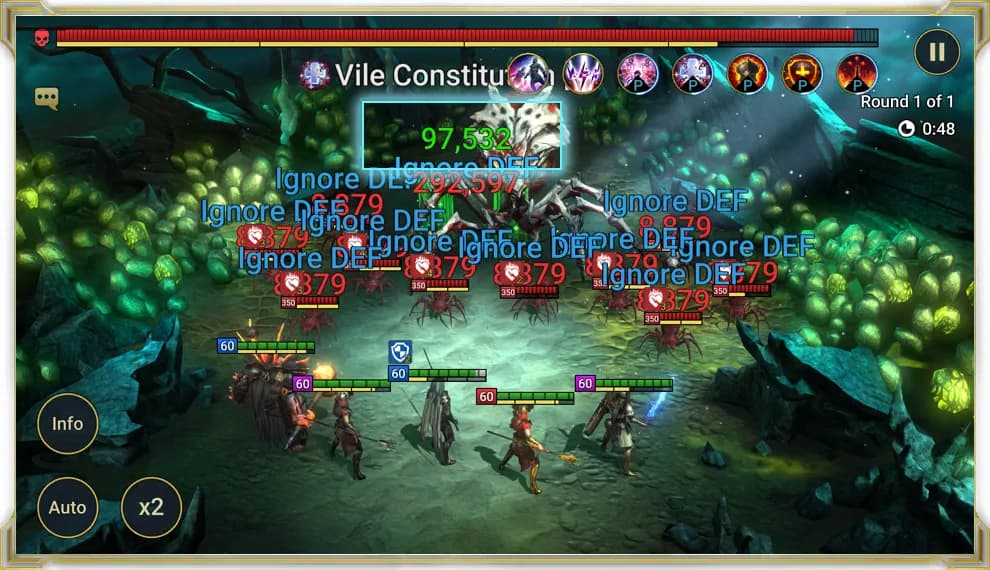
However, don't despair just yet! There are key differences to help make the fight a little easier. The most valuable difference is that Tainted Skavag receives damage equal to 3% of her MAX HP whenever a Tainted Spiderling dies. Taking out the maximum of 10 Tainted Spiderlings in one go means Tainted Skavag loses 30% of her MAX HP instantly.

So, bringing Champions like Sinesha, Skullcrown, and Acrizia with powerful AoE attacks will be vital. Maximize your damage output by placing Increase ATK or Increase C. DMG buffs on them.

You may not always be able to kill the Tainted Spiderlings in one shot, so protection is also important. To survive against Tainted Skavag and her clutch, you'll want to place Increase DEF and Shield buffs on your Champions. Consider your Artifact Set choices carefully too, as Bolster and Defiant will add extra survivability. Also make sure to boost your Champions' Turn Meters (Tainted Skavag is very fast!), as well as to decrease the Turn Meters of the Tainted Spiderlings. To help guarantee you take out all the Tainted Spiderlings in one fell swoop, place Decrease DEF and Weaken debuffs on them before unleashing the true power of your AoE nukers. Keep in mind that just like their mother, Tainted Spiderlings are immune to Freeze debuffs, so you'll have to use a different form of crowd control.

Minotaur
Spirit, Champion Proving Grounds, Minotaur's Labyrinth
How to beat Minotaur (4 steps)
How to beat Minotaur
The Minotaur looks impressive, but is actually very straightforward. He puts out a Hex debuff then exploits it to heavily damage your Champions. The Hex can't be resisted, but damage is just damage, enough DEF, buffs, or healing will take care of it.

The Minotaur also has a key weakness: every three turns, he takes triple damage from all attacks. If you're struggling to defeat him, try waiting until his defenses are down to lay on the hurt. However, most high-level teams can beat him regardless of his state.

He also has a pair of hard-hitting minions, but they aren't very tough, the AOE Champions you bring to deal with the waves leading up to the Minotaur should be able to deal with these minions as well, without you having to shift your focus off the Minotaur.
The trick of this Dungeon is that your team will change often. Scrolls are earned on a per-Champion basis, so you'll eventually want to swap out one of the Champions in your Minotaur team for someone new. Effectively, you need to be able to defeat the Minotaur with just 4 Champions, since you never know if your fifth is going to be someone useful.
Iron Twins
Void, Champion Proving Grounds, Iron Twins Fortress (Force), Iron Twins Fortress (Magic), Iron Twins Fortress (Spirit) and 2 more
How to beat Iron Twins (5 steps)
How to beat Iron Twins
The Iron Twins are a powerful threat that requires management of both debuffs and your Champions' Affinities if you want to come out on top. The key to success in this fight is dealing with the Iron Twins' unique debuff, Ironbrand, and adjusting your team to account for the current Affinity of the Iron Twins, as it changes each day.

Ironbrand does nothing on its own, but one of the Iron Twins' skills, Doomsday Machine, deals damage to all Champions based on the duration of any Ironbrand debuffs currently on them. The longer you have left on an Ironbrand debuff, the more damage Doomsday Machine will do, so you need to manage Ironbrand carefully if you wish to survive. Ironbrand cannot be blocked or removed, but it can be resisted, so building your Champions to have high Resistance can make the difference between success and failure.
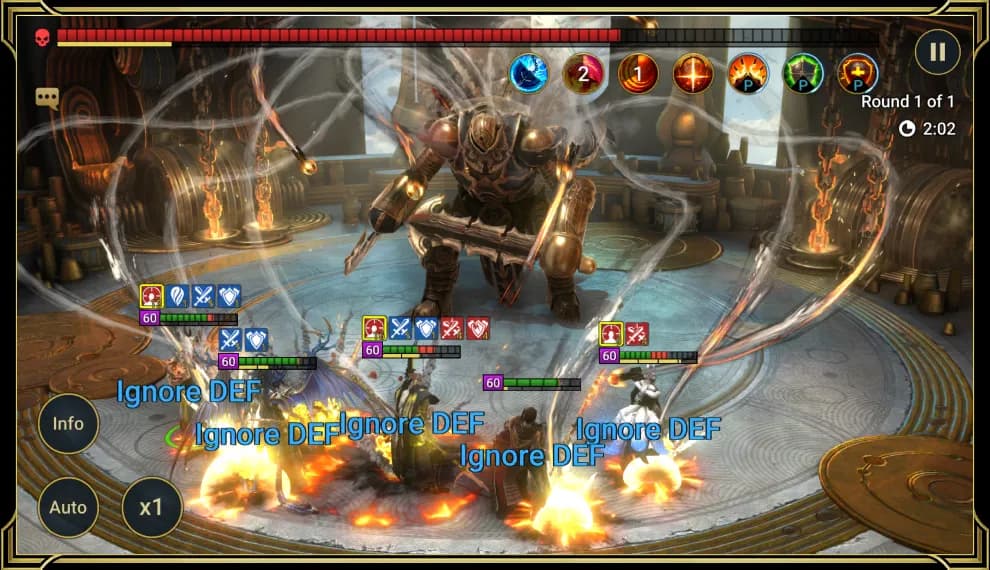
Two of the Iron Twins' skills, Ruinous Swath and Fires of Insanity, apply or extend Ironbrand debuffs on your Champions, based on their ATK or DEF respectively. The higher a Champion's ATK or DEF is, the more turns of Ironbrand they'll receive from these skills. Not only that, but the Iron Twins will increase their own ATK or DEF each time they use these skills. If that's not enough, the Iron Twins gain additional boosts to their ATK or DEF whenever they use these skills based on how many Champions have an Affinity different to theirs, so your Champions' Affinities are incredibly important. You might think building a team with an Affinity that counters the Iron Twins will make the battle easier but it actually means they get even stronger, even faster.
With time being against you in this fight, you want to bring Champions who can deal heavy damage quickly. The longer you leave the Iron Twins alive, the longer your Ironbrand debuffs will last and the higher their ATK and DEF will get. You'll want to stick to dealing damage with single-hit skills too, as the Iron Twins take 50% less damage from each subsequent hit of multi-hit skills. The Iron Twins also take reduced damage from HP Burn debuffs, but while these debuffs are less effective than usual, they are still a good tool to help you take the Twins down.
When the Iron Twins' HP drops below certain numbers, they'll remove all debuffs placed on them and launch a devastating missile barrage at all Champions, so be prepared to deal with this retaliatory strike. You'll also want to be careful when applying buffs to your team, as the Iron Twins will fill their Turn Meter by 10% each time you receive a buff. You can counter this Turn Meter fill by placing a Decrease SPD debuff on them, but they are immune to having their Turn Meter depleted or stolen.

Al-Naemeh the Sand Devil
Magic, Champion Proving Grounds, Sand Devil's Necropolis, Soulcross
How to beat Al-Naemeh the Sand Devil (7 steps)
How to beat Al-Naemeh the Sand Devil
Defeating Al-Naemeh the Sand Devil may seem difficult at first, but it's mainly a matter of using certain mechanics and debuffs that usually aren't effective against other Bosses.

Al-Naemeh's main weakness is that he is susceptible to Sleep debuffs. However, Sleep debuffs aren't removed from him when he's attacked, instead, he activates his Slumber counter for a certain number of turns whenever he is put to sleep. While that counter is active, the Sand Devil is vulnerable to many debuffs. Whenever the Slumber counter reaches 0 or the Sleep debuff on him expires, the Sand Devil will wake up. This counter decreases by 1 whenever Al-Naemeh receives damage (except damage from debuffs), meaning you can deal damage a certain number of times before you make the counter hit 0.
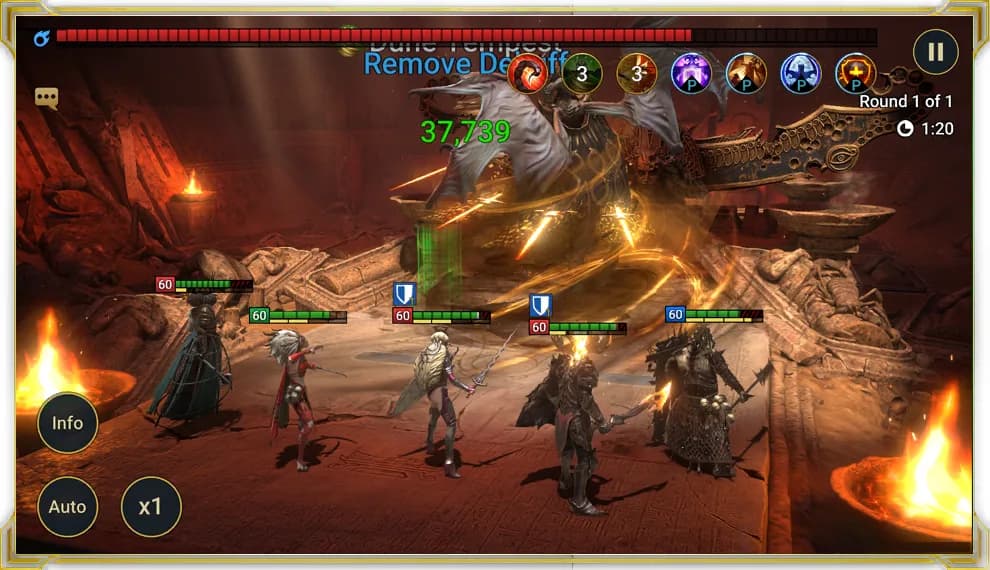
Making the most of when the Sand Devil is asleep is important, as this is the only time you can apply debuffs (besides Sleep) to him thanks to his Passive skill, Rest for the Wicked. While asleep, Al-Naemeh loses his immunity to most debuffs, allowing you to place vital effects that'll see you actually deal damage to him. This is doubly important, as each debuff placed on the Sand Devil reduces the innate damage reduction that Rest for the Wicked grants him. Keep in mind, Al-Naemeh is still immune to crowd control debuffs like Stun, Freeze or Fear, and he also becomes immune to Sleep for 1 turn after he wakes up. Naturally, you will want to bring Champions who can consistently apply Sleep, as well as those who can apply multiple debuffs in a single hit, as to maximize the hits left on the Slumber counter.

His Soul Sustenance Passive is equally as dangerous, as it causes all of the Sand Devil's attacks to destroy a flat 5% of your Champions' MAX HP. If a Champion also tries to reduce Al-Naemeh's Turn Meter, it'll destroy that Champion's MAX HP by the same percentage. Luckily, you can restore this destroyed MAX HP by healing your Champions while the Sand Devil is asleep, so bringing decent healers is essential to winning this fight.
Al-Naemeh's first skill, Rage of the Sands, places a Decrease SPD and a Decrease ACC debuff on all Champions, reducing your ability to place the debuffs needed to conquer the Sand Devil. Therefore, you want to raise your Champions' Resistance stats to resist the Decrease ACC buff placed by the Boss, and also ensure you have high enough Accuracy so you can put the Sand Devil to sleep, and then apply the debuffs needed to reduce his innate damage reduction.
Applying multiple debuffs to the Sand Devil not only reduces his defense, but it blunts the power of his second skill, Dune Tempest. This skill cleanses Al-Naemeh of all debuffs, heals him proportional to the total amount of destroyed MAX HP on your team, and then attacks you. Stacking multiple debuffs is key to surviving this attack, as it deals less damage for every debuff that the Sand Devil removes from himself.
Finally, his third skill, Feasting Swarm, is devastating if you aren't prepared for it. It completely ignores 100% of your Champions' DEF, along with Shield, Block Damage, and Unkillable buffs. This skill will most likely wipe out your entire party, so bringing a Champion who can apply Revive on Death buffs will be key to surviving this hungering locust cloud. Al-Naemeh will go to sleep after using this skill, giving anyone who survived time to regroup. If you put him to sleep again while this skill is on cooldown, you'll increase its current cooldown by 1 turn. So if you can keep putting Al-Naemeh to sleep, you can stave off this cruel attack long enough to put the Sand Devil to sleep for good.
Akumori the Phantom Shogun
Magic, Champion Proving Grounds, Phantom Shogun's Grove
How to beat Akumori the Phantom Shogun (9 steps)
How to beat Akumori the Phantom Shogun
Akumori the Phantom Shogun's skills are centered on incapacitating your team through the use of the powerful Enfeeble debuff, applied via strong single-target attacks. As a debuff, Enfeeble makes it so enemies only land Weak Hits, unless otherwise specified by their individual skills. He'll focus on disabling your Champion with the highest C. DMG (prioritizing Champions not under Stone Skin buffs), as well as increasing his Shade counter to boost his offensive and defensive capabilities.
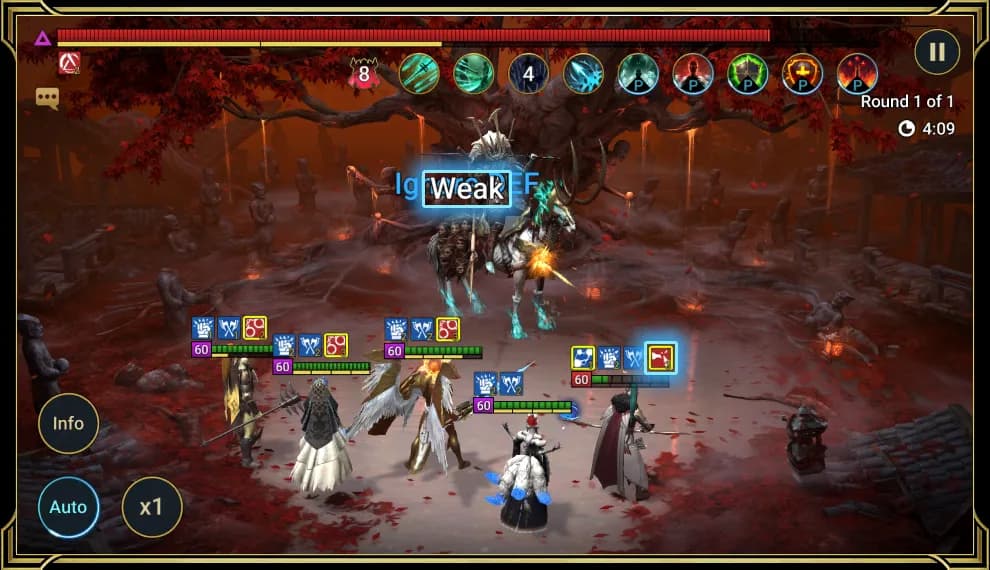
Managing the Shade counter is the crux of the fight with Akumori. Landing a Weak Hit increases the Phantom Shogun's Shade counter by 2 stacks on Stages 1-10, 4 stacks on Stages 11-20, and 6 stacks on Stages 21-25, with each individual stack raising his C. RATE by 1% and C. DMG by 2%, up to a maximum of 100% for both.

Increasing the Shade counter also grants Akumori additional bonuses, like ignoring DEF and immunity to damage from Poison, HP Burn, and Smite debuffs. If the Shade counter reaches over 40 stacks, Akumori will also completely ignore damage from skills or Masteries that scale based on his MAX HP.
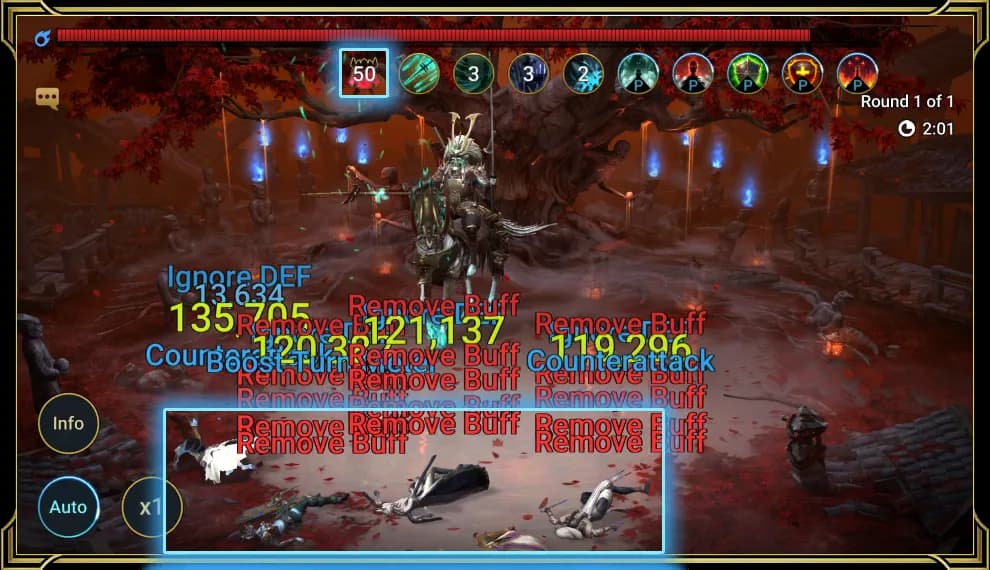
Akumori prefers to fight in single combat, with most of his skills focusing on one target. His default skill, Spectral Lunge, can become an AoE attack if you have any Enfeeble debuffs on your other Champions. The Phantom Shogun will also automatically attack all enemies every time he kills a target. This will be fatal for your team if the Shade counter reaches 50 stacks, as he'll ignore 100% of your Champion's DEF, almost guaranteeing a defeat with this strike.

To defeat Akumori, you will need Awakened Champions. Not only do they possess strong bonuses, but having them on your team is also the only way to reduce the Shade counter. Awakened Champions will decrease the Shade counter based on their Awakening Level whenever they use a skill against Akumori. If a skill inflicts multiple hits, each subsequent hit inflicted will remove fewer stacks than the previous one.
Also, Champions who can place Taunt buffs will be incredibly helpful. The Taunt buff can draw Akumori's focus away from your frailest Champions, and to a Champion without an Enfeeble debuff. This means his second skill, Scourge Sword, won't be able to spread an existing Enfeeble debuff to the rest of your team.
Don't forget about survivability! Akumori hits hard, especially with Critical Hits, so bring Champions who can place Decrease ATK, Decrease C. RATE, and Decrease C. DMG debuffs.
A cleanser is another must-have for this fight. Akumori can place an unblockable, irresistible, and unremovable Enfeeble debuff, and he has the capability to spread it. However, the spread Enfeeble debuffs no longer have the unblockable, irresistible, and unremovable properties, meaning they can be cleansed, blocked, and resisted. The fewer Enfeeble debuffs that are placed on your Champions, the less you're contributing to Akumori's power increasing.
Finally, choose and equip your Champions effectively! Akumori can place an unblockable, irresistible, and unremovable Block Passive Skills debuff on your entire team, so don't rely on Champions with strong Passive skills. Do consider equipping your Champions with the Affinitybreaker Artifact Set, as it gives your Champions 30% C. DMG, and offers them a 50% chance to change a Weak Hit into a Critical Hit. This'll keep the Shade counter down, and allow you to hit Akumori hard.
Demon Lord (Clan Boss)
1 bossThe whole Clan wears down one Demon Lord HP pool per difficulty, and your chest depends on the damage your own team deals.
Demon Lord: 24 stages
Loading the stages...
Demon Lord
Void, Demon Lord
How to beat Demon Lord (6 steps)
How to beat Demon Lord
There are quite a few things to remember when you are assembling a team to fight the Demon Lord:

- He is immune to Freeze, Sleep, Fear, True Fear, and Stun debuffs, so there's no way to control him. - You cannot decrease the Demon Lord's SPD or deplete his Turn Meter. However, he's rather slow, so if you boost your team's SPD and Turn Meters your Champions can still get multiple hits for each of his turns. - Demon Lord reduces the damage he receives from HP Burn and Poison debuffs; however, his HP is so high that these effects are still really useful against him. - Demon Lord begins to ignore Block Damage and Unkillable buffs when he reaches turn 50. - There are no waves of enemies preceding the Demon Lord, so there is no point in selecting Champions with AoE attacks. Instead, pick Champions with multi-hits and skills that inflict damage based on the target's MAX HP.
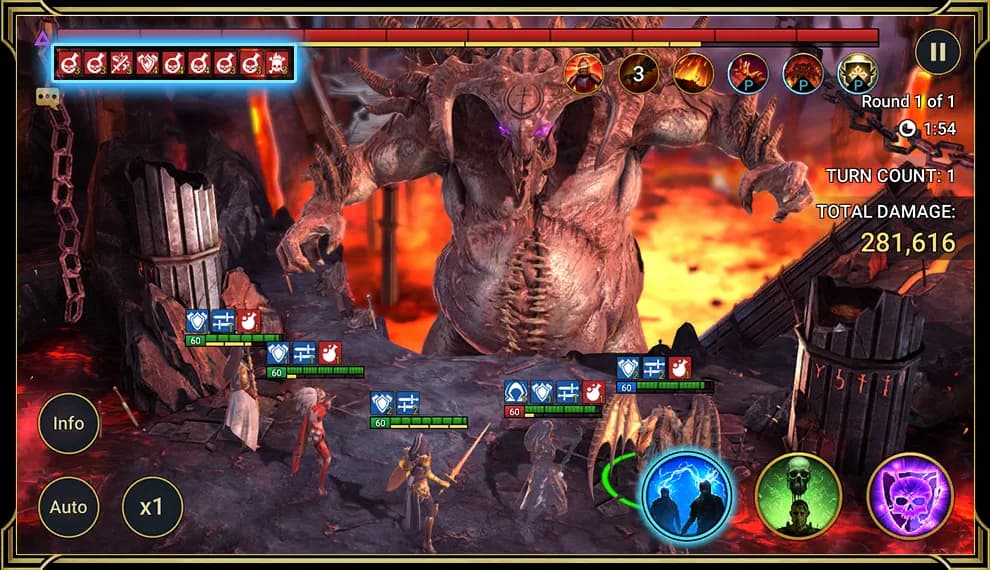
To inflict maximum damage, you will need Champions that can place Poison, HP Burn, Weaken, and Decrease DEF debuffs on the Boss, as well as Increase SPD and Counterattack buffs on their allies. In addition, you need either Warmaster or Giant Slayer Masteries on every one of your Champions, supports included, this way, even a low-damage Support Champion can get some good hits in.
It is also important to boost your team's longevity: the longer your Champions stay alive, the more damage they can inflict. To do this, you need debuffs like Decrease ATK and Leech, and buffs like Increase DEF, Revive On Death, Ally Protection, and Block Damage. It's worth noting that Warmaster and Giant Slayer combo really well with Leech, able to effectively heal your Champions even if they normally deal very little damage. If you have trouble keeping Leech on the Demon Lord, though, you can also use Lifesteal Artifacts the same way.
You should also remember the following:
- There cannot be more than 10 debuffs on the Demon Lord at the same time, so don't go overboard with Poisoners or they'll push out the Champions trying to place Leech, Decrease DEF, or Decrease ATK. - Always try to get the highest-level Chest you possibly can with your Boss Keys. This might sometimes mean fighting a Demon Lord that's lower level than you can normally handle, the final chest a Demon Lord can grant you is always better than the first chest from the next higher difficulty.
Hydra
6 bossesEach Hydra rotation fields four of its six heads, at four difficulties.
Hydra rotation 1: 4 stages
Loading the stages...
Hydra rotation 2: 4 stages
Loading the stages...
Hydra rotation 3: 4 stages
Loading the stages...
Hydra rotation 4: 4 stages
Loading the stages...
Hydra rotation 5: 4 stages
Loading the stages...
Hydra rotation 6: 4 stages
Loading the stages...

Head of Decay
Force, Hydra rotation 1, Hydra rotation 3, Hydra rotation 4, Hydra rotation 5 and 1 more

Head of Torment
Magic, Hydra rotation 1, Hydra rotation 2, Hydra rotation 6

Head of Suffering
Spirit, Hydra rotation 1, Hydra rotation 3, Hydra rotation 5

Head of Mischief
Spirit, Hydra rotation 1, Hydra rotation 2, Hydra rotation 4, Hydra rotation 5 and 1 more
Head of Blight
Force, Hydra rotation 2, Hydra rotation 3, Hydra rotation 4, Hydra rotation 5

Head of Wrath
Magic, Hydra rotation 2, Hydra rotation 3, Hydra rotation 4, Hydra rotation 6
Chimera
1 bossThe Chimera changes form during the fight, and each rotation brings it back at six difficulties.
Chimera rotation 1: 6 stages
Loading the stages...
Chimera rotation 2: 6 stages
Loading the stages...
Chimera rotation 3: 6 stages
Loading the stages...
Chimera rotation 4: 6 stages
Loading the stages...

Chimera
Void, Chimera rotation 1, Chimera rotation 2, Chimera rotation 3, Chimera rotation 4
How to beat Chimera (19 steps)
How to beat Chimera
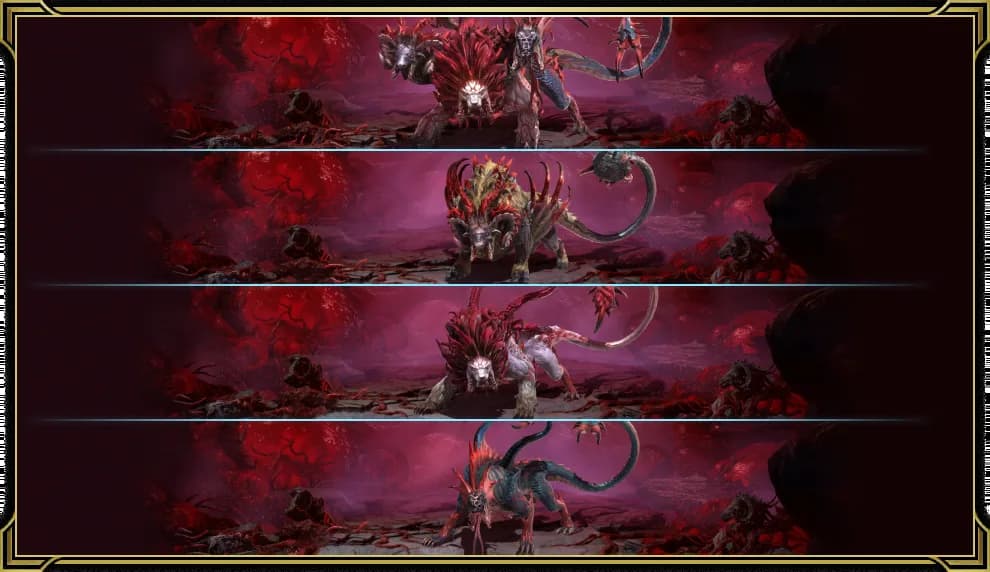
The Chimera is no simple foe, it's a mighty monster of mythical proportions with 4 Forms to contend with! Its Ram, Lion, Viper, and Ultimate Forms all have unique skills, so building a well-balanced team to defeat this titanic enemy is paramount. You'll also be able to complete Trials during your fight with the Chimera, such as dealing certain amounts of damage with debuffs or reviving a certain number of allies. Completing these Trials will earn you powerful rewards, but also make the Chimera's Ultimate Form much stronger in battle, so beware! It's also important to remember that all Forms have similarities that you'll need to bear in mind: - All Forms have the standard Boss immunities, with some specific exceptions. For example, the Ram Form is vulnerable to Fear and True Fear debuffs, while the Viper Form is vulnerable to Block Active Skills debuffs. - The Chimera's Turn Meter cannot be decreased, but all Forms are susceptible to Decrease SPD debuffs. - Each Form receives reduced damage from skills that scale based on enemy MAX HP, as well as Poison and HP Burn debuffs, the Warmaster and Giant Slayer Masteries, and Smite debuffs. However, the Lion Form receives 5 times more damage from Reflect Damage buffs, Pain Link debuffs, and Reflect Damage effects. - The Chimera will also change Affinities on each rotation. The Ram, Lion, and Viper Forms will all have the same Affinity, and the Ultimate Form will have a different Affinity. - The Chimera transforms into a different Form every 5 turns, with all buffs and debuffs being removed from it when it transforms.
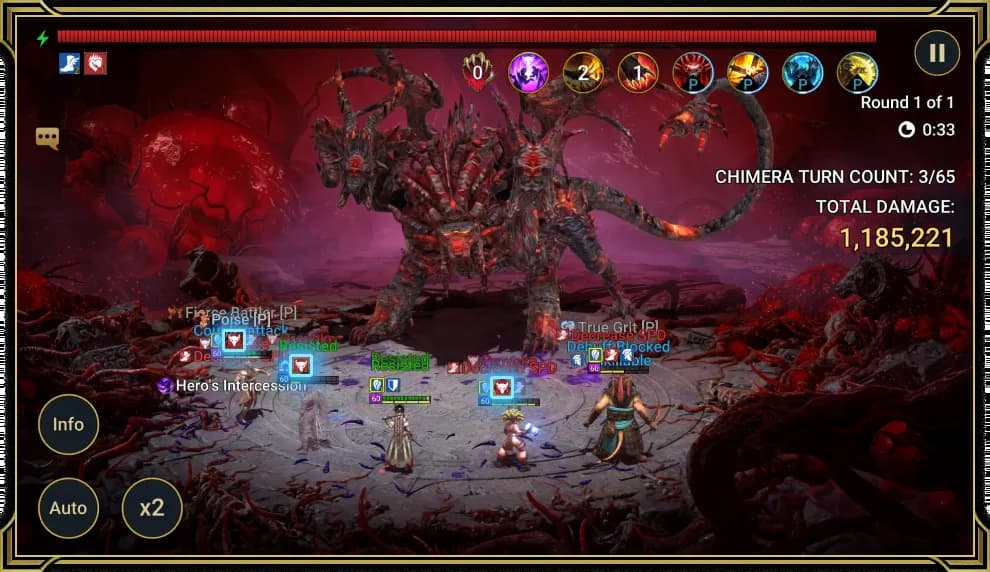
Ultimate Form The beast in all its monstrous glory, the Chimera's Ultimate Form lives up to its name. Its Baleful Torrent skill will attack all enemies, and can place a Provoke debuff, with its duration increased against Champions with less than 50% HP. The Chimera will also place a team-wide Decrease SPD debuff on your team, so be sure to bring a healer with high RES and the ability to remove debuffs, or someone who can place Block Debuffs buffs.
The Ultimate Form's Pincer Lash skill also attacks your whole team, placing an Increase SPD buff on itself. The skill's damage will also increase by 10% for each debuff on the Chimera. Avoid using plenty of debuffs, and focus on just using Decrease ATK, Decrease C. RATE, Decrease C. DMG debuffs to help negate the incoming damage.
The third and final active skill of the Chimera's Ultimate Form will remove all buffs from your team before it attacks, and increase the damage done by 10% for each buff removed. There's a couple things you can try and do here, place a Decrease ACC debuff on the Chimera, place Increase RES buffs on your team, or make sure your Champions are in Protection Gear to place protected buffs that can't be removed.
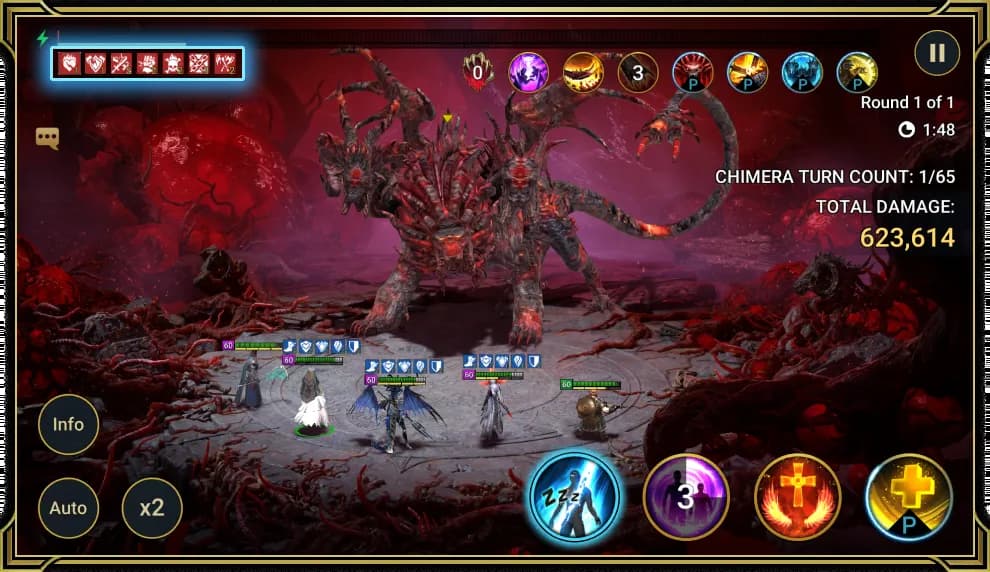
The Ultimate Form's passive skills are just as terrifying. Transfixing Presence P will reduce the amount of damage the Chimera receives by 10% for each enemy with no active buffs, and also receive 50% less damage from enemies under Provoke debuffs. Champions who can remove debuffs and place buffs are vital here, ensuring the rest of your team can hit the Chimera as hard as possible. The Chimera's final, unique passive skill in its Ultimate Form sees it evolving during the fight, becoming more dangerous and resilient with each in-battle Trial you complete. The Chimera's Ultimate Form will start increasing its own ATK, C. DMG, and C. RATE, as well as ignoring your Champion's DEF and valuable buffs such as Unkillable and Block Damage.

Ram Form In its Ram Form, the Chimera will blunt your attacks and carve open your defenses by placing plenty of Stun debuffs, and replacing your buffs with debuffs. Most notably though, the Ram Form introduces the Duel effect to the battle. With it, the Chimera will challenge the enemy with the lowest C. DMG to a 1v1 battle, placing a Duel bar on the Chimera that is equal to 0.5% of its MAX HP. Once that bar is depleted, or the targeted Champion is killed, the Duel effect will be removed. However, Champions not under the Duel effect will deal 50% less damage to the Chimera while it is active. However, the Ram Form is susceptible to Fear and True Fear debuffs. The damage reduction from the Duel effect can be negated by those Fear and True Fear debuffs, so bring a Champion to scare the Ram Form away from charging at your team.

The Ram Form's first skill, Monstrous Stomp, will attack 2 times at random, prioritizing the target under the Duel effect first. It'll reduce a target's Turn Meter, and place a Stun debuff if the target's Turn Meter is below 50%. The Chimera also gets an Extra Turn if the Stun debuff is placed, so use Block Debuffs buffs and Intercept stacks to stop its rampage. The Hammertail Quake skill first attacks one target, then attacks everyone else. The more HP the initial target loses, the more damage the Chimera will do with its subsequent attack. It'll then attempt to place a Stun debuff on everyone except the initial target. If that gets resisted or blocked, everyone except the initial target loses 50% Turn Meter. That's not all though, the Chimera will also remove any Block Debuffs buffs from your entire team, and place Decrease C. RATE, Decrease C. DMG, and Decrease SPD debuffs on your whole team too. High RES stats are crucial here, don't let the Ram Form slow you down!

The Chimera's third skill in Ram Form, Maiming Stampede, will attack a single enemy after replacing all of the target's buffs with their mirrored debuff equivalent. Replacing them increases the attack's damage, and if the attack deals more than 20% of the target's MAX HP, the Chimera will repeat the attack. It'll keep repeating the attack if it keeps dealing more than 20% of the target's MAX HP, so don't let it build up a head of steam. In order to avoid this, place debuffs on the Chimera to reduce its damage and place protected buffs on your Champions to prevent them from being turned into debuffs.
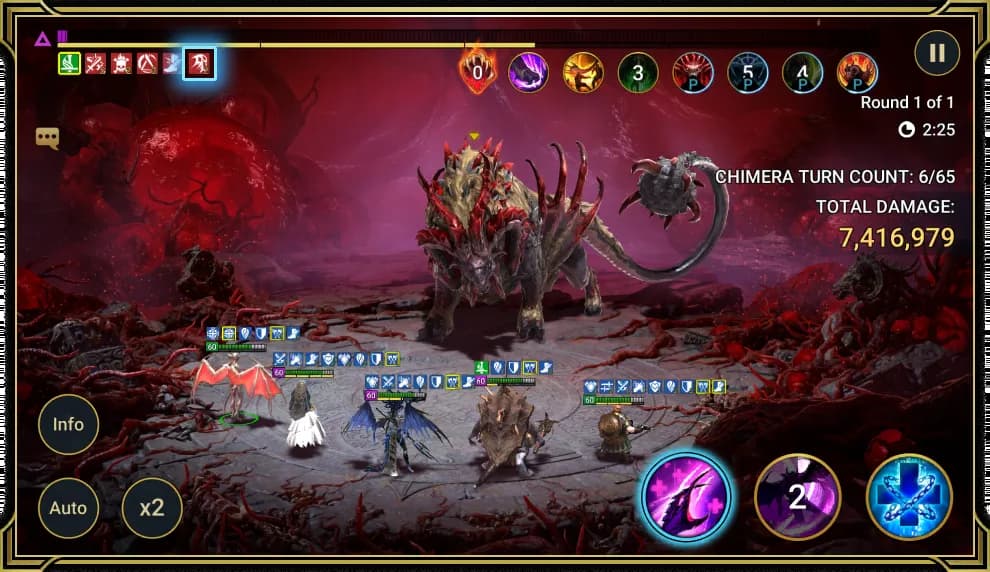
Finally, the Ram Form's passive allows it to reflect a quarter of the damage it receives back to the attacker, unless they're under the Duel effect. However, this is where your Fear and True Fear debuffs are going to come in really handy. If the Ram Form is under a Fear debuff, it'll only reflect 10% of the damage received. If it's under a True Fear debuff, it won't reflect any damage back at all! You may want to think twice about goading this great beast too, it'll ignore 50% Defense when attacking targets under Taunt, Veil or Perfect Veil buffs. The Chimera can also reflect debuffs back to a producer, so think carefully about who you want to place debuffs on it when it first transforms into the Ram Form.
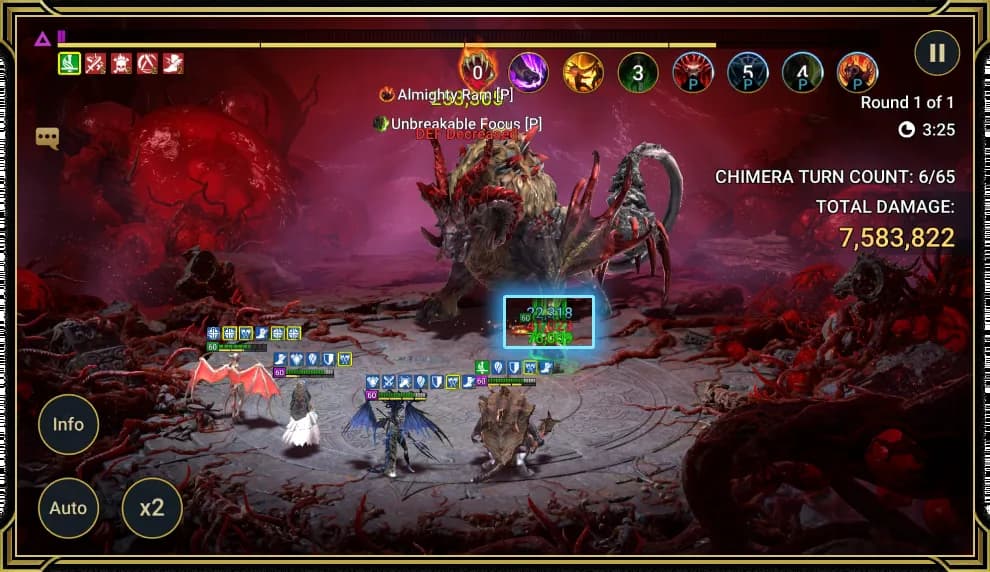
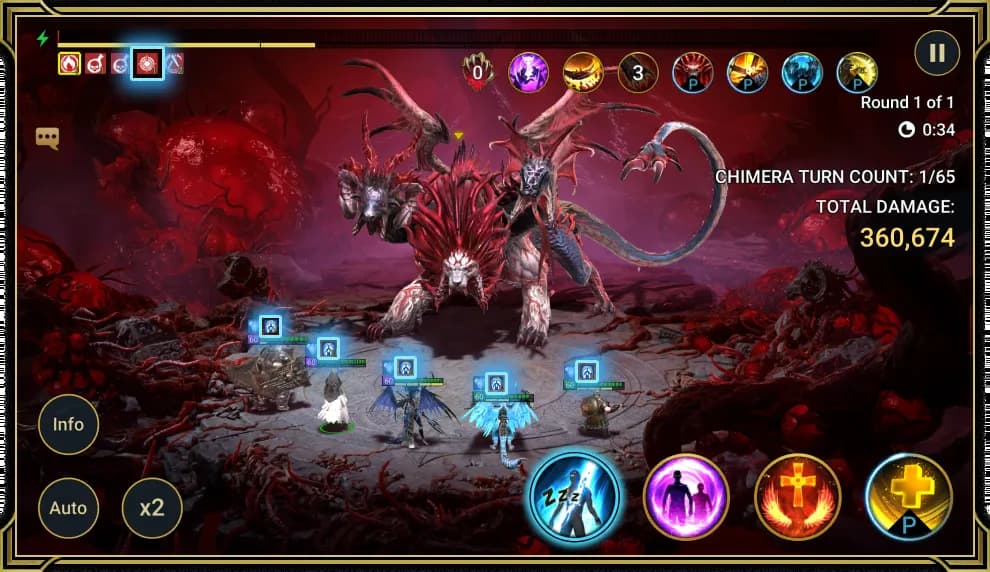
Lion Form Arguably the Chimera's most aggressive Form, the Lion stalks its prey with the new Hunter's Gaze debuff, ensuring any damage dealt cannot be decreased, blocked, redirected, or transferred. Buffs such as Unkillable, Block Damage, and even Shield won't work here either. Your only hope is to have another Champion standing by with a Taunt buff handy. Being vicious has its downfalls though. The Lion Form will receive 5 times more damage from Reflect Damage buffs, Pain Link debuffs, and Reflect Damage effects, so ensure your team can turn the Lion Form's damage against itself.
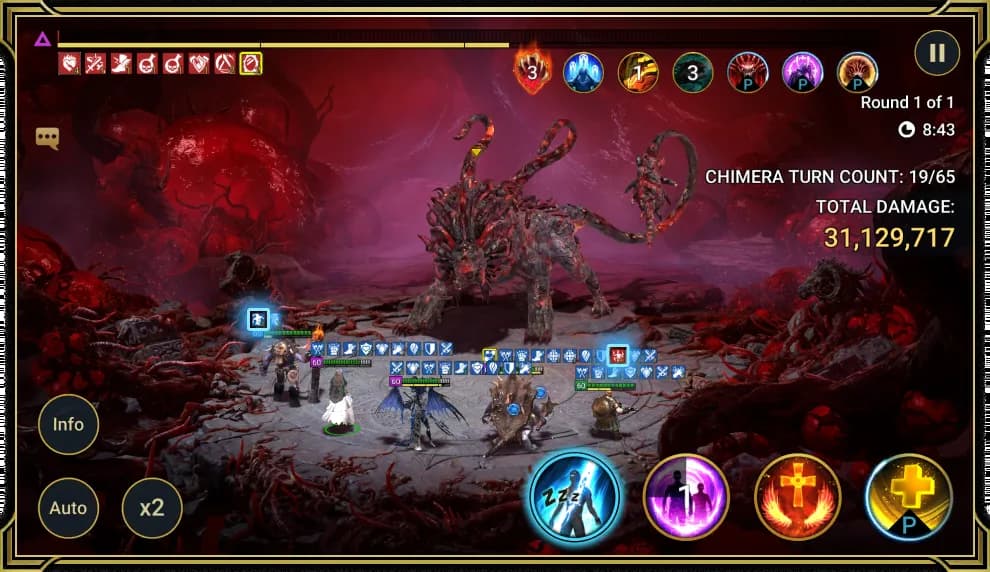
The Lion Form's first skill, Annihilation Claw, attacks 1 enemy 2 times with a 50% chance to place a True Fear debuff on each hit. The Chimera will then attempt to attack all other enemies on your team in a random order, but the chance to successfully attack them decreases by 20% for each subsequent target. So, the Chimera will have an 80% chance to hit the second enemy, 60% to hit the third enemy, and so on. Each enemy successfully hit will receive 10% less damage than the previous enemy. Damage reducing debuffs and defensive buffs are your best friend here.
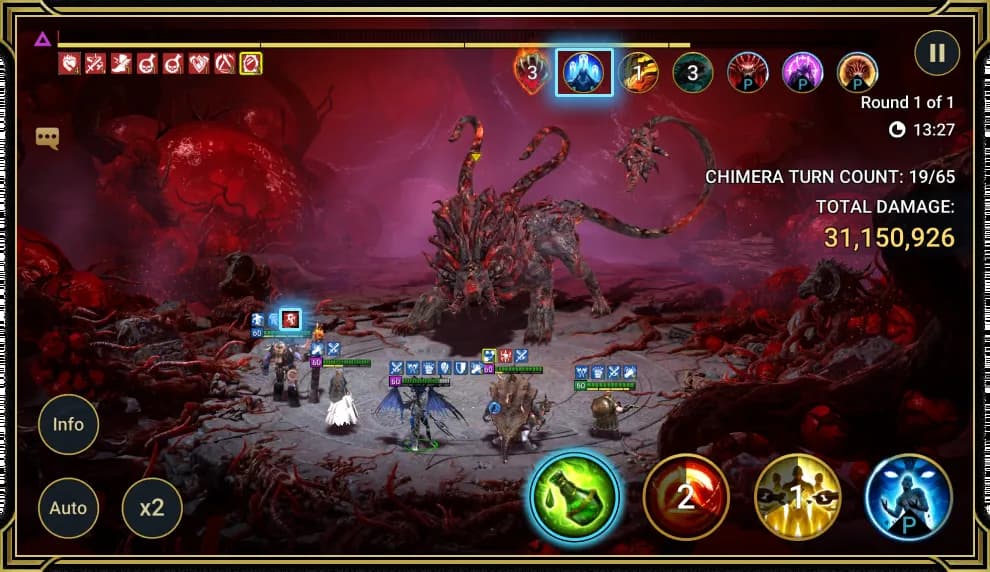
The Shred Reality skill will place Decrease DEF and Weaken debuffs on a single target, before attempting to spread them to all other enemies. The initial placement will pierce any Block Debuffs buffs, but the spread can be blocked.
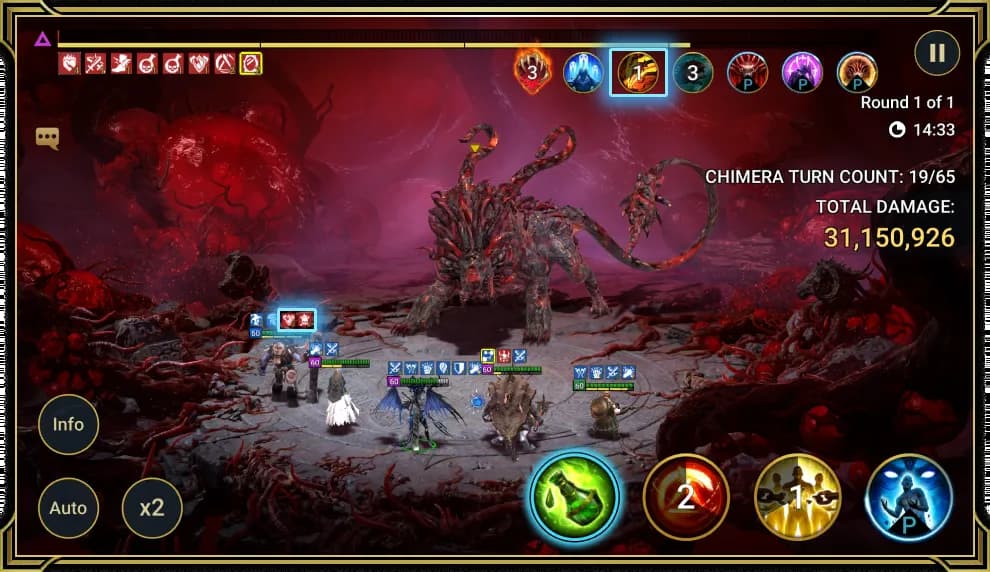
Its third skill is Atomizing Roar, and is another devastating strike. Before attacking, the Chimera will remove any Decrease ATK, Decrease C. DMG, and Decrease C. RATE debuffs. The attack will then ignore 50% of the target's DEF, plus an additional 10% per each debuff removed. If it kills the target, the Chimera gets an Extra Turn and if it doesn't, the Chimera will attack all other targets, dealing 50% of the initial attack's damage and ignoring 100% of each target's DEF. The Lion Form's unique passive is just as deadly. Predator's Feast P will activate Annihilation Claw each time a Hunter's Gaze debuff is removed. So instead of removing debuffs, focus on placing defensive buffs such as Strengthen, Increase DEF and Ally Protection.

Viper Form Finally, we have the Viper Form and as its name suggests, it is the most noxious. It places plenty of Poison debuffs, and stacks of a new debuff, Necrosis. Necrosis turns your own dead Champions against you, dealing damage at the start of each turn depending on how many dead allies you have. The solution is simple, bring Champions that can revive your fallen friends. But it wouldn't be a Clan Boss if it was that simple though. The Viper Form's passive, Enemy of Mortality P, will deny 1 enemy revive attempt. If you're reviving multiple Champions, it'll deny one random revival, so chances are you're still taking damage from at least one Necrosis stack.

While the Chimera's Viper Form may be venomous, there is an antidote available, it is susceptible to Block Active Skills debuffs. You can vastly reduce the effectiveness of its poisonous attacks and see your team safely through this part of the fight.
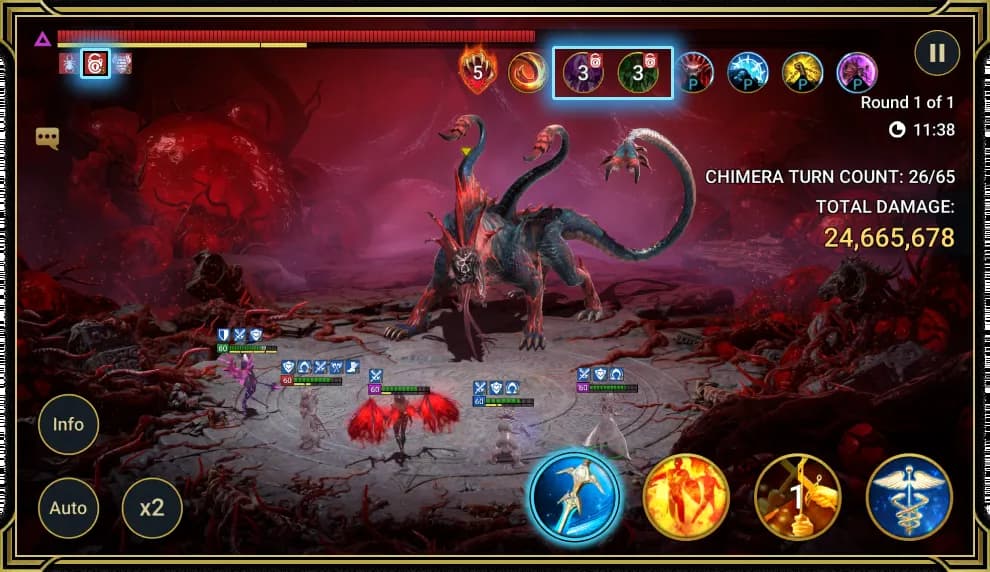
The Viper Form's first skill is Putrid Fang, and it'll attack all enemies with a 50% chance to place one random crowd control debuff, except for Sheep. If it kills the initial target, or if a Champion on your team is already dead, it'll repeat this attack once, so ensure your whole team is alive and standing ready with defensive buffs.

Stinger Cyclone will place Hex and Heal Reduction debuffs on your whole team before attacking them all once. It'll also instantly activate any Poison debuffs on your Champions, and then transfer any debuffs on the Chimera to enemies under Hex and Heal Reduction debuffs. As if that weren't bad enough, the Chimera will also increase its Turn Meter by 5% for each debuff transferred. You're going to need very high RES to stand against this onslaught of debuffs.

The Chimera's third skill in its Viper Form is Haze of Pestilence. With it, the Chimera will steal all of your buffs, except Continuous Heal, so bring someone in Protection Gear to help prevent your buffs being stolen. Having cleared the way, the Chimera will then place three 5% Poison debuffs and a 25% Poison Sensitivity debuff. You'll need a Champion that can place either a Decrease ACC debuff on the Chimera or Increase RES buffs on your team.

Not content to simply place Necrosis stacks on your team when your Champions are killed, the Chimera's Viper Form will also make reviving your Champions less effective too. Revived Champions will return to the battlefield with 25% less HP and 25% less Turn Meter, so bring Champions that are capable of healing and increasing Turn Meter to get your team back in the fight quickly. Note that completing Trials will grant bonus stats and effects that only affect the Chimera's Ultimate Form. Check the table below for more details:
Doom Tower
8 bossesDoom Tower has 120 floors per rotation with a boss on every tenth floor and Secret Rooms between them, on Normal and Hard.
Frost Spider (Normal): 132 stages
Loading the stages...
Frost Spider (Hard): 132 stages
Loading the stages...
Eternal Dragon (Normal): 132 stages
Loading the stages...
Eternal Dragon (Hard): 132 stages
Loading the stages...
Dark Fae (Normal): 132 stages
Loading the stages...
Dark Fae (Hard): 132 stages
Loading the stages...

Kuldath
Magic, Cobblemarket, Deadrise, Eternal Dragon, Frost Spider
How to beat Kuldath (3 steps)
How to beat Kuldath
Kuldath is extremely deadly, able to use Hex debuffs to ignore your Champion's DEF and tear through your team. If you let him, that is, Kuldath the Magma Dragon isn't immune to Provoke debuffs. Bring your toughest Provoke Champions and he'll forget all of his other powers. If you don't have any Provoke Champions that are tough enough, you can equip a Champion with a Provoke Artifact Set to get the job done.
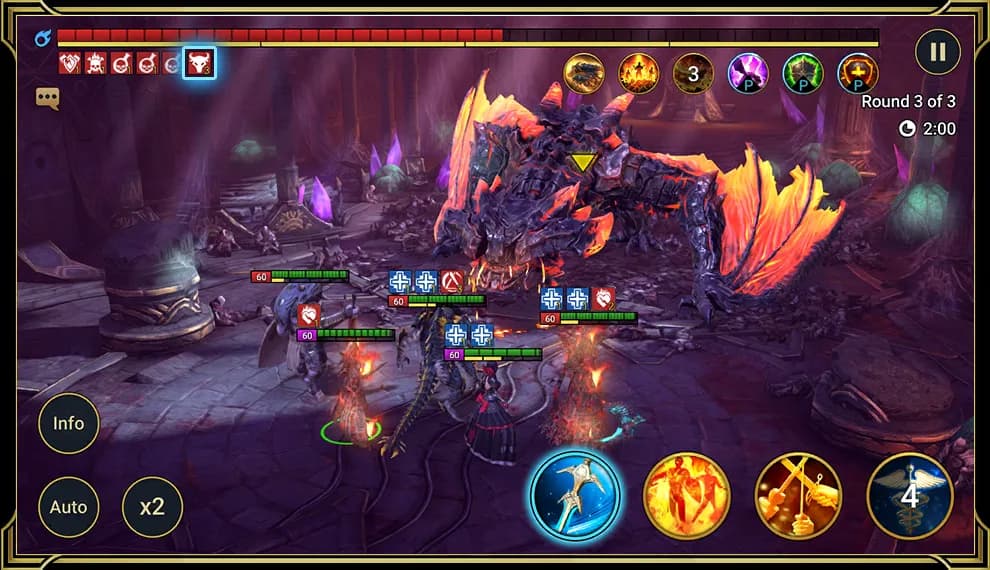
Make sure you don't bring any Champions that place HP Burn debuffs, as Kuldath can heal himself by replacing the HP Burns with Continuous Heal buffs.
As always, Champions with Decrease DEF/Decrease ATK will be of great help to make Kuldath more vulnerable to your attacks and weaken his hits. It's also worth bringing a Champion or two that can heal a single target, increase DEF, or spread the damage around with Ally Protection, as your Provoke Champion will need help to keep taking those massive hits at higher Stages.
Agreth
Spirit, Cobblemarket, Eternal Dragon, Frost Spider, Plagueholme and 1 more
How to beat Agreth (3 steps)
How to beat Agreth
Agreth is an interesting challenge, as she thoroughly punishes AoE teams. Spiderling counterattacks will heal Agreth far faster than most teams can hurt her, not to mention the Poison they can stack up on your team. There is also a risk to bringing Champions that reduce Turn Meters, but with enough protection and healing, the risk is worth it.
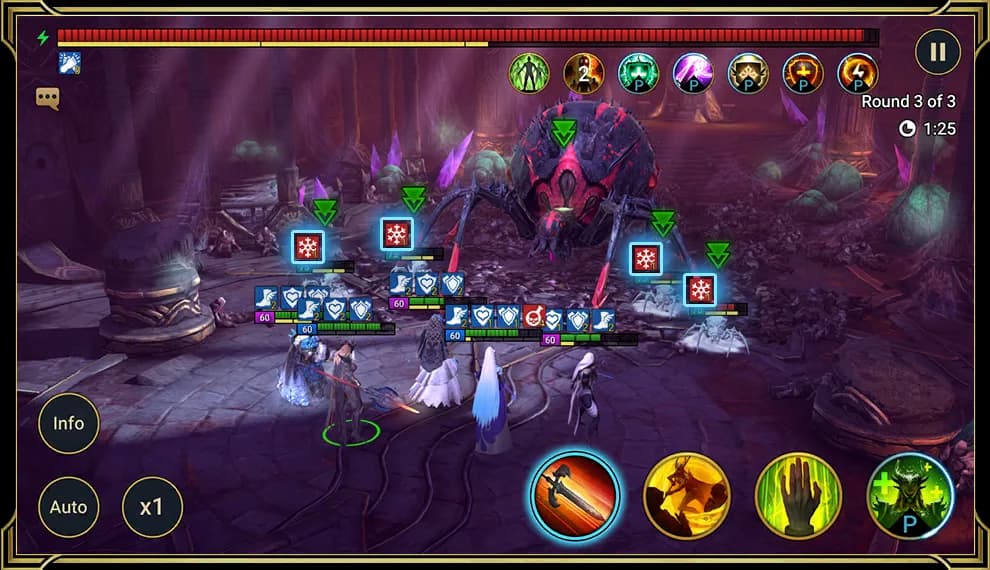
It's crucial to make sure that Spiderlings never counterattack or get a turn, so bringing Champions with AOE Stuns or Freezes will help you to defeat the Boss.
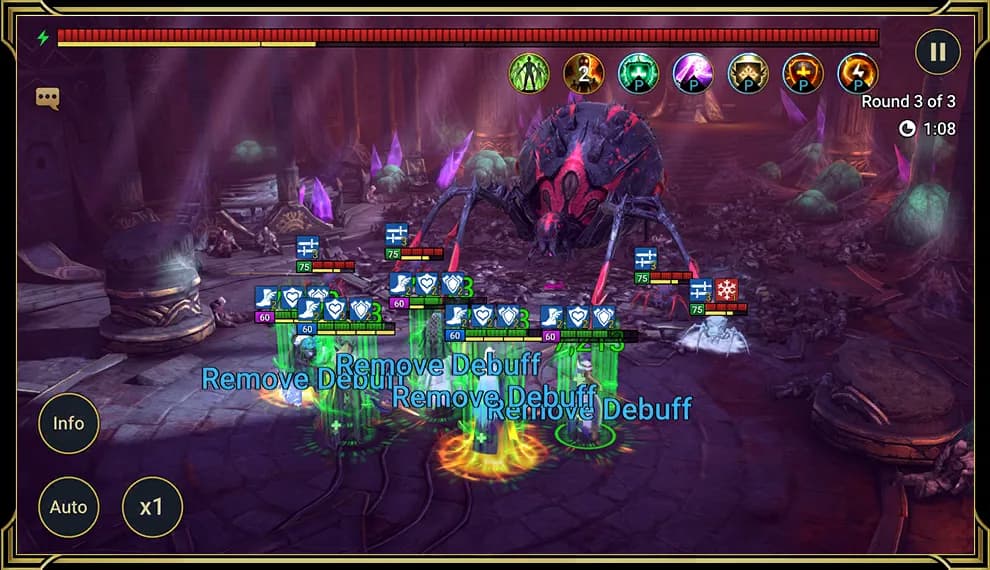
Last but not least, you will need to remove Poison from your team. These debuffs can't be blocked or resisted, so the only way to deal with them is to remove them, and quickly, the Nether Spider will spit them back as direct damage every time she gets a turn, so waiting them out isn't an option. However, they only deal damage, so powerful healing can counteract the effects if you can't remove debuffs fast enough.
Borgoth
Force, Champion Proving Grounds, Dark Fae, Deadrise, Frost Spider and 1 more
How to beat Borgoth (4 steps)
How to beat Borgoth
Borgoth has three major dangers: if any Champion doesn't have Shields and they attack, the whole team can get into a Provoke spiral you can never recover from. If your team has too many Buffs and not enough DEF, Borgoth will use his Vile Absorption skill to strip everything and wreck your team, almost certainly leading to another Provoke spiral. And third, he basically ignores any damage you deal to him until you destroy his MAX HP and break his damage shield.

The Scarab King requires extremely specific teams of Champions to overcome. To deal with the Provoke spirals, you need high-SPD Champions that can put up Shield buffs on short cooldowns, preferably more than one. It only takes a single unshielded attack to wipe most teams, so every Champion has to have a Shield at all times. Champions that can extend allied buff durations can help with this, as can any Champions that give themselves Shields every time they attack. You can also make use of the Shield Artifact Set to give your Champions time to use their Shield skills at the start of the battle.
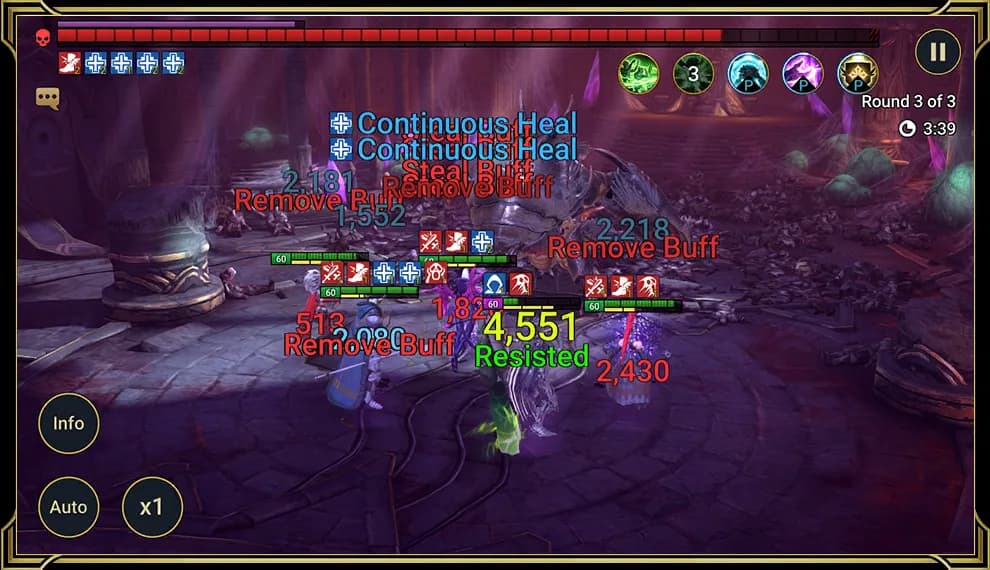
As for dealing with the Scarab King's Vile Absorption skill, limiting the types of buffs placed on your team can be a real asset, only bring the buffs you're sure to need. Beyond that, though, high DEF can help your Shields survive the onslaught.

Lastly, you will not be able to defeat Borgoth without Champions that can destroy MAX HP. While there aren't many Champions that can do this inherently, a Champion with a Destroy Artifact Set will be able to do the job.

Sorath
Void, Cobblemarket, Frost Spider, Plagueholme, Soulcross
How to beat Sorath (5 steps)
How to beat Sorath
When fighting Sorath, first you will need to focus on wiping out the Spiderlings as they will definitely make your fight more difficult. But, once they're taken care of, you have just one last priority: HP Burn.
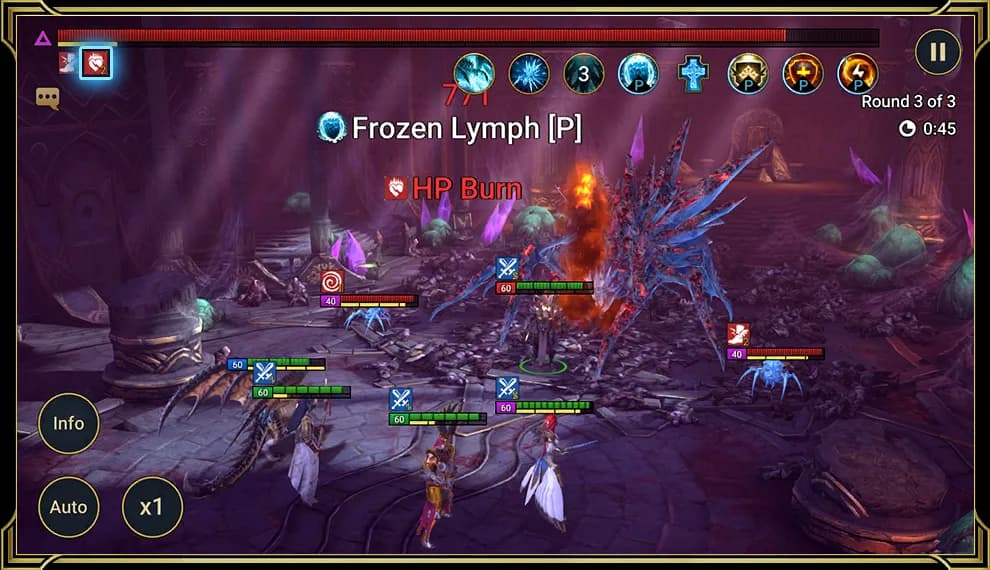
Sorath can Freeze your whole team every three turns, and can put out crippling debuffs on Frozen Champions. But, while she's under an HP Burn debuff, her RES goes down and the chance to place the Freeze on her Absolute Zero skill goes from 100% down to 50%. You can try and overcome all her debuffs with RES, but there are no guarantees.

Worst of all, if killed while not burning, Sorath just pops back up again, all her skills off cooldown. The only other way to beat her for good is to block her revive, but that's a far less reliable (not to mention less accessible) solution.
To help make sure your HP Burn debuffs stay up as long as possible, you can try depleting Sorath's Turn Meter and placing the Decrease SPD debuff on her. But remember to pack in high Accuracy, as her DEF and RES will be incredibly high before that HP Burn gets placed. Champions with an Increase ACC Aura will be of great help here.
Finally, you can opt for Champions whose attacks depend on the enemy's MAX HP. Such powerful hits will help you destroy the Frost Spider's health much faster, not to mention her minions.
Grythion
Spirit, Champion Proving Grounds, Dark Fae, Deadrise, Eternal Dragon
How to beat Grythion (6 steps)
How to beat Grythion
Grythion is no easy fight. Many of his abilities combine to be able to counter or deconstruct almost any team, and it may require you to use manual control to achieve victory.
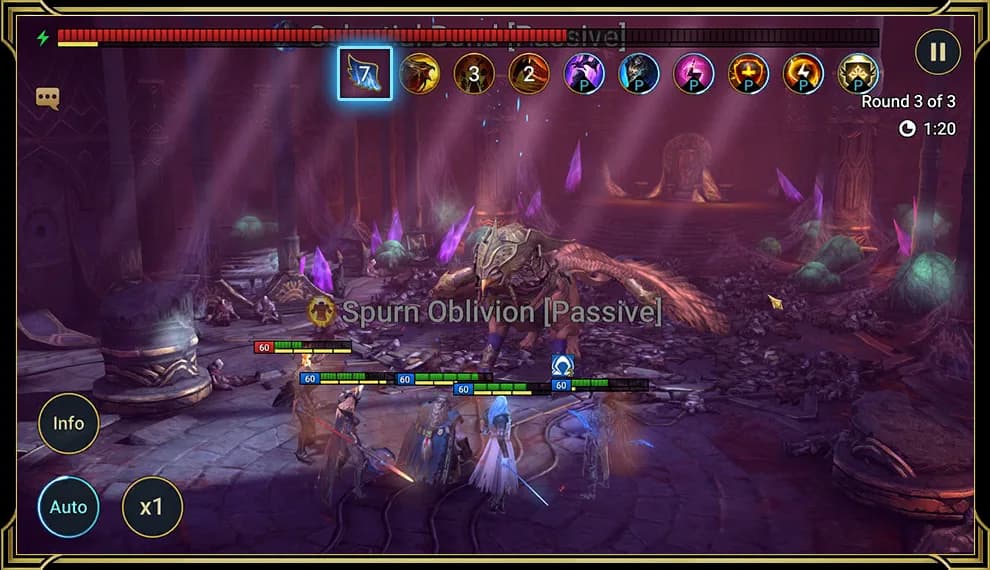
Your primary enemy, other than Grythion, is the Sky Bond. In this battle, it's very easy to end up on a ticking clock, as the Sky Bond offers the Celestial Griffin huge bonuses to SPD and damage.

Tracking the boss' cooldown timers is critical to success. He is incredibly good at manipulating buffs and debuffs to his advantage, either he removes debuffs to fill his turn meter, or he removes your buffs to deal damage, enough damage to kill even very powerful teams, especially when combined with Divine Strike.
One major thing to avoid is using any Turn Meter fill and reduction skills. Grythion will reduce all Turn Meter Reduction effects by 50%, but that's no different from any other Doom Tower boss. No, the issue is that Grythion will mirror all Turn Meter Reduction effects, so, reduce his turn meter by 50%, and he'll reduce the turn meters of your entire team by 50%. Increase your team's Turn Meters by 15%, and Grythion will increase his Turn Meter by 75%, 15% for each Champion on your team. The effect can be resisted, however, so if you want to try and use Turn Meter reduction to control Grythion, be sure to pack plenty of RES. Needless to say, leave Champions that increased friendly Turn Meters off your team.
You will need strong healing to keep your Champions above 50% HP, as he can destroy a target extremely quickly once they dip below that threshold. You'll also want good debuff removal to counteract anything Grythion puts out.
Ultimately, you'll need a team that can function without buffs, Champions that destroy HP and ignore DEF will be critical, as you can't rely on debuffs to make Grythion vulnerable without giving him the opportunity to turn the tables. Same goes for RES, you can't use buffs to stop everything Grythion dishes out.

Iragoth
Void, Cobblemarket, Deadrise, Eternal Dragon, Plagueholme
How to beat Iragoth (3 steps)
How to beat Iragoth
Several strategies can help you defeat Iragoth. For example, the Eternal Dragon is one of the few bosses that can be affected by attacks that increase cooldowns, and that can be used to delay her more dangerous skills. This will help keep you alive, but it's also critical to deal with her minions whenever they are summoned, as they can easily allow Iragoth to overwhelm your healing or heal herself.

Alternatively, if you don't want to (or can't) go for an Increase Cooldown strategy, you can also use Artifacts to build a team with high enough RES to shrug off Iragoth's debuffs and cooldown increases. However, the minions should still be your priority.
Finally, you can opt for Champions with low cooldowns to decrease the damage Iragoth inflicts with her Spirit Rush skill. Minions should not be forgotten here, either.
Bommal
Force, Champion Proving Grounds, Cobblemarket, Dark Fae, Deadrise
How to beat Bommal (6 steps)
How to beat Bommal
Bommal is a powerful Boss with impressive ACC that allows him to shower his enemies with Bombs. These Bombs cannot be removed or blocked, and the only thing that can save your team is high RES. You're going to want to get your team's Resistance as high as possible, using whatever means you've got available.

Aside from all the bombing, Bommal also sets your team on fire, and the HP Burn damage scales up based on the number of Bombs you've got on you. If that sounds manageable, keep in mind that he'll be dropping a lot of Bombs, he throws them out on your whole team every time you place a debuff on him.

Now, Bombs are Bommal's weapon of choice, but they're also the chink in his armor. He also receives massive bonus damage from Bombs.
Bommal the Dreadhorn also has his minions, Dreadbombs. They are very slow and may seem like they're not a threat. However, at the start of their turn, they self-destruct, dealing incredible damage to your team. Neither Shields nor DEF will help against it, you can only reduce the damage by placing a Freeze debuff on the Dreadbomb. Alternatively, if you can get it, you can use a Block Damage buff to prevent the blast from even scratching you.
Dreadbombs may be slow, but they're immune to all effects except Freeze and HP Burn, and they don't receive any damage from enemy attacks. In addition, when they take damage from HP Burn (including a HP Burn debuff on Bommal himself), they fill their Turn Meters.
To defeat this Boss you will need: - high RES - a Decrease ACC debuff on the Boss at all times - to place as few debuffs as possible - Block Damage and Unkillable buffs - Champions that can consistently Freeze the Dreadbombs

Astranyx
Void, Champion Proving Grounds, Dark Fae, Plagueholme, Soulcross
How to beat Astranyx (10 steps)
How to beat Astranyx
Astranyx the Dark Fae is a very, very unique boss, who demands extremely distinct strategies if you're going to beat her. The biggest weapon in her arsenal is the ability to steal your champions and use them against you.

At the start of the battle, she will instantly spawn a perfect replica of every living Champion on your team. These Mirror Copies are identical to your own Champions in every way, including Artifact sets, levels of Ascension, and Skill Tome upgrades. While fighting yourself is bad, Astranyx also has a team attack skill that deals bonus damage for every Mirror Copy she has out. She hits with an AoE, and all her Mirror Copies will pile onto one of your unlucky Champions. It can become a massacre.
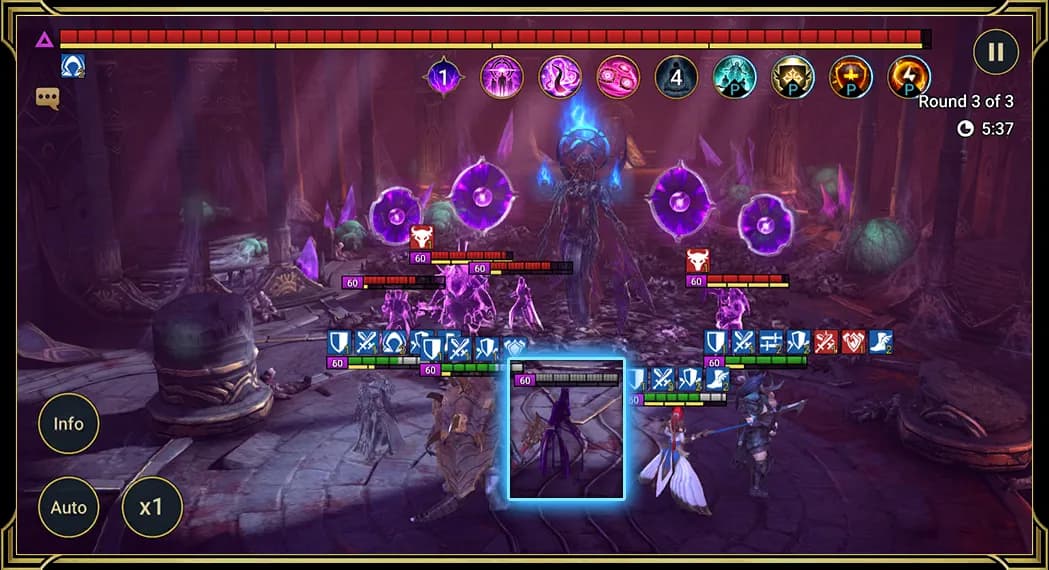
Obviously, taking out this first wave of Mirror Copies is essential. Once you're done with the initial set, though, you're not done with them. Every few turns, Astranyx will use a skill to Banish one of your Champions. Banishing is a new effect, which completely disables a Champion, they can't take turns, heal themselves, or be the target of any abilities. They're effectively removed from the Battle. If that wasn't bad enough, when the Dark Fae Banishes one of your Champions, she produces a Mirror Copy of the Banished Champion. If you want your Champion back, you need to kill their Mirror Copy.

And, in case you were thinking that you're better off leaving them, if all your Champions are Banished, you lose the battle just as much as if they had been taken out the old-fashioned way.

Worse yet, every time she Banishes a Champion, she gains a point of Dark Energy. Once Astranyx has 5 Dark Energy, she'll spawn Mirror Copies of all your living Champions, just like she did in the first round. She won't Banish anyone, but just spawning a bunch of Mirror Copies at once can be a devastating blow if you're not ready for it, especially if some of your Champions are still Banished from earlier.
Here are some specific rules about Mirror Copies: - Mirror Copies come into existence with no skills on cooldown, no matter what skills your own Champions have used. This can be a problem when you first arrive, as your team might still need time to recover from the minion wave they just beat. - Mirror Copies gain the same benefits you do from nearly every Artifact set… except Divine, Shield, or Immunity Artifact sets. You can use those sets to give yourself a little early breathing room. - Mirror Copies have EXACTLY the same Speed as your Champions, so, unless you do something to the Turn Meters, each of them will go right after the Champion they're duplicating. - Mirror Copies can revive each other. This can turn 1 Banished Champion into an entire enemy team of Mirror Copies if you're not careful. Using Block Revive will prevent this, but that strategy can be turned against you, and it won't stop Astranyx from spawning fresh Mirror Copies.
- Mirror Copies will get the bonus from your Leader's Aura skill, even if there isn't currently a Mirror Copy of your team's Leader. - Currently, active Buffs and Debuffs don't get transferred when a Mirror Copy is created. - Mirror Copies ignore any auto skill use overrides you've set using Skill Instructions. If you really know your Champions, you can use this to your advantage when trying to use Auto Battle. - There can only be 1 Mirror Copy for each Champion on your team.
The Dark Fae isn't just about Mirror Copies. She also has Dark Tendrils: a powerful attack that gets stronger depending on the Affinities of the Champions on your team. She heals herself 10% for every Spirit Champion, steals a buff for every Magic Champion, steals 10% Turn Meter from your team for every Force Champion, and places True Fear if you've got Void Champions (25% chance to start, with another 25% for every Void Champion you've got). This skill can seriously mess up your team if you're not careful.
The key to defeating Astranyx is to select a team of warriors that can handle their own Mirror Copies. Keep the following in mind: - You'll want several damage dealers that can kill your Mirror Copies before they get a turn. - Failing that, using AoE control effects like Stun or Freeze can keep the Mirror Copies from destroying you… but be cautious, as they can easily return the favor. Using Immunity Artifacts can help with that early on. - Manage your team's Affinities to make sure Astranyx doesn't hit you with effects you can't deal with, bring Heal Reduction debuffs if you plan on having any Spirit Champions, for example.
- A very high-Speed Champion with a Turn Meter Reduction skill can help your team get the drop on the enemy in the first round. - Using AoE Turn Meter Reduction skills and Increase SPD buffs can prove extremely useful for controlling Mirror Copies, especially after the first turn. While Astranyx will ignore half the Turn Meter Reduction (like all Doom Tower bosses), Mirror Copies will get the full effect. - Poison debuffs do next to nothing to Astranyx.
Cursed City
19 bossesCursed City's four districts mix bosses from the rest of the game, and Amius the Lunar Archon waits at the end.
Cobblemarket (Normal): 25 stages
Loading the stages...
Cobblemarket (Hard): 25 stages
Loading the stages...
Deadrise (Normal): 25 stages
Loading the stages...
Deadrise (Hard): 25 stages
Loading the stages...
Plagueholme (Normal): 25 stages
Loading the stages...
Plagueholme (Hard): 25 stages
Loading the stages...
Soulcross (Normal): 25 stages
Loading the stages...
Soulcross (Hard): 25 stages
Loading the stages...
Amius the Lunar Archon (Normal): 1 stage
Loading the stages...
Amius the Lunar Archon (Hard): 1 stage
Loading the stages...
Also fought here: Agreth, Bommal, Kuldath, Klyssus, Iragoth, Skavag, Hellrazor, Sorath, Tainted Skavag, Borgoth, Grythion, Fyro, Tainted Klyssus, Tainted Hellrazor, Astranyx, Tainted Fyro, Iron Twins, Al-Naemeh the Sand Devil.
Amius the Lunar Archon
Void, Amius the Lunar Archon
How to beat Amius the Lunar Archon (14 steps)
How to beat Amius the Lunar Archon
Looming over the Cursed City from high atop the Eclipse Tower, Amius the Lunar Archon is one of the toughest challenges in Raid. Similar to Mythical Champions, Amius can transform between two Forms, thanks to his special Eclipse buff, and comes with a self-revive, debuff and buff removal, and serious damage capability. You'll need to understand exactly how each Form works to ensure that you're bringing the best Champions for this fight.

In his Base Form, which can be seen when the moon is full, Amius can turn debuffs to his advantage by replacing them with their equivalent buffs using his Rampant Chaos skill. What's more, Amius' Waxing Potence skill has its damage boosted according to the number of buffs he currently has active on himself. Amius is also able to heal himself based on the damage dealt, including damage against Champions with Shield buffs, so keeping buffs off him is imperative for reducing damage.
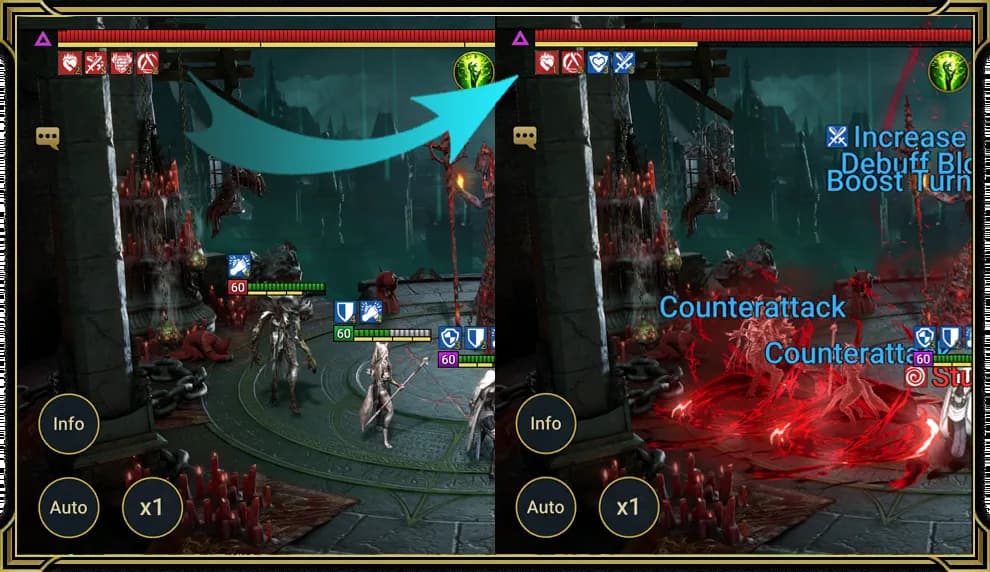
His second skill, Lunar Storm, attacks all enemies whilst also increasing the duration of all buffs and decreasing the duration of all debuffs on Amius. He'll also heal for 20% of his own MAX HP, and that heal increases by a further 5% for each buff that has its duration increased by this skill. Finally, Amius will also fill his own Turn Meter by 10% for each debuff that has its duration decreased.
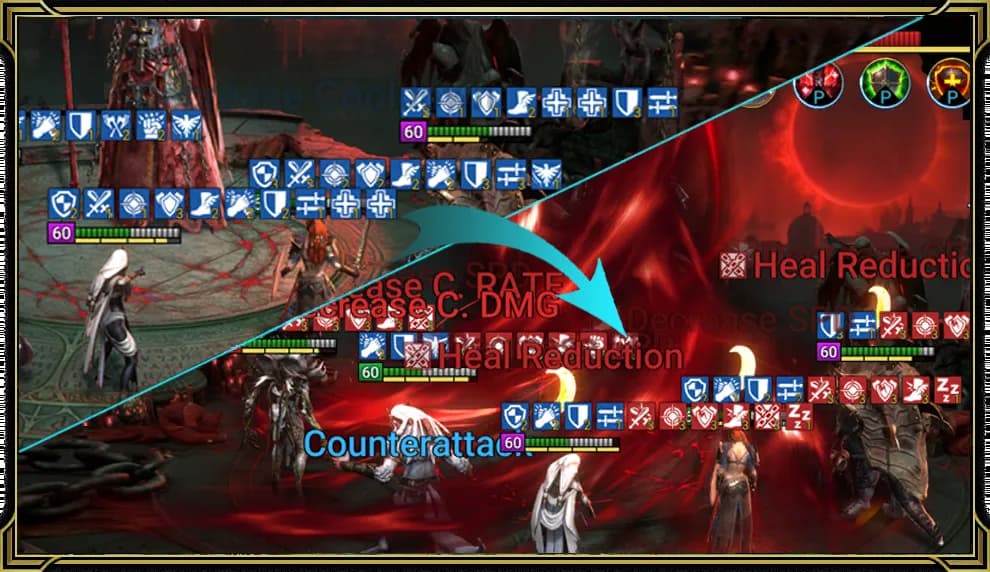
Amius doesn't just hit hard, he can also place crowd control debuffs on any non-Mythical Champions. In his Base Form, Amius places Stun with his Rampant Chaos skill, which can be blocked or resisted. However, that's not to say Mythical Champions will get away unscathed. Amius will force Mythical Champions to switch between their Forms, regardless of which one they are currently in. You'll need to anticipate when Amius is about to force Mythical Champions to switch Forms, so that you can prepare for whatever Amius' current Form is about to throw at you.
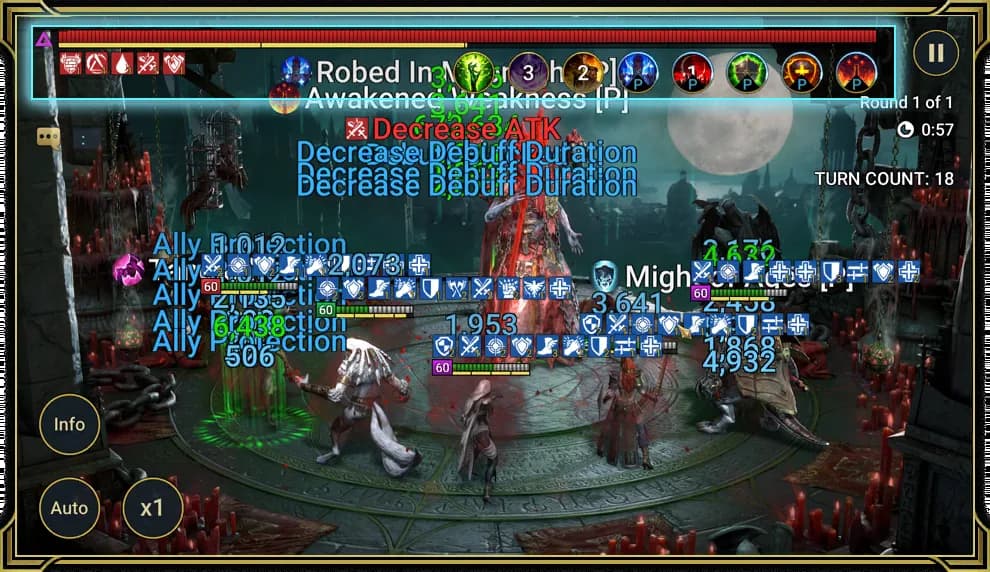
Amius' fourth skill, Robed In Moonlight P, allows him to heal by 25% of any heal that your team puts out, and heal by 100% of the damage he deals against targets with Shield buffs. If a Shield is removed by damage, Amius also heals equal to the Shield's value. Finally, Robed In Moonlight P reduces the cooldown of Archon's Ascendance P whenever one of your Champions reduces a cooldown of their own. His Base Form's passive skill, Archon's Ascendance P, places on Amius a fully protected Eclipse buff for 3 turns. The Eclipse buff is what changes Amius into his Alternate Form, complete with a blood-red eclipse in the background.
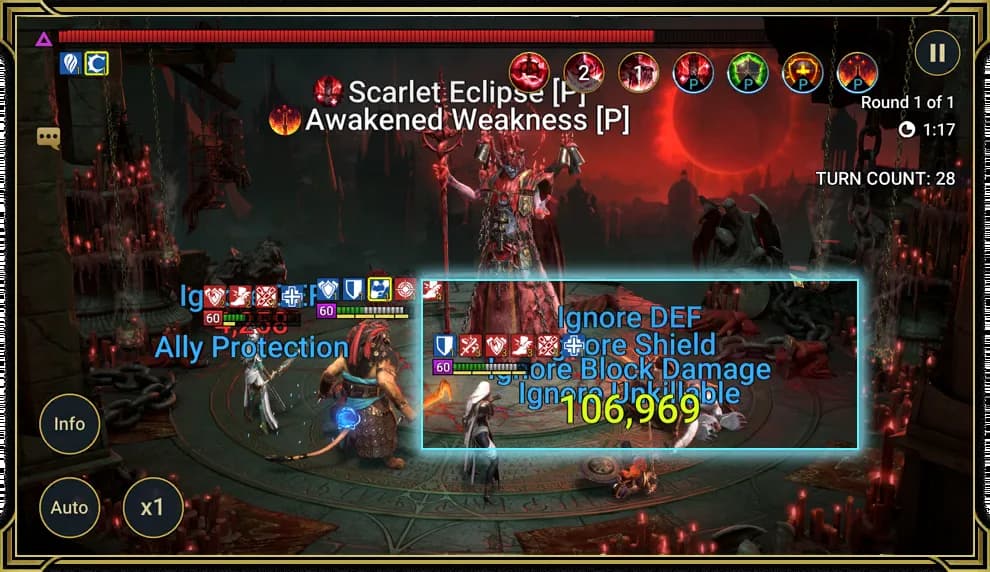
Amius' Alternate Form can replace your team's buffs for debuffs, increase his own damage according to the number of debuffs on your team, and decrease the amount of healing your team receives by 50%.
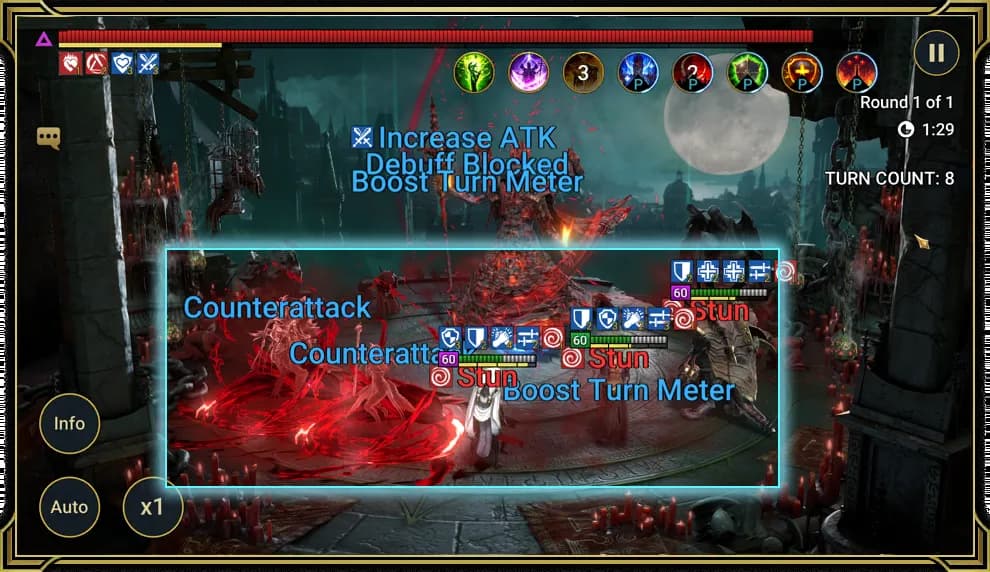
In his Alternate Form, Amius can also ignore Shield, Block Damage, and Unkillable buffs too.
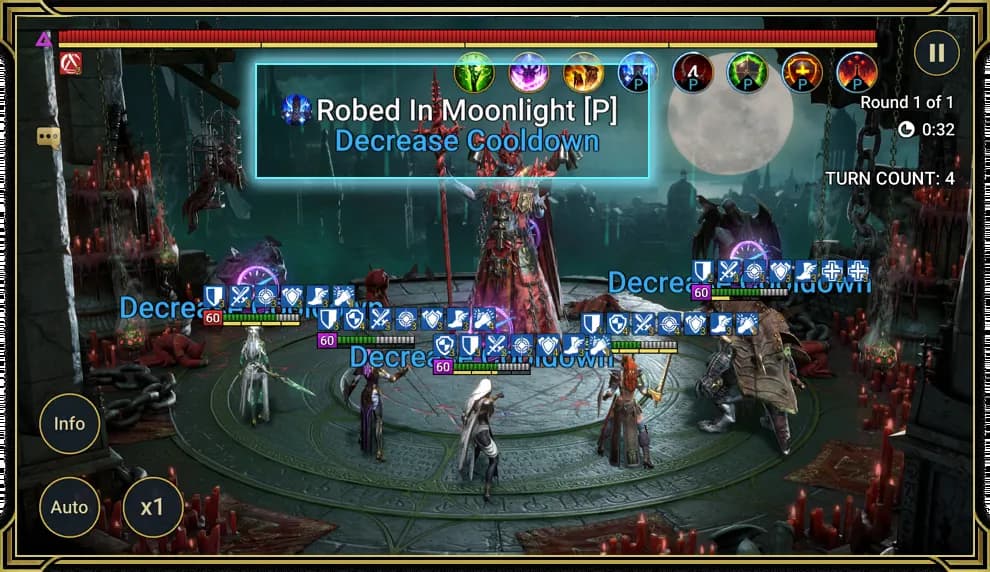
His first skill, Abyssal Construct, will not only ignore 100% of the target's DEF, but also have its damage increased by 20% for each debuff on the target. If it kills its target, it will also activate Amius' third skill, Maniacal Bedlam. This works similarly to his Base Form's third skill, Rampant Chaos, except this time, Amius is removing your teams' buffs and replacing them with their equivalent debuffs. Also, he'll place an unresistible Sleep debuff, and force all Mythical Champions to change Form.

Amius' second skill, Bloodmoon Vortex, will attack all enemies after increasing the duration of all debuffs and decreasing the duration of all buffs on your team. For every buff that has its duration decreased, Amius will increase the damage inflicted by this skill by 5% of each target's MAX HP, up to a maximum of 50%. Likewise, for every debuff that has its duration increased by this skill, Amius will decrease each target's Turn Meter by 10%.
Amius' passive skill in his Alternate Form is Scarlet Eclipse P. Firstly, this passive will reduce the amount of healing that your Champions receive by 50% when Amius is under an Eclipse buff. It also lets Amius ignore Shield, Block Damage, and Unkillable buffs when he is under an Eclipse buff. The final part of Amius' passive in his Alternate Form activates his Abyssal Construct skill when an enemy reduces a skill's cooldown. If Amius kills a target, he'll then activate his third skill, Maniacal Bedlam, which replaces all your team's buffs with their debuff equivalent. It's a devastating combination, so avoid reducing cooldowns where possible!
Across both of his Forms, Amius will both buff himself and debuff your team. Amius also has immunity to Decrease SPD debuffs and Decrease Turn Meter across both of his Forms, thanks to some sneaky secret skills. You'll need to keep a careful eye on your buffs and debuffs, as well as those placed on Amius himself. Make sure your team has plenty of HP and survivability, including support Champions who can cleanse debuffs, revive your team, or even strip buffs from Amius. You'll also definitely want to bring your Awakened Champions to this fight. Passively, they will weaken the Turn Meter reduction effect and Ignore DEF effect of Amius' attacks in his Alternate Form. The difference between having Amius ignore 50% or 100% of DEF could make or break a fight. Preventing him from killing a Champion with his Abyssal Construct skill also means his Maniacal Bedlam skill won't activate, meaning your team retains their buffs and keeps nasty Sleep debuffs from the Maniacal Bedlam skill away.
Another thing to bear in mind is the self-revive element of Amius' passive skill in his Base Form, thanks to the Eclipse buff. If Amius has this buff and is killed while in his Alternate Form, he will be revived in his Base Form with 30% HP and 50% Turn Meter. This can be countered with the Block Revive debuff or Lydia the Deathsiren's ability to deny enemy revive attempts. If you don't have Champions who can place a Block Revive debuff, then you'll need to kill Amius while he's in his Base Form. Also, consider bringing a Champion that can place Heal Reduction and preventing Amius from healing himself while in his Base Form. Just watch out for that debuff replacement on his Rampant Chaos skill, as any Heal Reduction debuffs will be replaced with a Continuous Heal buffs.
In terms of dealing damage to Amius, focus on bringing Champions with skills that scale off a target's MAX HP, or Champions with debuffs such as Poison or HP Burn. These debuffs are very important, as they don't have a mirrored equivalent that can be replaced when Amius uses his Rampant Chaos skill. Don't rely entirely on this strategy though, Amius, like other Bosses, will innately reduce the damage dealt by these debuffs and skills that scale off a target's MAX HP thanks to the Almighty Strength P skill.
This is a seriously tough fight, so be sure to choose and use your Champions wisely. You'll need to be as flexible as possible when countering both of Amius' Forms with all his different attacks and ways of keeping your team at a disadvantage. Good luck!
Faction Wars
10 bossesEach Faction Crypt has 21 stages for champions of one faction, with a Crypt Keeper on stages 7, 14 and 21.
Banner Lord Crypt: 21 stages
Loading the stages...
Banner Lord Crypt (Hard): 21 stages
Loading the stages...
High Elf Crypt: 21 stages
Loading the stages...
High Elf Crypt (Hard): 21 stages
Loading the stages...
Sacred Order Crypt: 21 stages
Loading the stages...
Sacred Order Crypt (Hard): 21 stages
Loading the stages...
Ogryn Tribe Crypt: 21 stages
Loading the stages...
Ogryn Tribe Crypt (Hard): 21 stages
Loading the stages...
Lizardmen Crypt: 21 stages
Loading the stages...
Lizardmen Crypt (Hard): 21 stages
Loading the stages...
Skinwalker Crypt: 21 stages
Loading the stages...
Skinwalker Crypt (Hard): 21 stages
Loading the stages...
Orc Crypt: 21 stages
Loading the stages...
Orc Crypt (Hard): 21 stages
Loading the stages...
Demonspawn Crypt: 21 stages
Loading the stages...
Demonspawn Crypt (Hard): 21 stages
Loading the stages...
Undead Horde Crypt: 21 stages
Loading the stages...
Undead Horde Crypt (Hard): 21 stages
Loading the stages...
Dark Elf Crypt: 21 stages
Loading the stages...
Dark Elf Crypt (Hard): 21 stages
Loading the stages...
Knights Revenant Crypt: 21 stages
Loading the stages...
Knights Revenant Crypt (Hard): 21 stages
Loading the stages...
Barbarian Crypt: 21 stages
Loading the stages...
Barbarian Crypt (Hard): 21 stages
Loading the stages...
Dwarf Crypt: 21 stages
Loading the stages...
Dwarf Crypt (Hard): 21 stages
Loading the stages...
Shadowkin Crypt: 21 stages
Loading the stages...
Shadowkin Crypt (Hard): 21 stages
Loading the stages...
Sylvan Watcher Crypt: 21 stages
Loading the stages...
Sylvan Watcher Crypt (Hard): 21 stages
Loading the stages...

The Mirrorer
Void, Banner Lord Crypt, Champion Proving Grounds, Dark Elf Crypt, High Elf Crypt and 6 more
How to beat The Mirrorer (3 steps)
How to beat The Mirrorer
The fight against the Mirrorer is a race, and one of the most dangerous encounters in Faction Wars. He will place Fear on your whole team, with the chance of it increasing for each buff he has. He will also steal all the buffs from your team and transfer any debuffs he has on to your Champions instead. Finally, his trickiest skill is the swap of HP percentage with the target with the highest HP. The cooldown for the HP swap is 12 turns, so keep an eye on it.
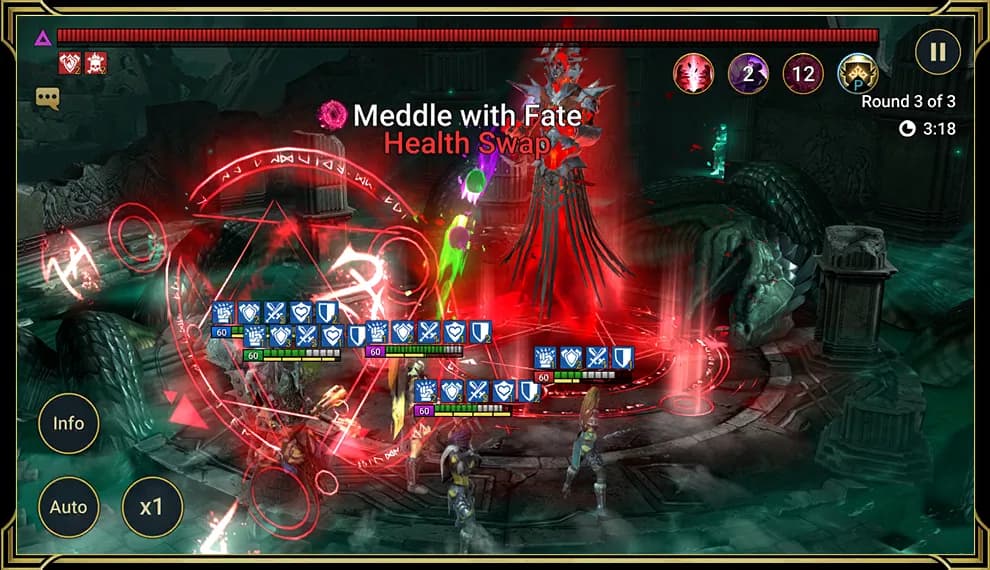
The Crypt Keeper's minions will place Provoke on your Champions and Leech on the boss, making it nearly impossible to take him down fast enough. Only start working on killing the boss once both minions are out of the picture.
To win the battle you will need to plan the placement of buffs and debuffs around his Mirror Universe skill, where he swaps your buffs for his debuffs. This skill has a 3-turn cooldown, and if you play your cards right, you can avoid the swap. You can also select single-target nukers to kill the Mirrorer before he swaps HP with your Champion.

The Dueler
Void, Banner Lord Crypt, Barbarian Crypt, Champion Proving Grounds, Demonspawn Crypt and 6 more
How to beat The Dueler (4 steps)
How to beat The Dueler
This Crypt Keeper lives up to his name: he prefers to stun all enemies and leave just one target to fight against.

RES won't help you here, because the Stun and True Fear placed by his Staggering Recovery skill cannot be resisted. But it can be blocked or removed, so you'll need Champions that can place Block Debuffs or clear their allies.
You will also need a healer on your team because this boss ignores his target's DEF and inflicts damage based on the target's MAX HP. Ally Protection can help reduce the damage, but it won't take long for him to tear down his target.
Just nuking down the boss isn't an option, as he fills his Turn Meter based on the damage he takes. He's guaranteed to take at least a few turns, so if you want to get 3 stars in this fight, you'll need to focus on durability over damage.

The Protector
Void, Banner Lord Crypt, Champion Proving Grounds, Dwarf Crypt, High Elf Crypt and 6 more
How to beat The Protector (3 steps)
How to beat The Protector
This Crypt Keeper is all about supporting his two minions. The damage they inflict depends on their target's HP, so they will always hit hard.
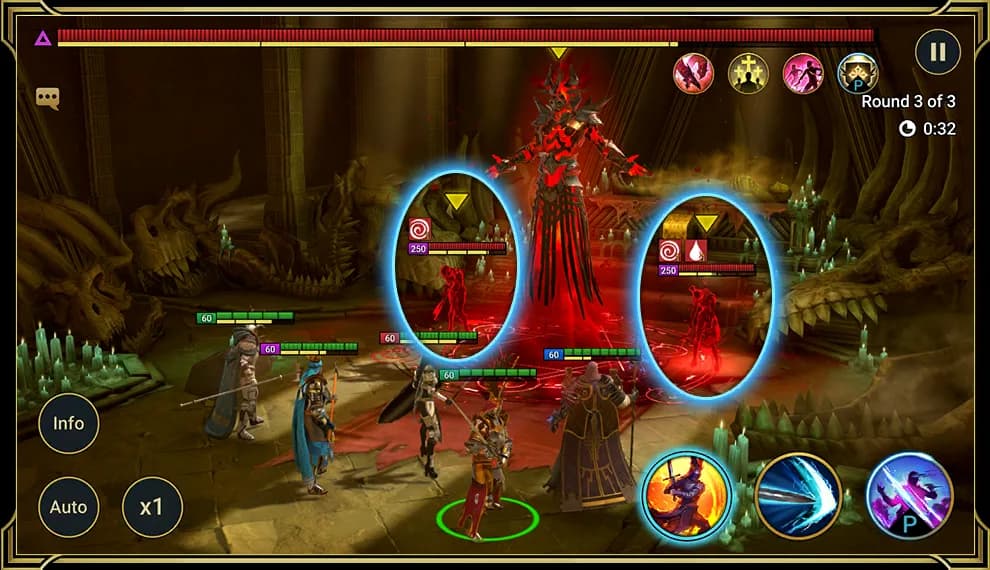
To defeat this team you will need Champions that can control the minions to prevent team attacks. However, the trick is only to control but not kill them, otherwise, the Protector will place a Block Damage buff on himself.
With minions out of the way, you will easily defeat this Crypt Keeper.
Tainted Mirrorer
Void, Banner Lord Crypt, Dark Elf Crypt, High Elf Crypt, Knights Revenant Crypt and 5 more
How to beat Tainted Mirrorer (7 steps)
How to beat Tainted Mirrorer
The Boss has become even more formidable than before, making it one of the most dangerous encounters in Faction Wars Hard Mode.

With their first skill, Tainted Mirrorer mercilessly attacks all Champions and places Fear and Block Active Skills debuffs which immediately puts you on the back foot.
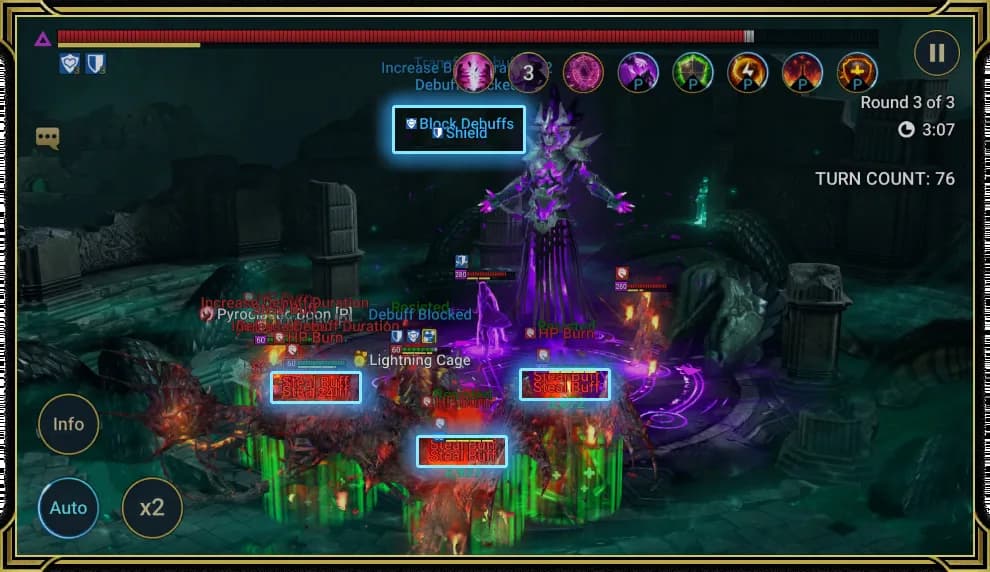
The second skill sees Tainted Mirrorer stealing all buffs, transfering all debuffs from themselves to your Champions, applying a Debuff Spread effect, and on top of that, increasing the duration of both ally buffs and enemy debuffs.
For his signature skill, not only will Tainted Mirrorer exchange remaining HP levels with the target enemy with the highest HP, but he'll also equalize the HP levels of all enemies to the level of the enemy with the lowest HP. You'll either need to nuke Tainted Mirrorer before he can use this skill, or have your healers standing by.
Tainted Mirrorer is also getting a new passive skill, one that grants him a chance to convert all debuffs into their mirrored buff equivalents before being placed on him. Oh, and it'll also grant him a chance to convert all enemy buffs into their mirrored debuff equivalents when they are placed on them.
Tainted Mirrorer's minions will also now place Reflect Damage and Decrease SPD, making this battle even tougher.
The key to victory against Tainted Mirrorer is all about maximizing your opportunities to deal damage. Time your strikes wisely to avoid having to start over when Tainted Mirrorer swaps HP with one of your Champions. Strategic timing and tactical planning are your best friends here.

Tainted Dueler
Void, Banner Lord Crypt, Barbarian Crypt, Demonspawn Crypt, Dwarf Crypt and 5 more
How to beat Tainted Dueler (7 steps)
How to beat Tainted Dueler
Tainted Dueler still favors duels against terrified foes, leaving their allies stunned with his devastating power. However, he now has more ways to disrupt enemy composition, even turning them against themselves.
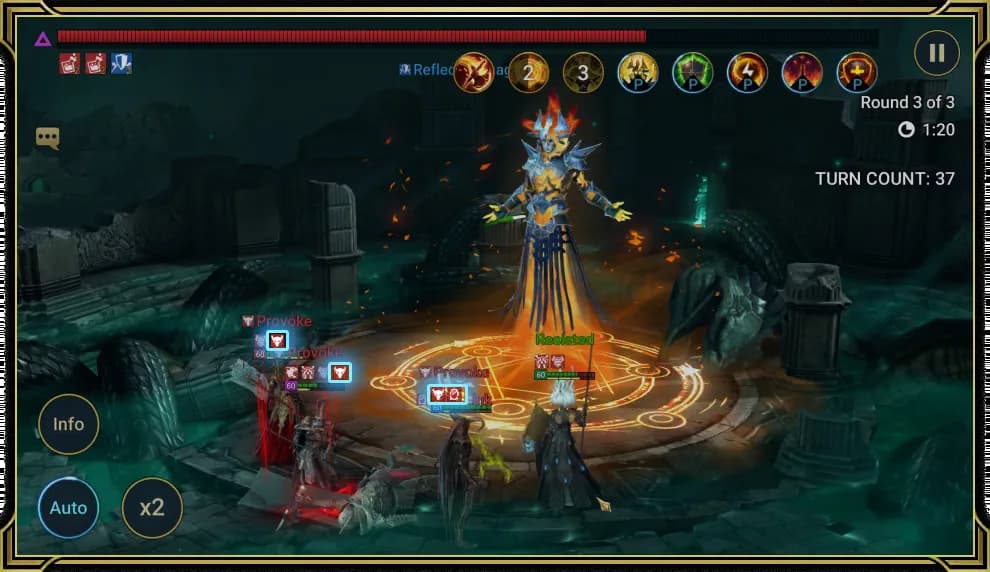
Tainted Dueler puts out unresistable Stun and True Fear debuffs with his second skill, so high RES won't be helpful against them.

Instead, make sure you have Champions that place Block Debuffs buffs in your team, since Tainted Dueler also now transfers all debuffs from himself to every enemy before placing Stun and True Fear debuffs. And don't forget, he also gets an Extra Turn.
Strong healers are also a must here. Although Tainted Dueler still has only one attack, which completely ignores all target's DEF and deals devastating damage, that's not the only reason you'll need healers. He has also gained a powerful new third skill.
Now, every 3 turns, Tainted Dueler can place a 30% Reflect Damage buff on himself, a Provoke debuff on all enemies for 1 turn and a Pain Link debuff on the enemy with the highest C. DMG for 2 turns. When calculating the damage inflicted by the Pain Link debuff, the attacker's skill multiplier is decreased by 75%. The damage inflicted by the Pain Link debuff will ignore 100% of the target's DEF. With enough protection and healing, you'll survive the damage that you'll end up receiving via this skill.
Tainted Dueler also fills his own Turn Meter based on the damage he takes, so nuking him isn't an option as he'll retaliate with brutal efficiency. His passive skill has also been reworked so that if Tainted Dueler has their Turn Meter filled by 20% or more from a single attack, he'll place an unresistable Berserk debuff on the attacker for 2 turns.
Last but not least, Tainted Dueler will heal himself by 50% of the damage inflicted when attacking enemies under Berserk debuffs.

Tainted Protector
Void, Banner Lord Crypt, Dwarf Crypt, High Elf Crypt, Ogryn Tribe Crypt and 4 more
How to beat Tainted Protector (4 steps)
How to beat Tainted Protector
While Tainted Protector has had an upgrade for this fight, the minions may actually pose the greater threat. Their attacks can now be critical as well as ignore your Champions' DEF, making them unpredictable and deadly. What makes it worse that every time you hit a minion, Tainted Protector himself will attack you and heal them. He'll also place a True Fear debuff on your team, meaning the fight gets a lot tougher.

If you manage to take out the minions, Tainted Protector will use his second skill to revive them and place a Berserk debuff on them, making them even more dangerous to your team.

With his third skill, Tainted Protector will place Increase C. RATE and Increase C. DMG buffs on all minions and team up with them to attack a single target. If neither minion is alive, Tainted Protector will simply place a Block Damage buff on himself for 1 turn, meaning he gets closer to that revive with his second skill.
Block Damage buffs are going to come in very handy here for repelling the minions' attacks. Alternatively, use your strongest Champions to take them out of the fight before they have a chance to build up a head of steam using the buffs from Tainted Protector. You'll also need to bring a Champion or two that can place Block Debuffs buffs to help protect your team from the True Fear debuffs Tainted Protector will put out when counterattacking.

The Disruptor
Void, Barbarian Crypt, Champion Proving Grounds, Dark Elf Crypt, Demonspawn Crypt and 5 more
How to beat The Disruptor (4 steps)
How to beat The Disruptor
This Crypt Keeper is all about stopping your team in its tracks, as he's armed with a whole host of control debuffs: Provoke, True Fear, and Freeze.

He places Provoke with his Consuming Furor skill and True Fear with the second, and has a 20% chance of Freezing any champion that hits him. The Freeze can't be resisted, so be ready to remove it or live with it.
To defeat the Disruptor, you will need Champions that can place the Block Debuffs buff on all allies, or clear the debuffs he places on you. If you don't have Champions available that can manage that, equip your Crypt team with high RES Artifacts.
Don't forget to control and kill the Crypt Keeper's minions, as they will put out tons of healing to keep the Boss alive.

Tainted Disruptor
Void, Barbarian Crypt, Dark Elf Crypt, Demonspawn Crypt, High Elf Crypt and 5 more
How to beat Tainted Disruptor (7 steps)
How to beat Tainted Disruptor
Tainted Disruptor has received an upgrade, and now it's a super nasty and tanky Boss with plenty of effects at his disposal: Provoke, True Fear, Freeze, and now also Block Buffs, healing, and Turn Meter manipulations.

Provoke and True Fear debuffs are applied with the first and second skills respectively, and the latter also places a Block Buffs debuff as well. With his powerful new third skill, Tainted Disruptor fully heals all allies and places a Taunt buff on himself. Then, to make the fight even more punishing for players, he'll equalize the Turn Meters of all enemies down to the level of the enemy with the lowest Turn Meter.

While we have increased the chance for Tainted Disruptor to land a Freeze debuff when attacked up to 30%, we've also made it resistible. Moreover, whenever a Freeze debuff is placed, Tainted Disruptor also places a 15% Continuous Heal buff on all allies.
All hope is not lost though! To conquer this Faction Crypt Keeper, you'll need to focus on increasing your team's survivability. Bring Support-type Champions that can place Block Debuffs buffs or Increase RES buffs on your team. Warriors that can remove control effects will also come in handy. These Champions will help you deal with those pesky crowd control debuffs that can get in the way.
You'll also need Champions that can place debuffs to either keep the minions under crowd control effects or under Heal Reduction debuffs. They're also effective against Tainted Disruptor himself, so don't reserve them solely for the minions!
Don't forget about your damage dealers either, they're essential for bringing down both the Boss and the minions. The minions won't hesitate to heal and strengthen their master, so taking them out is imperative to victory.
Tainted Disruptor isn't the only one to have had an upgrade. The left minion now attacks 1 enemy, ignoring 10% of the target's DEF for each buff on this minion. Then they heal Tainted Disruptor and also place a Increase DEF buff on him and Increase C. DMG on all allies except Tainted Disruptor. The right minion now attacks all enemies, ignoring 10% of the target's DEF for each buff on this minion. Then they heal Tainted Disruptor and also place a Increase SPD buff on him and Perfect Veil on all allies except Tainted Disruptor. They're just as important to take off the battlefield as the big guy himself.

The Incinerator
Void, Barbarian Crypt, Champion Proving Grounds, Dark Elf Crypt, Demonspawn Crypt and 7 more
How to beat The Incinerator (3 steps)
How to beat The Incinerator
This Crypt Keeper wants to see your team wither. He will place Poison debuffs on your team with his first two skills, all while decreasing their Turn Meters. He also puts out HP Burn when he's attacked.
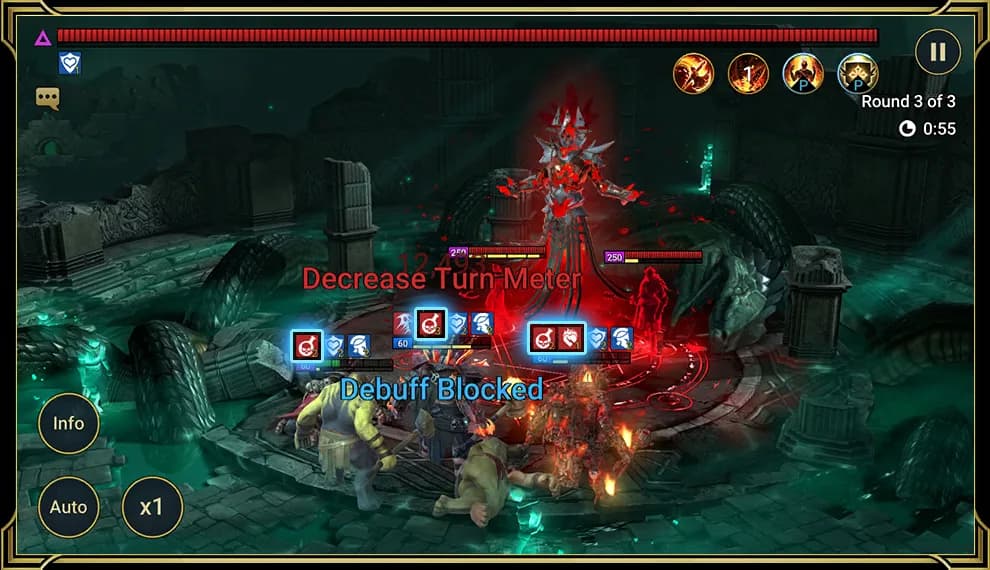
To conquer the Incinerator, bring the Champions that can block or remove debuffs. A powerful healer will help your team a lot, too.
Do not forget about the minions. They'll protect the boss with Block Damage and Block Debuffs, making him very difficult to hurt. Taking them out first should be a priority.

Tainted Incinerator
Void, Barbarian Crypt, Dark Elf Crypt, Demonspawn Crypt, Dwarf Crypt and 6 more
How to beat Tainted Incinerator (4 steps)
How to beat Tainted Incinerator
Tainted Incinerator specializes in slowly decaying your team, relentlessly placing Posion, Poison Sensitivity, and HP Burn debuffs on all who dare to stand against him.

Having been upgraded with skills that can remove buffs from your team, reduce your Champions' Turn Meters, and increase the duration of any debuffs, Tainted Incinerator is a seriously dangerous foe.

Both of the minions on the battlefield will protect Tainted Incinerator with Block Damage buffs, Block Debuffs buffs, and now two additional buffs, Increase RES and Increase ACC.
In short, you'll need to bring Champions that can remove buffs from Tainted Incinerator, as well as Champions that can place Block Debuffs buffs or Champions that can remove debuffs from their allies. A healer will also be crucial to ensure your survival against this particular foe.
Grim Forest
7 bossesGrim Forest has four zones, each on Normal and Hard, and many of its bosses are champions from the roster in boss form.
Grim Forest: first zone (Normal): 35 stages
Loading the stages...
Grim Forest: first zone (Hard): 35 stages
Loading the stages...
Grim Forest: middle zone (Normal): 131 stages
Loading the stages...
Grim Forest: middle zone (Hard): 131 stages
Loading the stages...
Grim Forest: hard zone (Normal): 35 stages
Loading the stages...
Grim Forest: hard zone (Hard): 35 stages
Loading the stages...
Phrygius the Trovemaster
Void, Grim Forest: first zone, Grim Forest: hard zone, Grim Forest: middle zone
How to beat Phrygius the Trovemaster (6 steps)
How to beat Phrygius the Trovemaster
The goal of battling Phrygius the Trovemaster is about dealing as much damage as you possibly can to this gold-obsessed goblin, so you can earn rewards based on the damage dealt.

Phrygius' first skill is Mine! Mine! Mine! and like any good obsessive treasure hoarder, he's on the lookout for more! He'll attack your whole team and steal a random buff from each Champion. Make sure your buffs are protected, or simply leave them at home before Phrygius attacks.
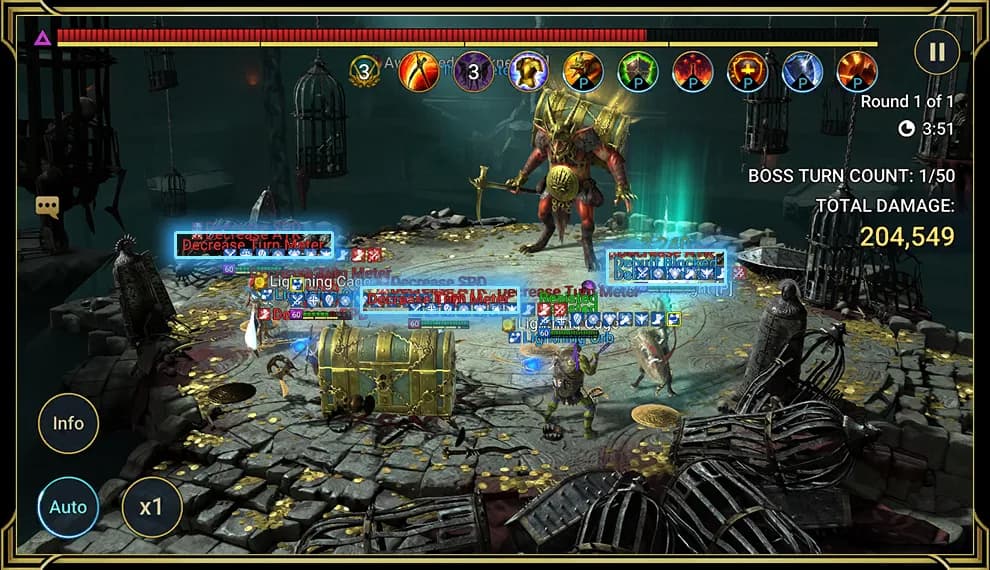
Can't Catch Me! is Phrygius' second skill, where he'll both attack your team and place Decrease ATK & Decrease SPD debuffs. He'll also steal 30% of each target's Turn Meter, an effect that can't be resisted if a target is under any buffs. Phrygius will also increase this skill's attack damage depending on how many Goldplated layers he currently has on him. To survive the hit and avoid the debuffs, bring Champions with Block Debuffs buffs in their kit. Just be mindful that you'll lose 30% of your Turn Meter.

Next up is Phrygius' signature third skill, Hardened Avarice, where he'll place 5 layers of the Goldplated effect on himself. Each Goldplated layer is worth 10% of Phrygius' HP, and it'll absorb any damage you deal. When a layer is destroyed, Phrygius's Turn Meter will be filled by 10% but he'll also receive damage equal to the layer's value. Your Champions, meanwhile, will receive damage equal to 5% of the layer's value. All this protection comes at a cost for Phrygius though, while he's under Goldplated layers, he won't be able to Evade any of your team's skills or effects. Dealing with Goldplated layers means maximizing your damage output while keeping your team suitably protected, Shield, Block Damage and Unkillable buffs will come in handy.
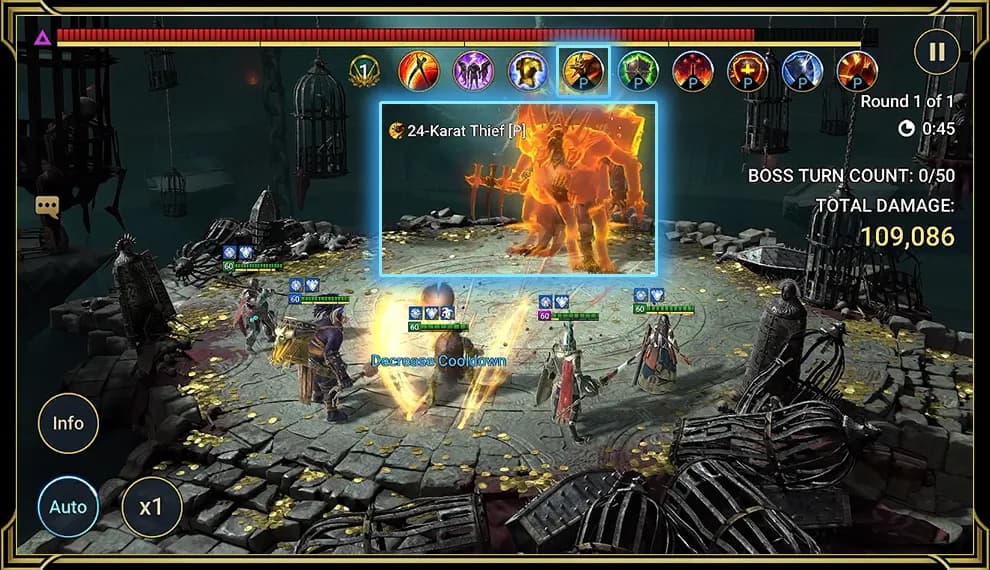
Phrygius' passive skill is 24-Karat Thief P. It'll grant Phrygius a slim chance at Evading incoming attacks, and this chance increases with each turn that Phrygius has active Goldplated layers, along with his Speed. To prevent this, destroy the Goldplated layers as quickly as you can.

Successfully controlling the fight against Phrygius means finding the balance between attacking him when he's under Goldplated layers and when he's not. Phrygius can't Evade while he's under Goldplated layers and he takes damage from those Goldplated layers once they're destroyed, so maximize your damage focus there. However, watch your team's HP and survivability from Phrygius' attacks that get increasingly powerful when he's under Goldplated layers. Without Goldplated, Phrygius is less threatening but can Evade your attacks. He's also immune to Turn Meter reduction and Decrease SPD debuffs, so getting rid of his Goldplated layers to prevent him gaining more Speed is a must.
Mimic
Void, Grim Forest: first zone, Grim Forest: hard zone, Grim Forest: middle zone
How to beat Mimic (6 steps)
How to beat Mimic
Along the winding paths of the Grim Forest are many treasures, just waiting to be found. However, not all treasure is as it seems. Should you be unlucky enough, you'll instead encounter the terrifying Mimic! Fighting it means dealing with Mini-Mimics that it will summon throughout the battle to take your strongest fighters out of the equation.
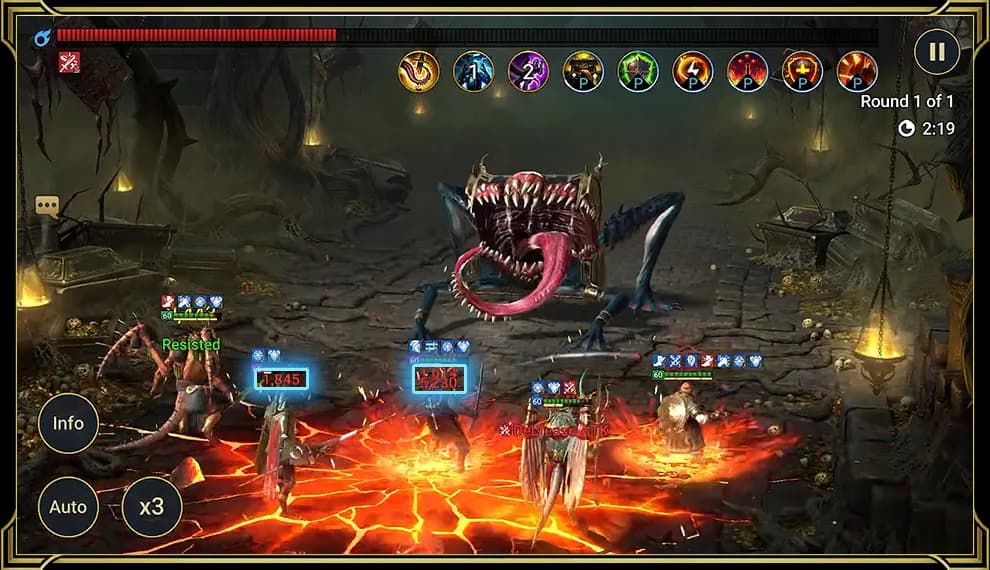
The Mimic's first skill, Plunder Pounce is an AoE attack that deals additional pure damage based on the number of buffs each target has. You'll need to be mindful of your own buffs, ensuring that when it lands, you're not taking extra damage of your own doing! The Mimic also has a chance of applying a Decrease ATK debuff, so bring a cleanser or ensure your Champions have high RES to counter it.

Lashing Spiral is the Mimic's second skill, using it's teeth-laden tongue to lash out at a single enemy and place a Stun debuff. If that debuff isn't placed for any reason, the Mimic will unleash a follow-up attack on your entire team and decrease the Turn Meters of everyone without a Stun debuff by 30%. You'll need to ensure your team includes someone who can tank the initial hit without receiving a Stun debuff, or a Champion who can place Block Debuffs buffs on your entire team.

For its third skill, Feeding Time!, the Mimic summons a Mini-Mimic to the field, and has it Ingest your Champion with the highest C.DMG, removing them from the battle for 4 turns. Bear in mind that any C.DMG boost your Champions get from Masteries won't count towards the total that the Mini-Mimic calculates. The Mini-Mimic has its own set of stats, with 20% of the Mimic's HP, 70% of the Mimic's DEF, and the same amount of RES. When the Mimic takes its turn, the Mini-Mimic will feast on the Ingested Champion, dealing damage equal to 25% of their current HP. The Ingested Champion returns to battle when the Mini-Mimic is defeated, or after 4 turns have passed. To make matters worse, the Mimic places Decrease SPD debuffs on your entire team for 2 turns to make it harder to stop the Mini-Mimic from chomping your Champion.
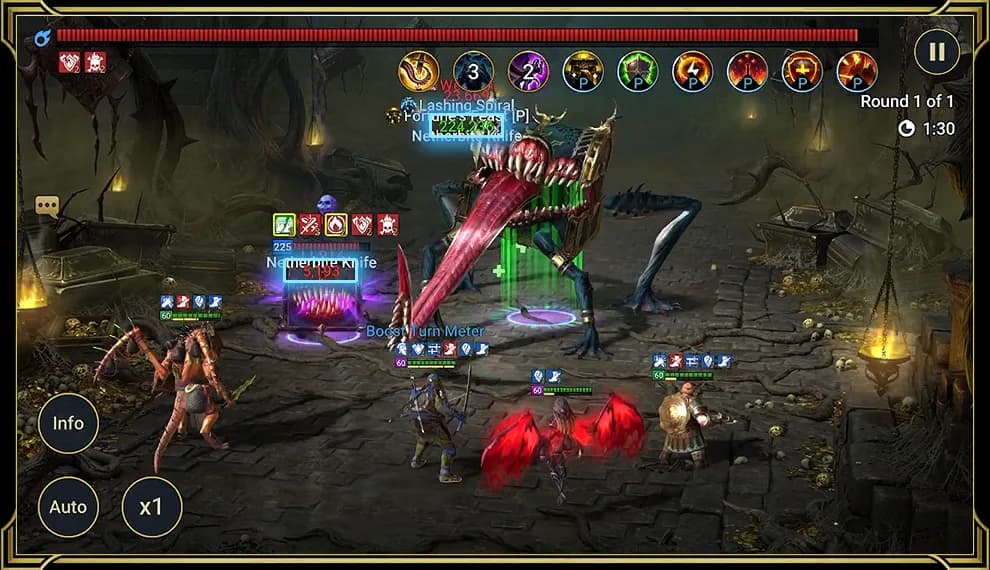
Finally, the Mimic's passive skill is Fortune's Feast P. It decreases the cooldown of the Feeding Time! skill by 1 turn for every 3 buffs your team receives, so you'll need to manage your buffs effectively, or bring Champions who aren't reliant on buffs to win this fight. Fortune's Feast P also heals the Mimic by 25% of its MAX HP at the start of its turn if a Mini-Mimic is present in the battle, so you'll need to get rid of it quickly!
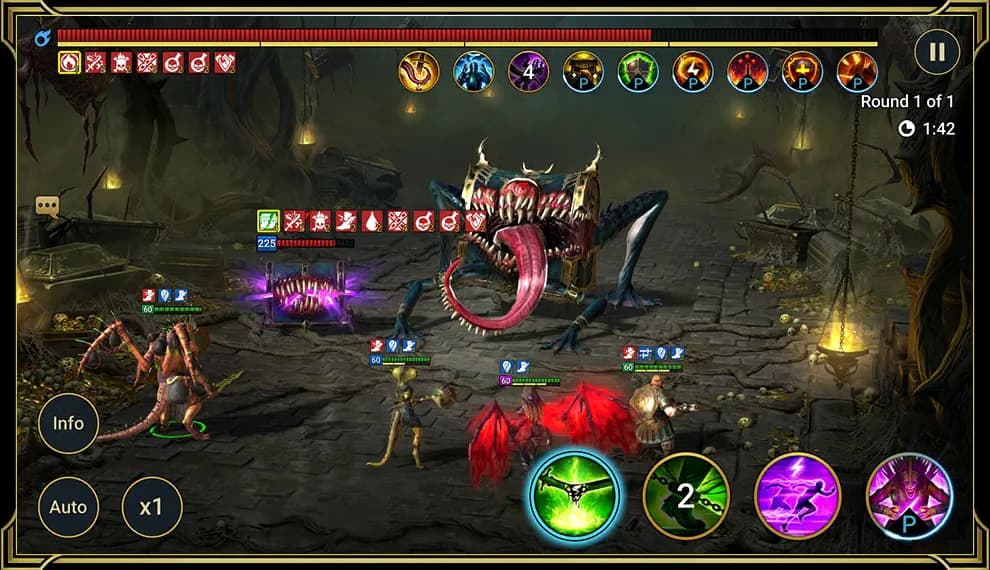
There are a few tricks to dealing with the Mimic. First up, keep an eye on your buffs, and make sure you're not enabling the Mini-Mimic to rejoin the fight as soon as it leaves. If the Mini-Mimic is going to be present, place Heal Reduction debuffs to prevent the Mimic from healing itself. If you must place buffs, go for Shield and Block Debuffs buffs to protect against the Mimic's attacks and Decrease SPD debuffs. Finally, make sure you have at least two damage-dealers so that one can free the other from the Mini-Mimic's grasp.

Leshun the Entangled One
Void, Grim Forest: middle zone
How to beat Leshun the Entangled One (10 steps)
How to beat Leshun the Entangled One
Leshun the Entangled One (Solo) The great lumbering lord of the Grim Forest, Leshun the Entangled One, stands ready to punish all who wander in the gloom unprepared. With the new Entangle and Siphon debuffs at his disposal, Leshun will seek to suffocate the life out of your Champions, prevent them from moving and steal your stats to boost his own. Leshun's first skill is Bloodbranch Bash, where this great guardian will bring down a mighty cleaving blow on all his enemies. He'll deal 50% less damage against enemies under an Entangle debuff, but also has a 50% chance to place a True Fear debuff on anyone not under an Entangle. Frightening stuff if you don't have Shield or Block Debuffs buffs already set up.
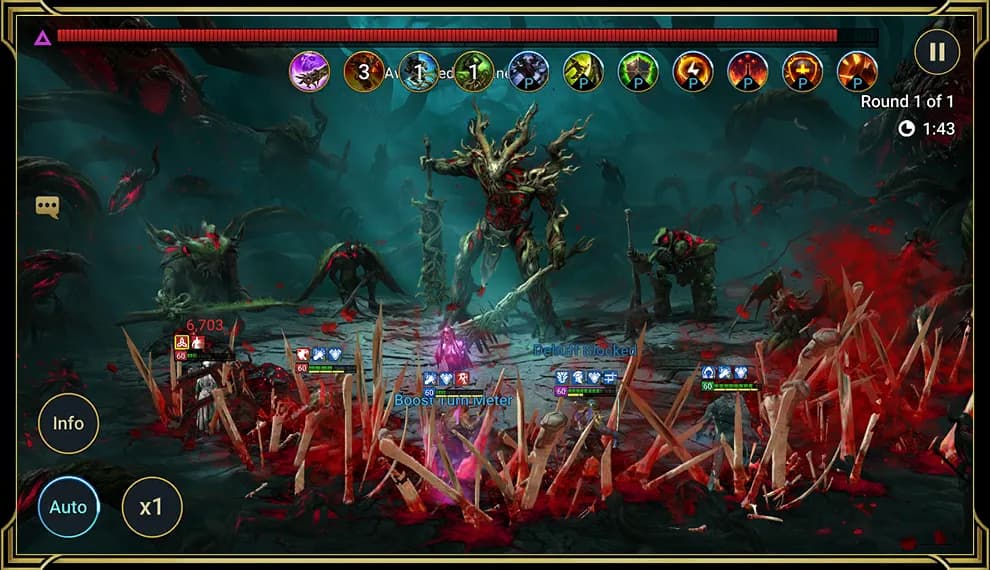
Next up is Gloomwrecker, an AoE attack, before which Leshun will remove all debuffs from himself and remove all buffs from all enemies. What's worse is that Leshun will increase the damage inflicted by this skill by 5% and ignore 5% of each target's Defense for each buff and debuff removed before attacking. Avoid heavily debuffing Leshun, and pack protected buffs for your team so that he can't remove them before launching this potentially devastating attack.

Thorn Prison is Leshun's third skill, which sees him attack all enemies under an Entangle debuff and decrease each target's Turn Meter by 30%. If your team is lucky enough to not have anyone under an Entangle debuff, Leshun won't let you off easy though, he'll place a protected Entangle debuff on your Champion with the highest Speed. What's worse is that there's no way around this, Entangle cannot be Evaded, redirected to another target, or resisted, and it will ignore Stone Skin.
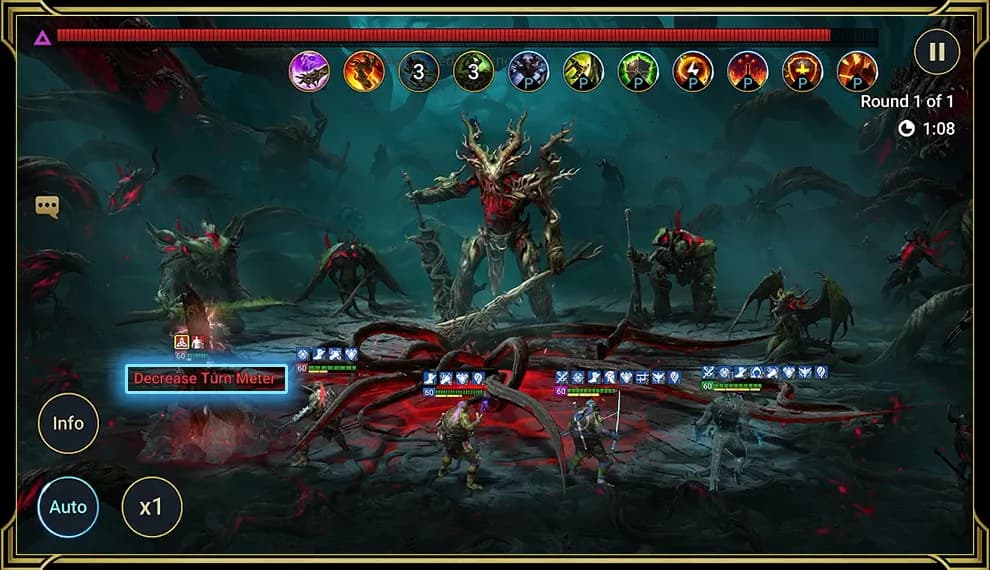
In a nutshell, Entangle stops your Champion from receiving any positive effects or buffs, including passive Turn Meter increases each turn. The only way to break out of Entangle is to manually fill the affected Champion's Turn Meter to 100%, so you'll need to bring Champions who can actively fill the Turn Meters of their allies to combat this new debuff. The last of Leshun's active skills is Sublimate Life, which sees this gargantuan green lord place a protected Entangle debuff on your Champion with the highest Speed, as well as a Siphon debuff for 3 turns. Neither of these debuffs can be Evaded, redirected to another target, resisted, or blocked, and both debuffs will ignore Stone Skin and Taunt buffs. Siphon will sap a portion of your Champion's stats and grant them to Leshun instead, so you'll need to bring Champions who can remove the Siphon debuff as quickly as possible to prevent that from happening.

Leshun's first unique passive skill is Parasitic Growth P and with it, he'll fill his own and his allies' Turn Meters by 10% whenever a True Fear debuff placed by Leshun is activated. He'll also decrease the duration of all debuffs on himself and his allies by 1 turn too, so avoid those debuffs! That's not all though, Leshun will also deal damage to any targets under an Entangle debuff at the start of his turn, equal to 20% of their MAX HP. If you can't free your allies quick enough, they'll be dead before you know it. If this damage kills an enemy under an Entangle debuff, Leshun then places another protected Entangle debuff on the enemy with the next highest Speed, and puts out True Fear debuffs on all other enemies. You're going to need to make sure you've got Block Debuffs on your Champions to avoid the True Fear debuffs, and bring plenty of Champions who can fill their allies' Turn Meters.

Last, but by no means least, is Leshun's second passive skill, Elder Tree P. With it, Leshun will decrease all incoming damage by 60% and has a 30% chance to change an incoming critical hit into a weak hit if he's not under a HP Burn debuff. If you do manage to put a HP Burn debuff on Leshun though, the benefits don't stop with high damage and critical hits, your Champions will also have their Turn Meter fill effects be 30% more effective when used on allies under Entangle. Save your Turn Meter fill effects until Leshun's under a HP Burn debuff, and focus on staying alive until then.
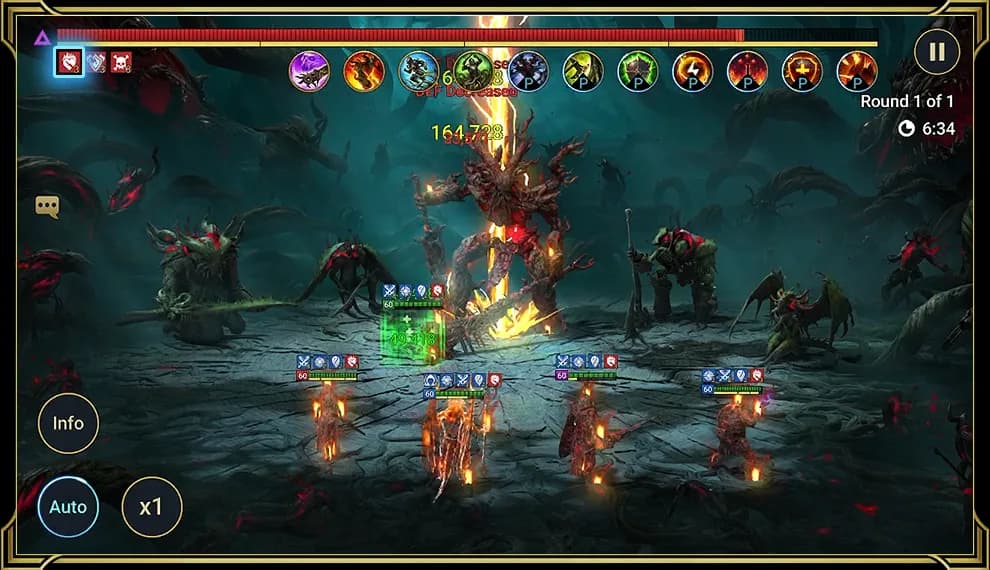
Leshun the Entangled One (With Roaming Bosses) If you don't defeat Isheth the Crimson Siren, Tauraze the Bestial Flame, Maximoz the Weeping Blade, and Draugnell the Eternal Gatherer on your travels through the Grim Forest before taking on Leshun the Entangled One, they'll appear alongside him in this fight. It'll make an already difficult fight much more nightmarish!
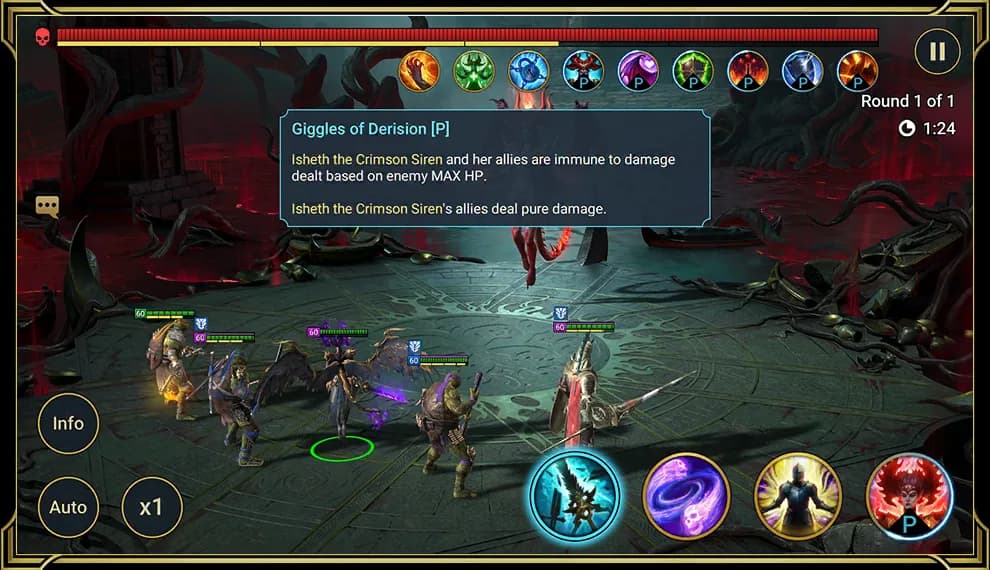
@

@
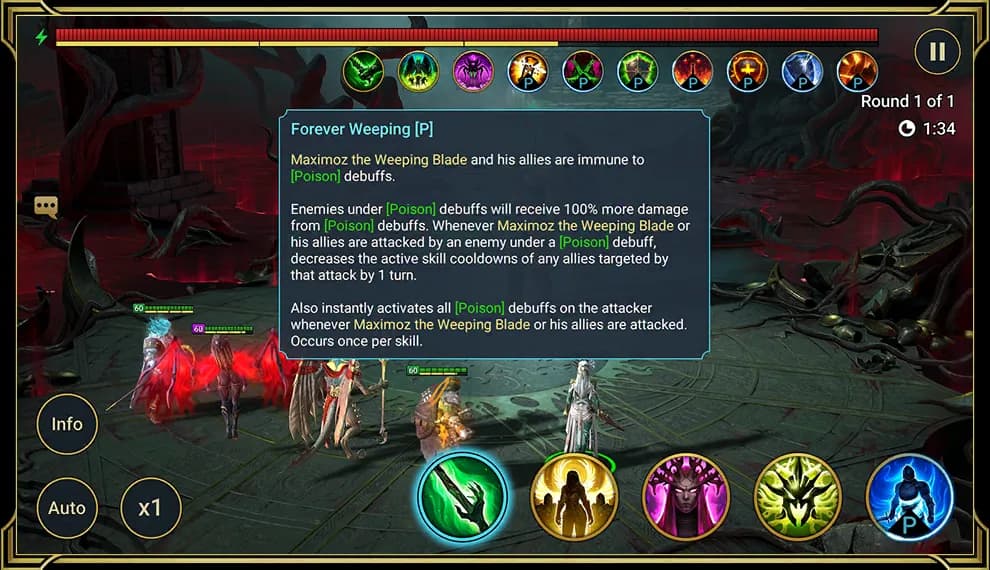
@

Isheth the Crimson Siren
Force, Grim Forest: middle zone
How to beat Isheth the Crimson Siren (7 steps)
How to beat Isheth the Crimson Siren
A seductive temptress she may be, but don't be caught off guard by Isheth the Crimson Siren! The key thing to remember here is that both her and her allies are immune to damage dealt based on enemy MAX HP, so Champions like Marius the Gallant and Gnut won't be very effective here.

If you want to maintain control over this fight, you'll need to keep Isheth under Block Buffs or Heal Reduction debuffs, preferably both! Isheth will shower herself and her allies with her twisted adoration, placing plenty of Continuous Heal buffs before instantly activating them with her Lust Pulse skill. That's not all though, each activation of a Continuous Heal buff fills her Turn Meter and increases her MAX HP.
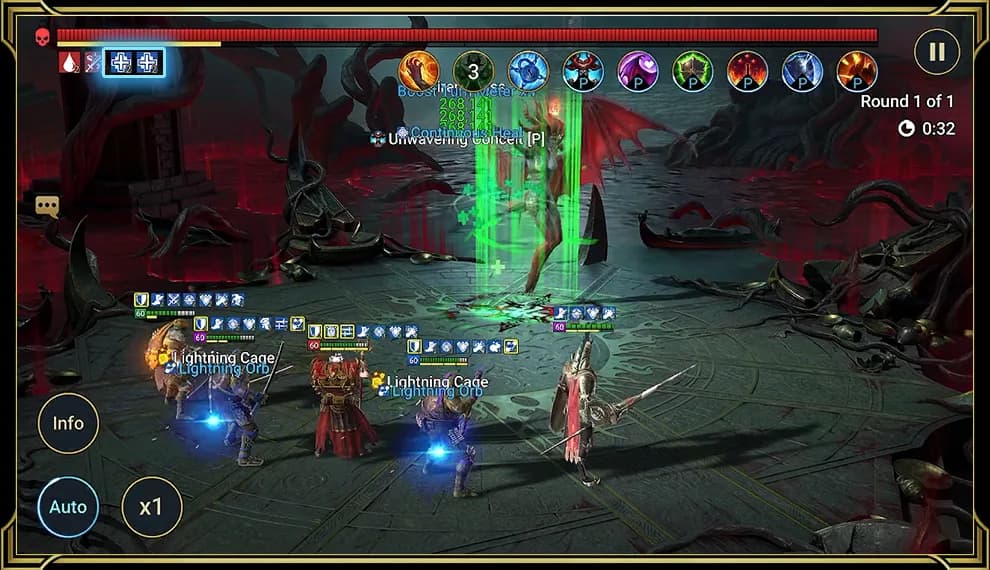
Keep an eye out for Isheth's Siren's Kiss skill too, that's how she'll place Continuous Heal buffs to outheal any damage you can do. Block Buffs debuffs will be your best friend here, or use Champions that can remove buffs from the Crimson Siren.

Don't forget about her Doom Aroma skill either! With it, Isheth the Crimson Siren will remove all buffs from your team before placing a Master Seal and a Block Passive Skills debuff on them. Effective preparation means bringing a Champion who can remove debuffs or place protected Block Debuffs buffs.

Another crucial way to defeating Isheth the Crimson Siren is to destroy her MAX HP, since her Unwavering Conceit P skill fills her Turn Meter by 5% and increases her MAX HP by 5% whenever a Continuous Heal buff activates on her or an ally, stacking up to 100%.
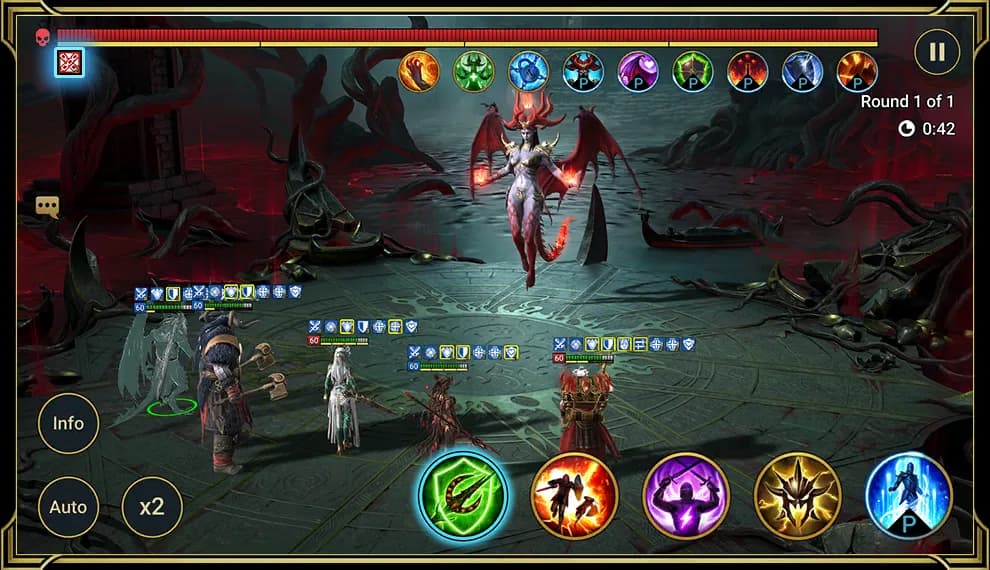
Isheth's Giggles of Derision P skill is what makes her immune to damage that scales from enemy MAX HP, so you'll need to find other ways to deal high damage. Poison and HP Burn debuffs can be an effective counter here, stacking plenty of them alongside Block Buffs and Heal Reduction debuffs.
On the defensive side of the battle, you'll need plenty of Shield and Block Debuffs buffs to keep your team in the fight against this scarlet sorceress. If you can stay alive long enough, use skills that increase the duration of enemy debuffs, remove buffs from enemies, and cleanse debuffs from your team. Isheth the Crimson Siren won't be singing quite so much after that.

Tauraze the Bestial Flame
Magic, Grim Forest: middle zone
How to beat Tauraze the Bestial Flame (7 steps)
How to beat Tauraze the Bestial Flame
Quelling Tauraze the Bestial Flame means controlling and avoiding HP Burn debuffs, whether that's by placing Block Debuffs buffs on your team, or Heal Reduction and Freeze debuffs on Tauraze.

Tauraze's first skill, Fume Cleaver, attacks your whole team twice and has a 50% chance to instantly activate any HP Burn debuffs on each hit. Make sure you don't have any HP Burn debuffs there for Tauraze to extend by bringing Champions who can remove debuffs or place Block Debuffs buffs.
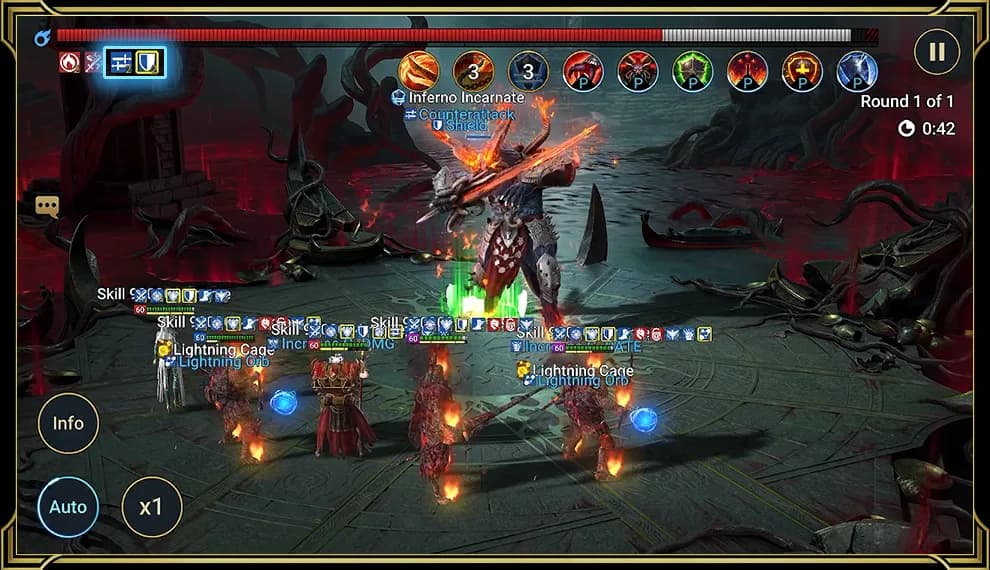
Setting up HP Burn debuffs is the name of the game for Tauraze's second skill, Slash and Burn. He'll attack your whole team again, and place HP Burn debuffs on each enemy for 3 turns, as well as a Block Active Skills debuff for 2 turns for good measure. Having your Block Debuffs buffs already up and running before this skill comes in is the perfect counter.

Although not an attack, Tauraze's third skill has the potential to wreak havoc on your team. Inferno Incarnate will see Tauraze place a Counterattack buff and a protected Shield buff on himself for 2 turns. If you're not careful and don't manage any HP Burn debuffs on your team, Tauraze will be extending those HP Burn debuffs or constantly decreasing the cooldown of his Slash and Burn skill. Keeping Tauraze under Block Buffs is critical to your survival.

Don't ignore Tauraze's passive skills either, his first one is Wildfire Soul P and with it, Tauraze will extend the duration of any HP Burn debuffs on an attacker for each hit he receives. Getting around it isn't that easy though, for each hit Tauraze receives from an enemy without a HP Burn debuff, he'll fill his own Turn Meter by 20%. The trick is to make sure Tauraze is under a Freeze debuff, as his Turn Meter won't fill if that's the case.
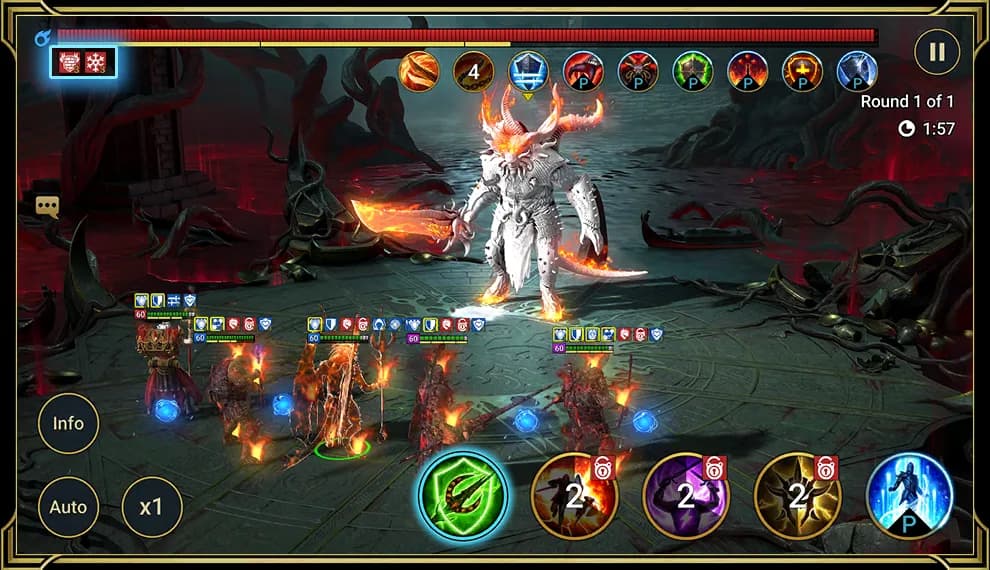
Last but not least is Vital Spark P skill. With it, Tauraze will make sure himself and his allies are immune to HP Burn debuffs, as well as ensure that enemies under HP Burn debuffs receive 100% more damage from each activation. As if that were bad enough, this skill also heals Tauraze and his allies by 2% of their MAX HP each time a HP Burn debuff is activated. Heal Reduction debuffs are a must-have if you can't prevent Tauraze from placing HP Burn debuffs on your team.
Here's some key points to bear in mind. Keep Tauraze under Block Buffs debuffs to prevent him from getting his Shield and Counterattack buffs, and place Freeze on Tauraze to counter his Turn Meter fill effects. Bring Champions that can place Poison debuffs to corrode Tauraze's HP away, and remember to deck out your team with Champions that can remove debuffs or place Block Debuffs.

Maximoz the Weeping Blade
Spirit, Grim Forest: middle zone
How to beat Maximoz the Weeping Blade (7 steps)
How to beat Maximoz the Weeping Blade
With his twin swords, Maximoz the Weeping Blade is here to make you feel his toxic wrath using Poison debuffs and very powerful attacks. Defeating Maximoz is all about timing and buff management, ensuring you're landing the killing blow at just the right moment.

Maximoz's first skill is Soulmar Blades and it's a powerful AoE attack. The attack will extend the duration of all debuffs on your team, and instantly activate a single Poison debuff on each target too, dealing a high burst of damage. Shield and Block Debuffs buffs will be your best friends here, and making sure you're keeping debuffs off your team so Maximoz has nothing to extend the duration of.

Bringer of Desolation is Maximoz's second skill and it's as powerful as it sounds. A two-hit AoE attack sees Maximoz place a 25% Weaken debuff and a 25% Poison Sensitivity debuff for 2 turns with the first hit, and 3 5% Poison debuffs for 3 turns on the second hit. Without Block Debuffs buffs or a Champion that can remove debuffs, this skill makes fighting Maximoz a nightmare.
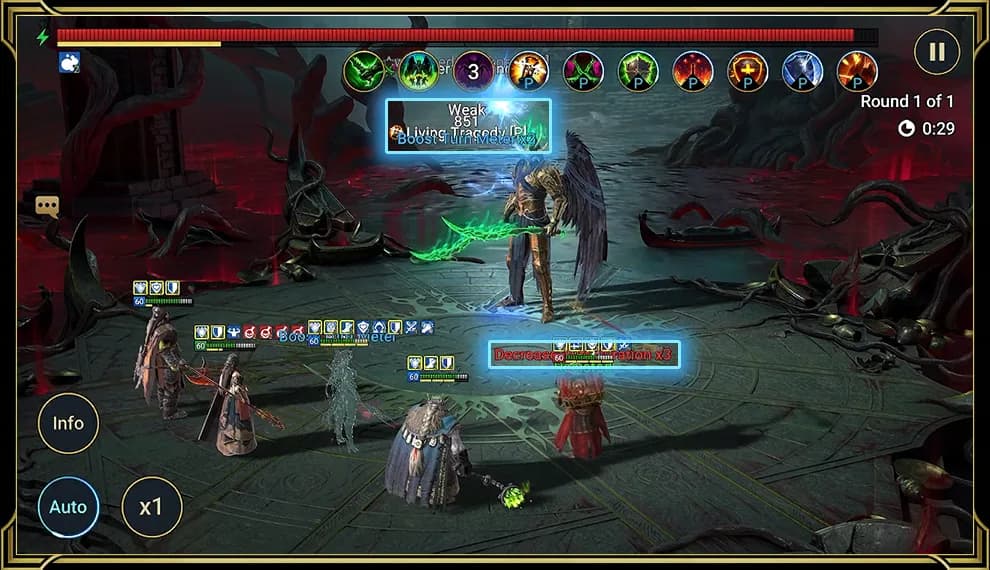
The third and final active skill for Maximoz is Exude Death, a devastatingly powerful AoE attack that increases the cooldowns of all your Champion's skills by 1 turn. That would be bad enough, but Maximoz isn't done there. He'll also place a number of Poison debuffs on your team for 2 turns. The number of Poisons placed on each of your Champions is equal to the number of skills they currently have on cooldown. Maximoz then removes all debuffs from himself and places a Poison Cloud buff on himself for good measure. To stop this toxic rampage, use Block Debuffs buffs and Immutable stacks, as well as HP Burn to counter the Poison Cloud.

Maximoz's first passive skill is Living Tragedy P and it's a nightmare for buff-heavy teams. Whenever Maximoz takes a hit, the attacker has the duration of all buffs on them decreased by 1 turn, or 2 turns if they land a weak hit. Weak hits against Maximoz also fill his Turn Meter by 10%, so avoiding them is key. You'll need to ensure you place HP Burn debuffs while Maximoz has his Poison Cloud buff active otherwise you can kiss your buffs, and your chance at success, goodbye.
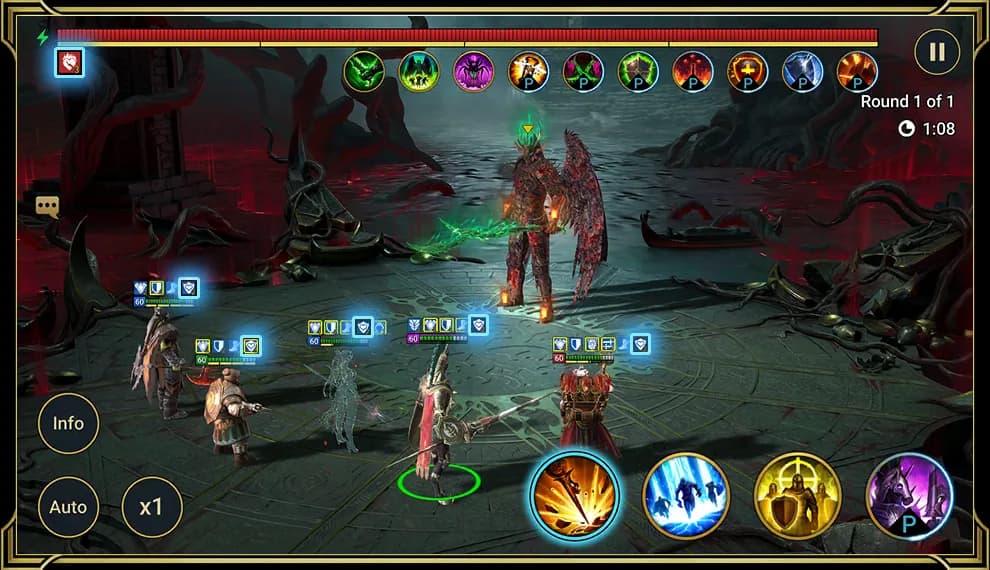
Finally, we have Forever Weeping P, Maximoz's second passive skill. Both Maximoz and his allies will be immune to Poison debuffs, and any of your Champions that are under Poison debuffs will receive 100% more damage from them. What's worse is that whenever Maximoz or one of his allies is attacked by an enemy under a Poison debuff, the recipient or recipients of that attack have all of their active skill cooldowns decreased by 1 turn, and the attacker has all of their Poison debuffs instantly activated. One or two strikes on an enemy while you're still under Poison debuffs is going to really hurt.
Combatting Maximoz ultimately comes down to making sure you have the right Champions to either cleanse debuffs immediately, or place consistent Block Debuffs buffs to keep them off. Don't forget to bring a Champion with HP Burn either, you'll need it to help avoid landing weak hits when Maximoz places Poison Cloud on himself. Maximoz might have lower HP and DEF than some of his allies, but he wields mighty force and should not be underestimated.

Draugnell the Eternal Gatherer
Void, Grim Forest: middle zone
How to beat Draugnell the Eternal Gatherer (7 steps)
How to beat Draugnell the Eternal Gatherer
A frosty reception awaits those who underestimate Draugnell the Eternal Gatherer. His kit focuses on Freeze debuffs and he's also immune to Ignore DEF effects, meaning this battle can be a real challenge if you're not prepared. The key thing to remember is that Draugnell passively reflects a lot of damage, so debuffs is the way to go.

Draugnell's Soulscream Ax skill may sound simple, but it can really disrupt the flow of battle. An AoE slam that places Provoke debuffs on all targets for 2 turns will frustrate those without high RES or Block Debuffs buffs.
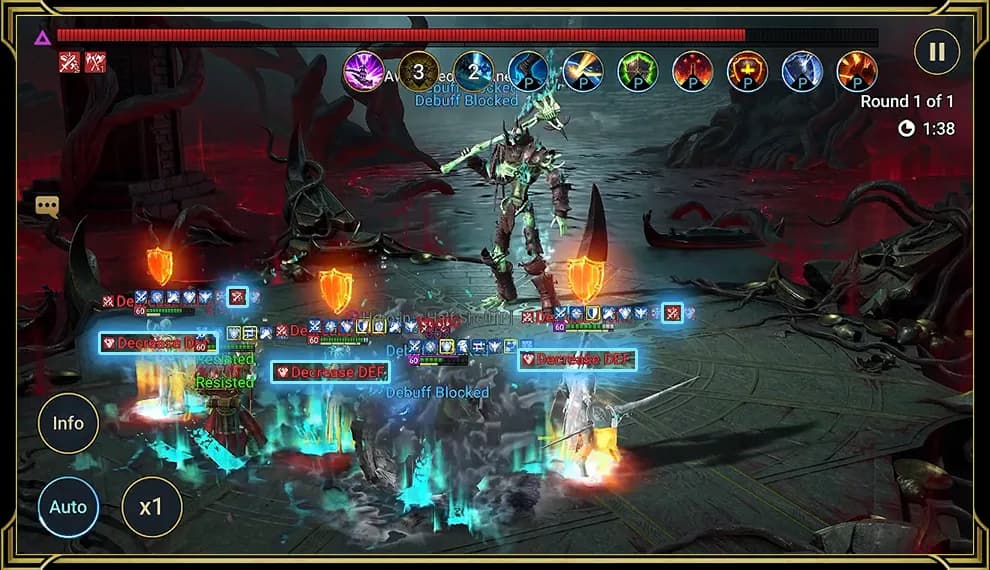
With his second skill, Osteomancy, Draugnell attacks all enemies again and this time, places a 50% Decrease ATK and 60% Decrease DEF debuff on all targets for 2 turns. Same as with Soulscream Ax, you'll need a reliable cleanser with high RES, or an ally that can place Block Debuffs to avoid a world of pain.

Spinefrost Howl is as chilling as it sounds for your team, with Draugnell attacking all enemies and putting out Freeze debuffs on everyone for 1 turn. Anyone who's under a Freeze debuff after the attack has all of their Turn Meter stolen by Draugnell. If you're not careful, he'll get another turn instantly and your control over the battle will be lost.
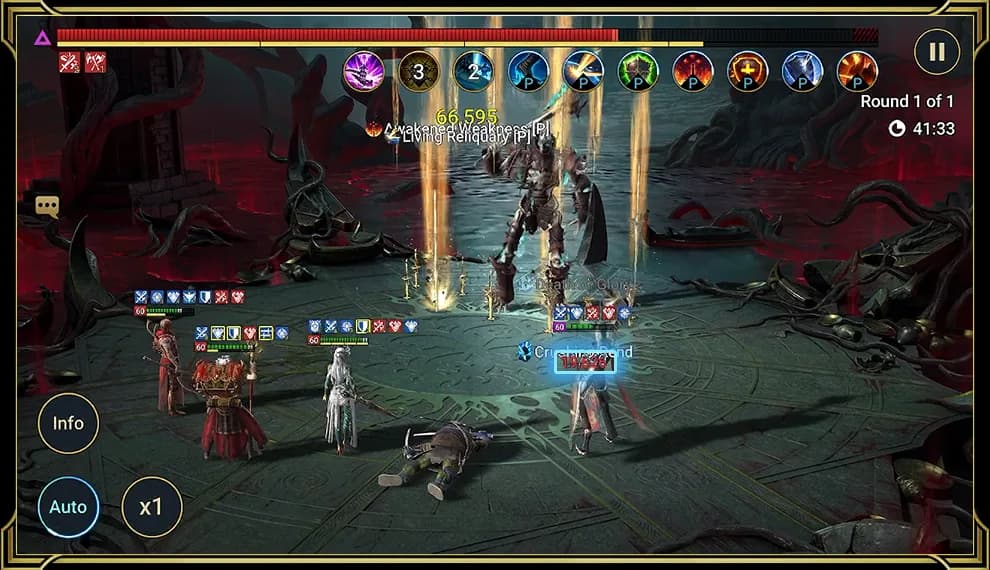
Draugnell's passive skills don't make things any easier, Death's Cold Hand P grants him a 40% chance to place a Freeze debuff on anyone who attacks him for 1 turn. Enemies under Freeze will also have their SPD halved. Without high RES or Block Debuffs buffs to stop Draugnell placing so many Freeze debuffs, he'll attack with brutal swiftness and destroy your team.
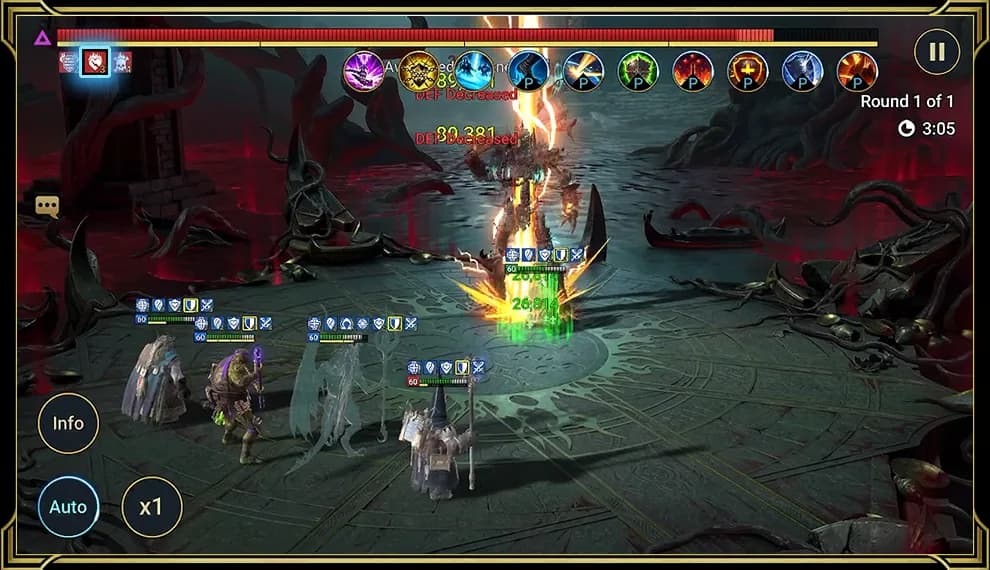
Finally, we have Living Reliquary P, a passive skill that makes Draugnell and his allies immune to Ignore DEF effects, while also letting Draugnell reflect 50% of all incoming damage from direct attacks on him back to the attacker. However, if Draugnell is under a HP Burn debuff, he won't reflect any damage. Getting a HP Burn on Draugnell and maintaining it is the key to success in this battle.
Beating Draugnell requires a careful balance of both survivability, and the right debuffs to counter Draugnell's passive skills. Champions who can place Shield buffs, Block Debuffs buffs, and HP Burn debuffs will be your most valuable assets in this fight. Cleansers will be a welcome addition too, as well as Champions with very high RES. High damage-dealers are a risk, given Draugnell reflects 50% of incoming damage unless he's under HP Burn, but Champions with plenty of Poison debuffs in their kit present a different approach.
Champion Proving Grounds
18 bossesChampion Proving Grounds sends a team of five against bosses from the rest of the game, three stages each.
Champion Proving Grounds: 27 stages
Loading the stages...
Also fought here: Force Guardian, The Mirrorer, Magic Guardian, The Protector, Akumori the Phantom Shogun, Minotaur, Void Guardian, Borgoth, Iron Twins, Grythion, Spirit Guardian, The Disruptor, Al-Naemeh the Sand Devil, The Incinerator, Arcane Guardian, Bommal, The Dueler, Astranyx.